social

Making 'Sharky' Goldfish Paper Lantern Decoration


Gold Post Medal for All Time! 899 Posts
January 7, 2017

'Sharky' Goldfish Paper Lantern Decoration - finished lantern hanging
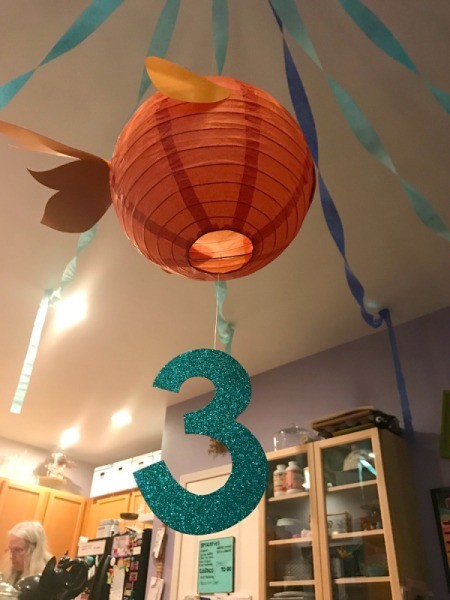
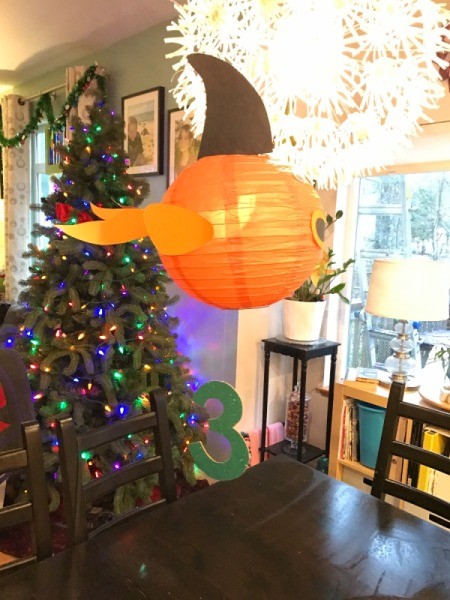
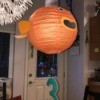
My son's party theme was pretty unique so I couldn't just buy decorations for it. I decided to make my own. This paper lantern goldfish (complete with shark fin) was the perfect decoration to hang over the table!

Advertisement

Supplies:

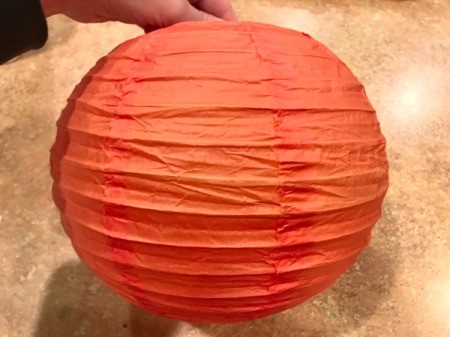
  • 10 in orange paper lantern (Affiliate Link)
  • cardstock paper (for templates), optional
  • orange scrapbooking paper
  • black scrapbooking paper
  • large googley eyes
  • scissors
  • hot glue gun
  • tape
  • fishing line

Related Product: 

Steps:

  1. Assemble the paper lantern, according to the instructions.
  2. 'Sharky' Goldfish Pap er Lantern Decoration - assemble lantern
     
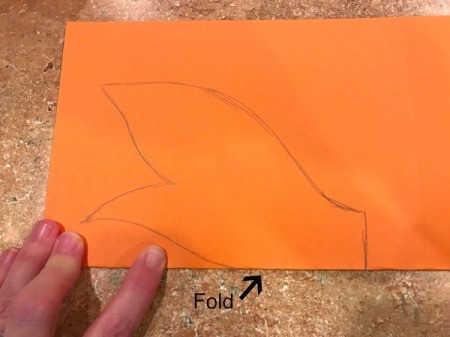
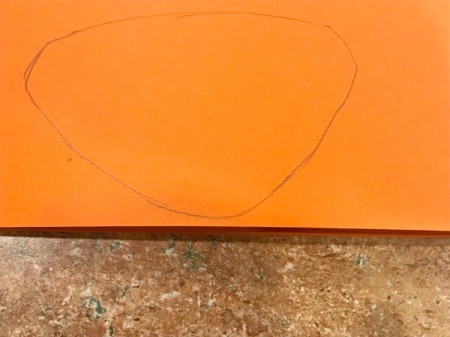
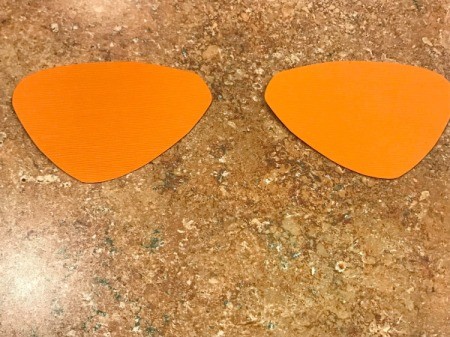
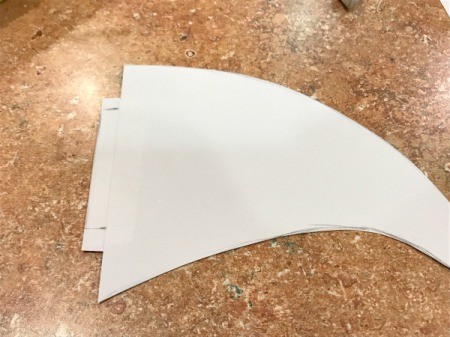
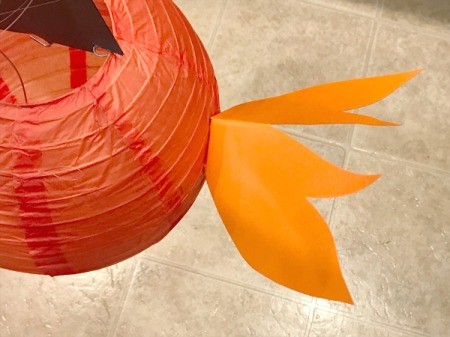
  3. Fold a piece of orange scrapbooking paper in half. Draw a tail along the fold, as shown below. Cut out the tail.
  4. 'Sharky' Goldfish Paper Lantern Decoration - folded piece of scrapbooking paper with tail shape drawn on
     
    'Sharky' Goldfish Paper Lantern Decoration - cut out tail
     
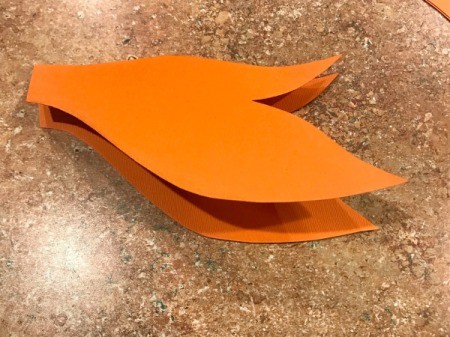
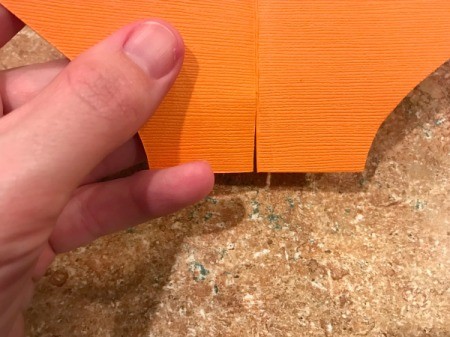
  5. Cut a 1/2 in slit in the end, to create two small tabs. Partially fold the tail, overlapping the tabs (see photo). Glue the tabs together, to give the tail a 3-dimensional shape.
  6. 'Sharky' Goldfish Paper Lantern Decoration - make a small slit in straight end of tail forming two tabs
     
    'Sharky' Goldfish Paper Lantern Decoration - partially fold tabs overlapping
     
    'Sharky' Goldfish Paper Lantern Decoration glue tail tabs together for 3-D effect
     
    'Sharky' Goldfish Paper Lantern Decoration - finished tail
     
    Advertisement

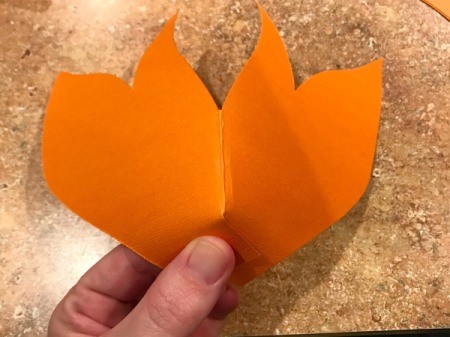
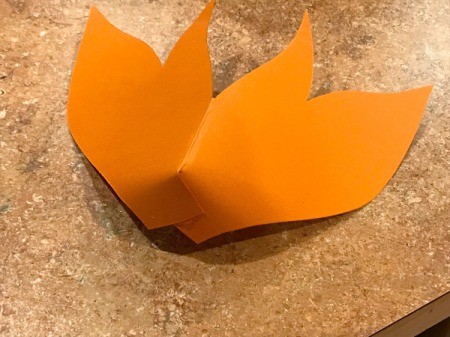
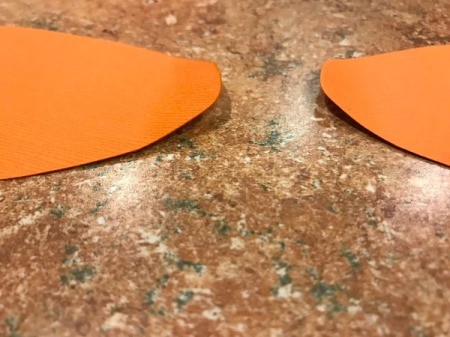
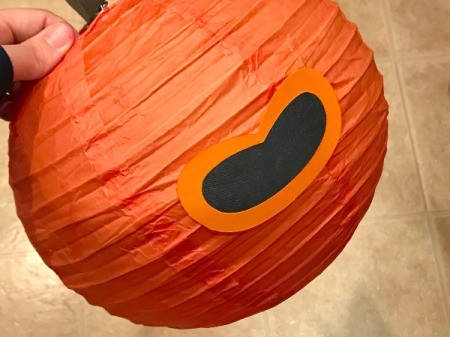
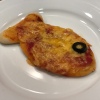
  7. Fold a piece of orange scrapbooking paper in half, draw a fin, and cut it out to make two fins. Slightly curl the small end of each fin, so that they will stick out from the body of the goldfish, once they are attached.
  8. 'Sharky' Goldfish Paper Lantern Decoration - draw a fin on the folded orange paper and cut out
     
    'Sharky' Goldfish Paper Lantern Decoration - two orange fins
     
    'Sharky' Goldfish Paper Lantern Decoration - slightly curl the small end of the fin
     
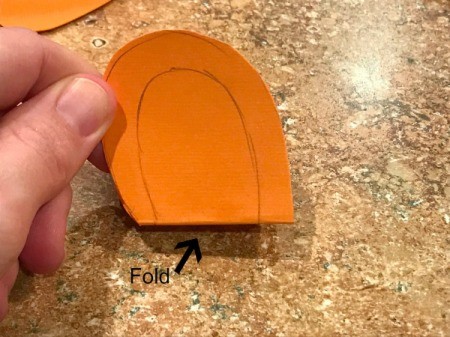
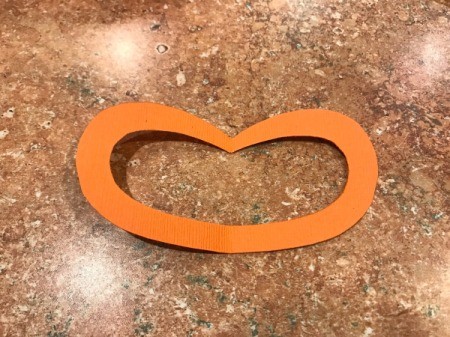
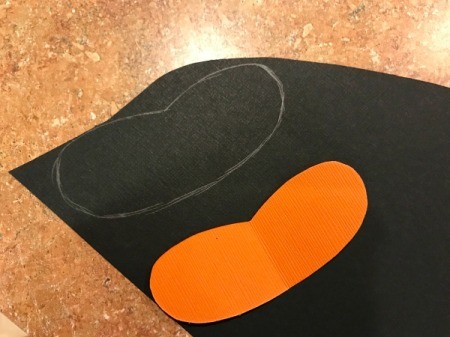
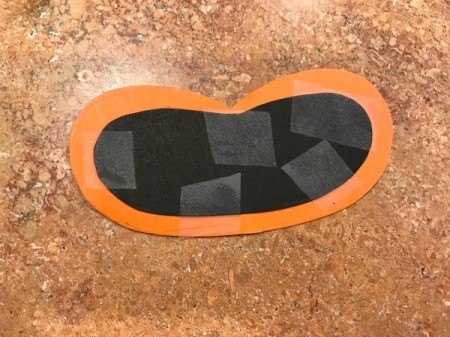
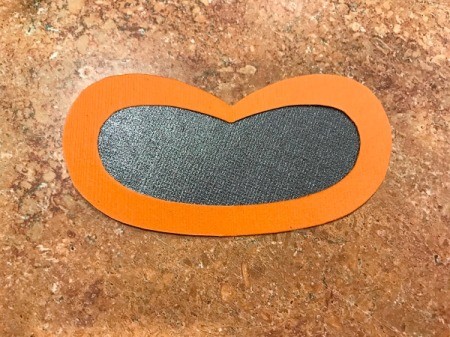
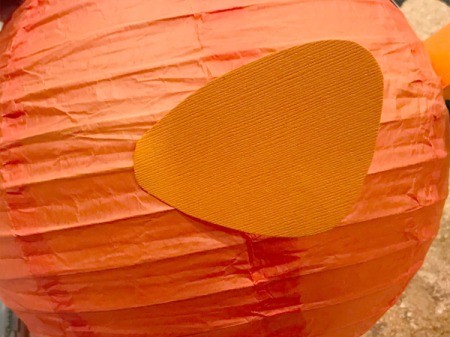
  9. Fold a piece of orange scrapbooking paper in half, draw half of the mouth at the fold, as shown below. Cut out, then cut the center shape out of the mouth and set it aside. Now unfold the lips for the mouth (see photo).
  10. 'Sharky' Goldfish Paper Lantern Decoration - draw a mouth on folded piece of paper and cut out
     
    'Sharky' Goldfish Paper Lantern Decoration - main shape of mouth cut out
     
    'Sharky' Goldfish Paper Lantern Decoration - center cut out of mouth
     
    'Sharky' Goldfish Paper Lantern Decoration - open paper final mouth shape
     
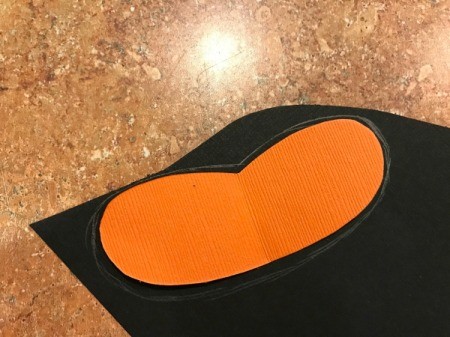
  11. Use the center of the mouth that you cut out as a template. Place it onto a black piece of scrapbooking paper and trace around it, adding about 1/8 in. all the way around. Cut it out and tape it to the back of the lips.
  12. 'Sharky' Goldfish Paper Lantern Decoration - using center of mouth as a template, add about 1/8 inch and trace onto black pair
     
    'Sharky' Goldfish Paper Lantern Decoration - template and tracing
     
    'Sharky' Goldfish Paper Lantern Decoration - cut out black shape and tape to back of the orange lips- view with taping done
     
    'Sharky' Goldfish Paper Lantern Decoration - front view of mouth
     
    Advertisement

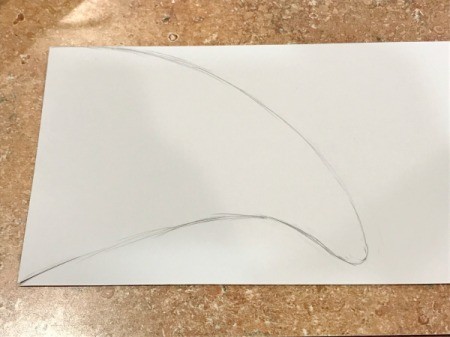
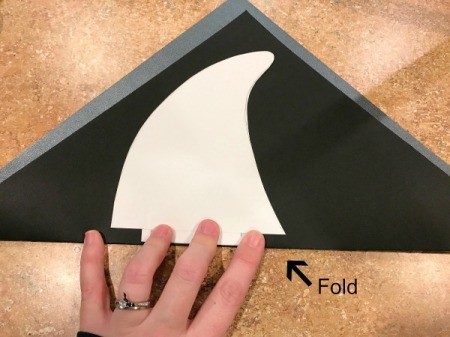
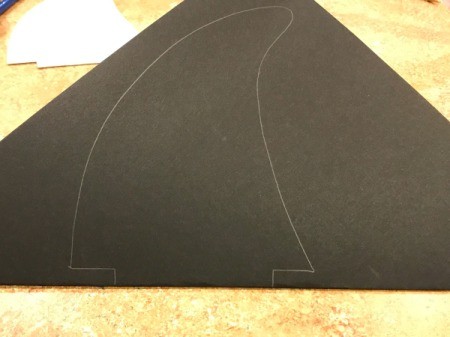
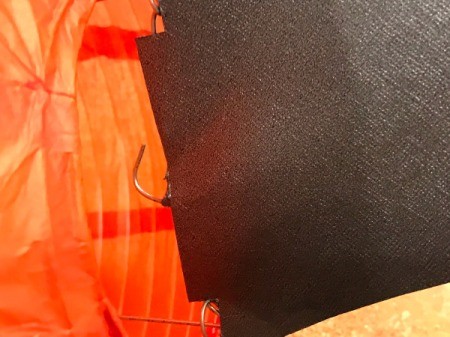
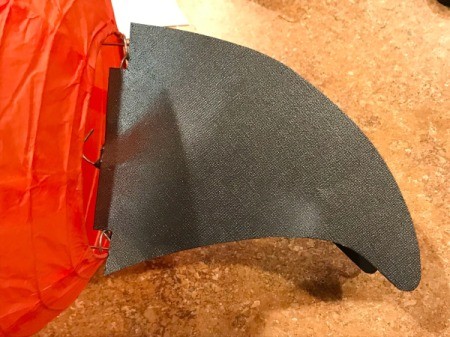
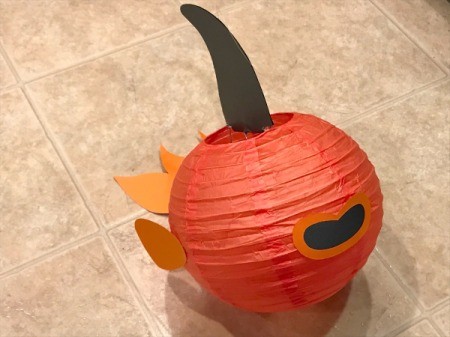
  13. On a piece of cardstock, draw a shark fin. Then add a tab that will go around the internal wire of the lantern, as shown below. Be sure to test fit it.
  14. 'Sharky' Goldfish Paper Lantern Decoration - on cardstock draw a shark fin with an added tab to attach to lantern
     
    'Sharky' Goldfish Paper Lantern Decoration - shark fin template cut out
     
    'Sharky' Goldfish Paper Lantern Decoration - check fitting fin on lantern wire
     
  15. Fold a piece of black scrapbooking paper in half, trace the shark fin on the fold, and cut it out.
  16. 'Sharky' Goldfish Paper Lantern Decoration
     
    'Sharky' Goldfish Paper Lantern Decoration - tracing shark fin on folded piece of black scrapbook paper
     
    'Sharky' Goldfish Paper Lantern Decoration - fin cut out
     
    'Sharky' Goldfish Paper Lantern Decoration - view of the open end of the shark fin
     
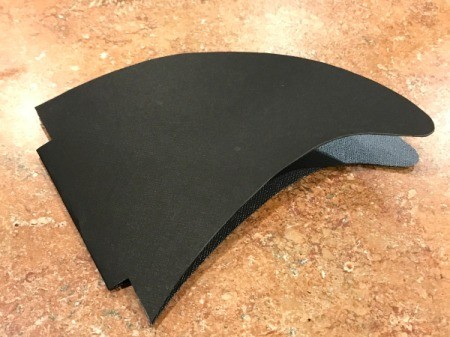
  17. Slide the fin into the lantern and around the center wire. You may need to poke the small wire hook through the paper (see photo) if necessary. Glue the two sides of the shark fin together.
  18. 'Sharky' Goldfish Paper Lantern Decoration - sliding fin over the lantern wire
     
    'Sharky' Goldfish Paper Lantern Decoration - small piece of wire end poked through the fin
     
    'Sharky' Goldfish Paper Lantern Decoration - fin ready to glue together
     
    'Sharky' Goldfish Paper Lantern Decoration - fin sticking up from top of lantern fish
     
    Advertisement

  19. Glue the tail to the back of the goldfish.
  20. 'Sharky' Goldfish Paper Lantern Decoration - tail glued on
     
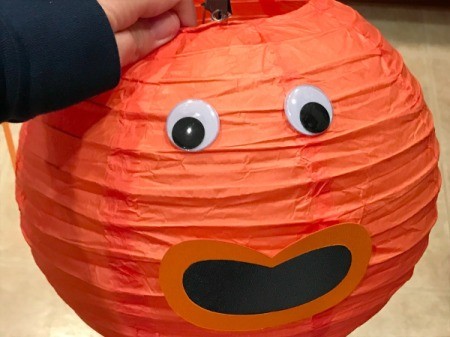
  21. Glue the mouth in place.
  22. 'Sharky' Goldfish Paper Lantern Decoration - mouth glued on
     
  23. Attach the fins to the sides of the goldfish.
  24. 'Sharky' Goldfish Paper Lantern Decoration - fins glued on sides
     
    'Sharky' Goldfish Paper Lantern Decoration - view of fish prior to adding eyes
     
  25. Add the googley eyes.
  26. 'Sharky' Goldfish Paper Lantern Decoration - eyes glued on
     
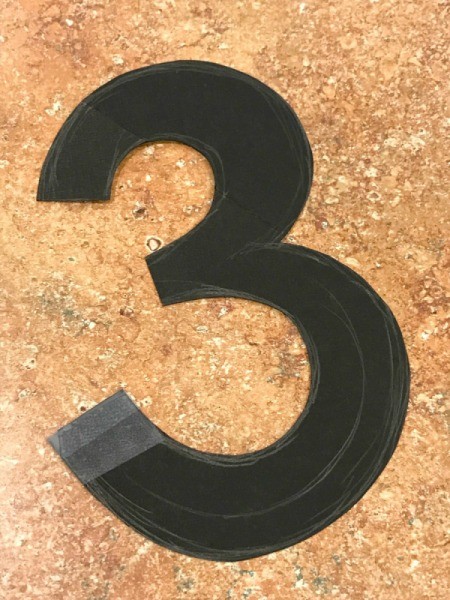
  27. Optional number: Create a template for the number, then trace it onto the colors of scrapbooking paper of your choice. I did the front side on glittery blue paper and the back on orange paper. Place a length of fishing line in between the numbers, tape in place, then glue the numbers together. Tie the other end of the fishing line to the lower wire of the lantern.
  28. 'Sharky' Goldfish Paper Lantern Decoration - optional template for age
     
    'Sharky' Goldfish Paper Lantern Decoration - template with glittery number three
     
    'Sharky' Goldfish Paper Lantern Decoration - making back side of three by tracing onto orange paper
     
    'Sharky' Goldfish Paper Lantern Decoration - finished shark goldfish with number 3 suspended from bottom of lantern
     
    Advertisement

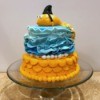
  29. I hung up streamers in various shades of blue from a central location and fanned them out all over the room, then hung the "shark" goldfish lantern in the center. I love how it turned out!
  30. 'Sharky' Goldfish Paper Lantern Decoration - side view
     
    'Sharky' Goldfish Paper Lantern Decoration - paper streamers in shades of blue
     
In These Pages
Categories
Crafts Party DecorationsJanuary 11, 2017
Pages
More
🎂
Birthday Ideas!
🍀
St. Patrick's Ideas!
💘
Valentine's Ideas!
Facebook
Pinterest
YouTube
Instagram
Categories
Better LivingBudget & FinanceBusiness and LegalComputersConsumer AdviceCoronavirusCraftsEducationEntertainmentFood and RecipesHealth & BeautyHolidays and PartiesHome and GardenMake Your OwnOrganizingParentingPetsPhotosTravel and RecreationWeddings
Published by ThriftyFun.
Desktop Page | View Mobile
Disclaimer | Privacy Policy | Contact Us
Generated 2024-01-30 07:21:16 in 9 secs. ⛅️️
© 1997-2024 by Cumuli, Inc. All Rights Reserved.
https://www.thriftyfun.com/Making-Sharky-Goldfish-Paper-Lantern-Decoration.html