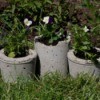
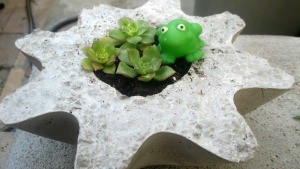
 I've seen all kinds of DIY concrete planters on Pinterest. I didn't try them because I wanted a drainage hole for my plants. Lo and behold, someone demonstrated how to make a hole in the planter! I made one by using a wavy bowl I bought years ago when Big Lots was Pic N Save. I just never quite knew what to do with it. Well, it made the perfect planter. And it slipped right out of the mold, so I can make more. :) I love how the concrete looks with the cute little succulents inside. This is an easy project and very inexpensive.
Total Time: About 30 minutes, plus drying time.
Yield: 1 concrete planter
Supplies:
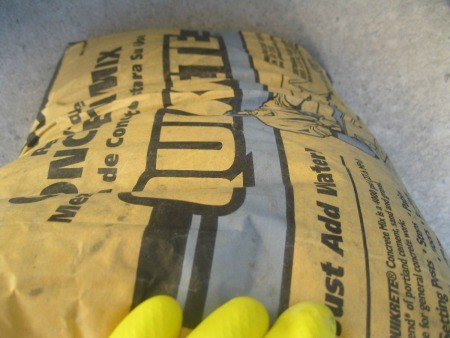
- concrete (I used Quik-rete)
- bucket to mix the concrete
- spoon or something to mix the concrete
- a bowl or some kind of mold
- another smaller bowl to make the planter. It should fit inside the bigger bowl with some room on the sides.
- scrap piece of cardboard
- tape
- cooking spray
- gloves (dishwashing gloves from the Dollar store are great)
Steps:
- Find a bowl to serve as the mold for your planter. Spray the inside with cooking spray.
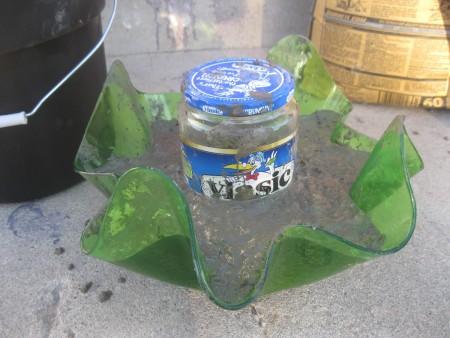
- Find another small bowl to put on the inside. This will serve as the bowl to add your dirt and plants. Warning: I used an old pickle jar, which was a bad idea! The jar would not come out and I had to break it with a hammer, kinda dangerous. When I do this again, I will find a disposable bowl and cover the outside with plastic wrap, then spray with cooking spray. You want to make sure it will come out.
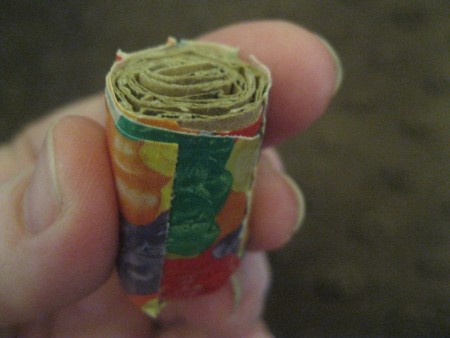
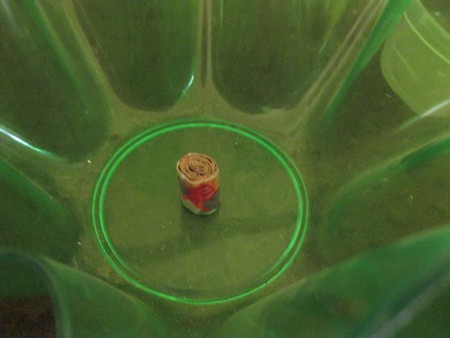
- Take a strip of cardboard, about 1 inch wide and 3 inches long. Roll it up tightly. Wrap some tape around it. Put that in the base of your big bowl, centered. This will be the drainage hole.
- Wearing gloves, mix up the concrete, in your bucket, according to the package directions.

- Trying to hold the cardboard "drainage hole", slowly pour in your concrete. Pour til you reach the top of the cardboard. Then place your smaller bowl (NOT a jar as shown) on top, centered. You may need to add something to weigh down the bowl, if it's light, such as a rock. Carefully pour the concrete around the bowl, til it's to your desired height.
- Once done, cover your concrete planter with a bag. Some people pour water on their concrete projects every day. Some don't. I just cover mine with a bag to keep the moisture in.
- Let your concrete cure for a few days. Take the planter out of the mold. Let planter sit another day or two.
- Fill with soil and plants. Enjoy your unique planter!

Becky Miles
Bronze Feedback Medal for All Time! 158 Feedbacks April 11, 20150 found this helpful
Ooops! I forgot to add in this post that once the concrete has cured and you take it out of the mold, pull out the cardboard piece. It's very easy to get out.