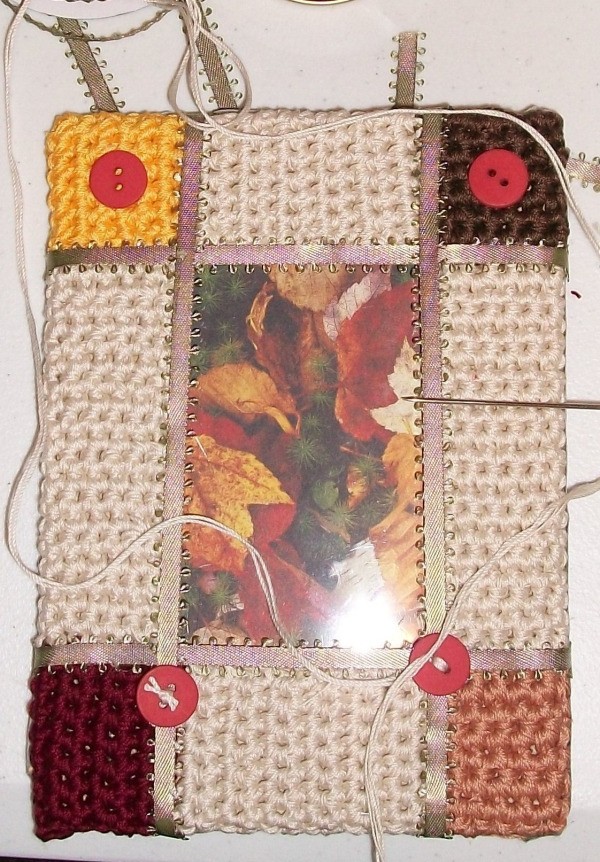
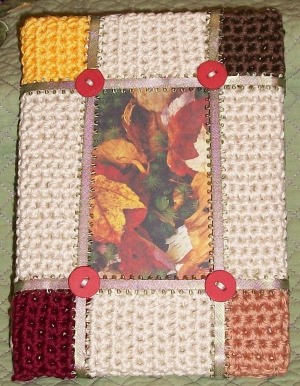
The cover over a wooden or cardboard frame is crocheted with ribbon and buttons.
Approximate Time: 4 hours
Supplies:
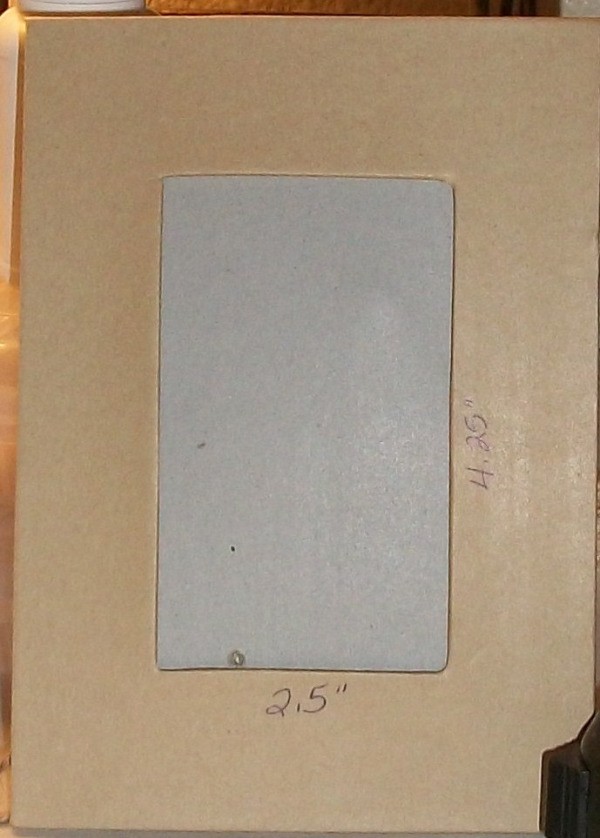
5 by 7 cardboard or wooden frame
Advertisement
crochet thread in five different colors
size G hook
plastic to cover photo if one isn't provided (I use sheet protectors.)
dual temp hot glue gun
needle that will hold two strands of thread
five matching buttons
70 inches of ribbon: cut two 8 inch and two 6 inch pieces and save the rest for the edging
Instructions:
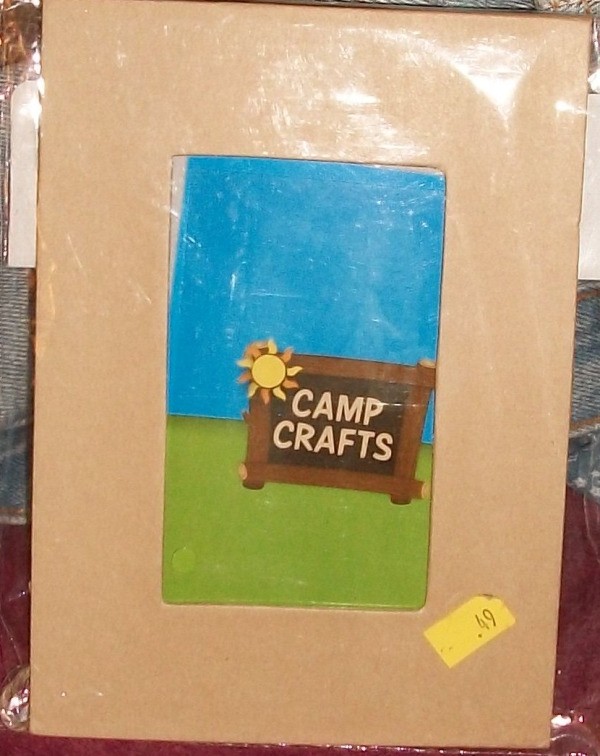
This is for a fall birthday present for a lady who lives in Nevada and doesn't see the fall trees anymore.
It could just as easily be pastel with a baby photo, Americana with summer photo, or holiday colors with a Santa or snowman.
Start out with cardboard or wooden frame. This one is a 5X7 with a 2.5 by 4.75 inch insert. Determine the colors and the photo before you start, as inserting the photo before any hot gluing is done is essential.
Advertisement
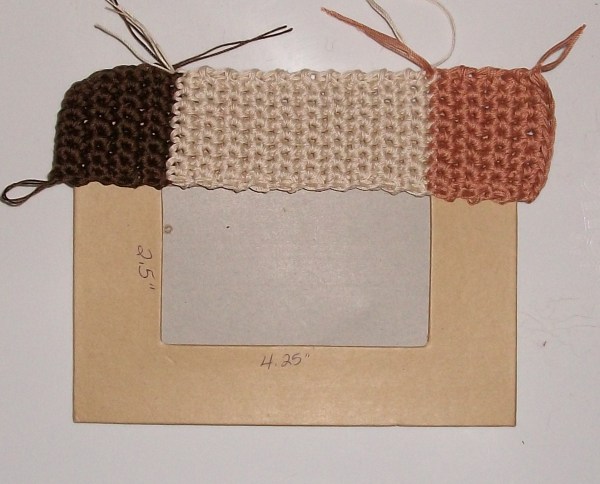
I used four strands and a G hook. This pattern is for that size frame and if your frame is different, you will have to adjust.
Once you determine colors, measure the frame part you will be starting on. Some frames are wider on the top and bottom than the sides, so this pattern wouldn't work. Your frame has to be the same on top and sides.
With a "corner" color, chain 8 across and turn, making sc in each of the next 7 chains. Make 8 rows, and change to main color. Some like to break off, but you can change any way you want. Make 20 rows of the main color, then change to second corner color and make 8 more rows. This completes one side.
Advertisement
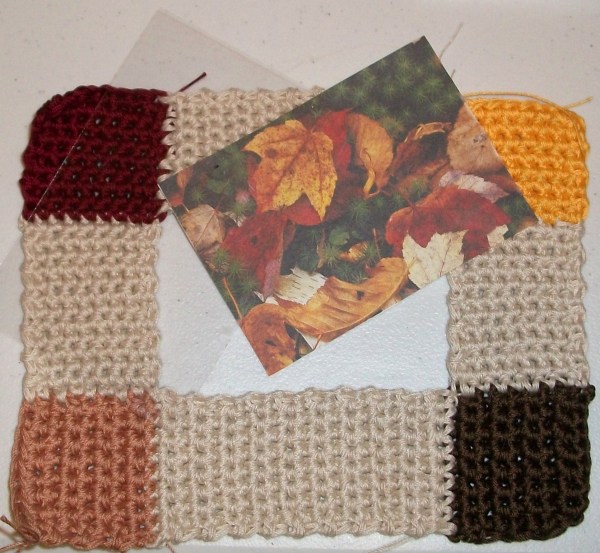
On the side of the second corner color, fasten on with main color, and make 12 rows. Break and fasten on third corner color, making 8 rows.
Fasten on main color and make 20 rows, then finish with 8 rows of your last corner color, leaving an 8" tail to sew last main color section to first corner color.
You will have a lot of tails to work in, but if you prefer, just glue them under when you are ready to hot glue the work to the frame. Because I used ribbon to cover the color change seams, I used that seam underneath to glue the crocheted work to the frame. This ensures that your frame won't slip if one outer and inner seam should dry out over time.
Advertisement
Mark the frame where the seams are, glue those and carefully lay the top onto the frame. Remember to use low temp glue as the ooze factor will burn you. To be safe, wear gloves or use something to weigh down the work, like a plastic cutting board or old glass frame.
Don't use too much glue or it will stick to whatever you use.
Once that is cooled, I used contrasting ribbon and covered the color change seams, so you will be able to just use a dab on the apex so the button covers any bleed through, then glue them good behind the back. You can't see this very well, but the ribbon is olive green.
For the buttons, I used all matching, but a complementary color not matching any of the crochet thread. I threaded two strands of thread in, tied them in the back, snipped the excess and glued them down. You notice I mitered the angle of the button holes as if it was a frame, but you don't have to.
Advertisement
They have fall buttons out now that are very cute, so go a little crazy if you can. Glue a ribbon on top, gluing a button to match (or not!) on top. I covered the edges of the frame, but you can back the edges with rickrack, lace, or eyelet.
This 4 strand effect is quite bulky, so anything "foo foo" might not work. It's your choice so have fun and I hope you enjoy this project.
 The cover over a wooden or cardboard frame is crocheted with ribbon and buttons.