social

Refurbishing A Lampshade


Bronze Post Medal for All Time! 105 Posts
November 14, 2019

Refurbishing A Lampshade with Jute Cord - lamp turned on
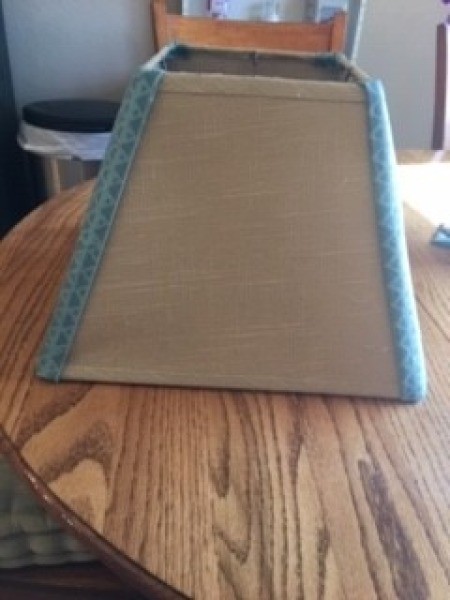
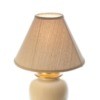
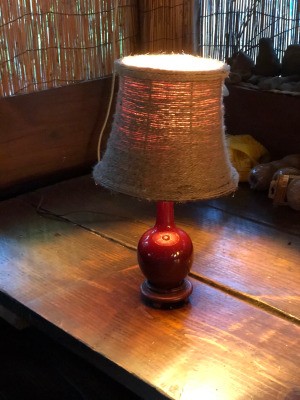
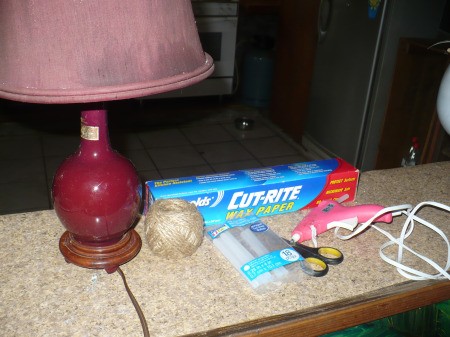
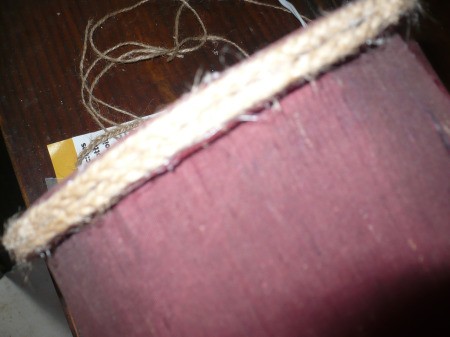
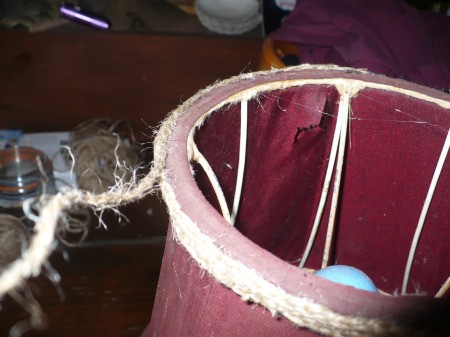
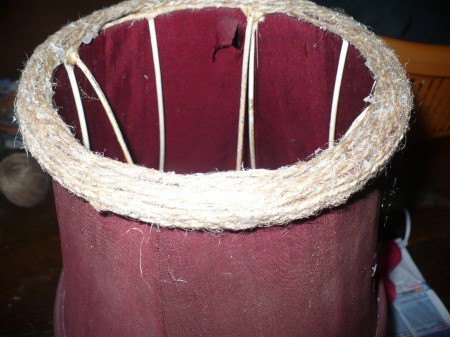
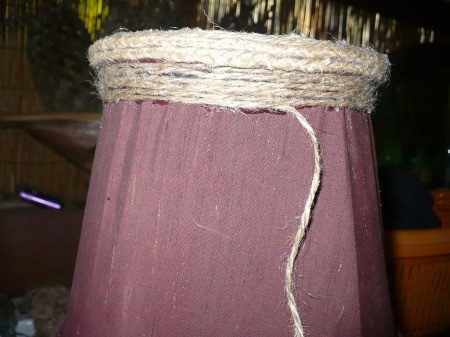
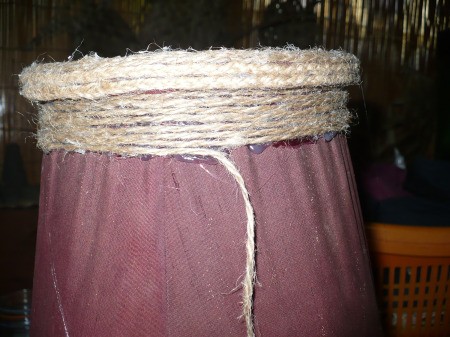
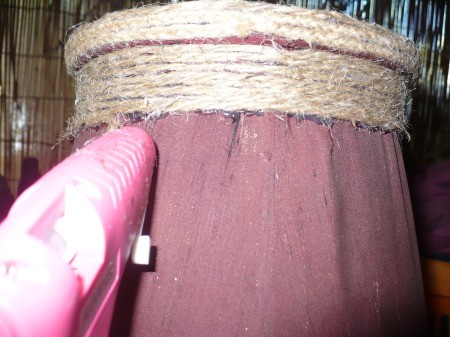
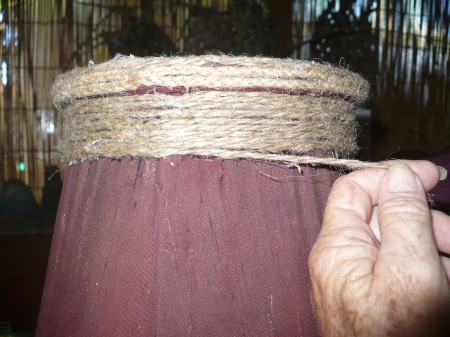
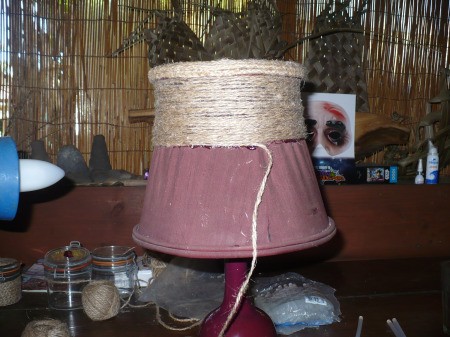
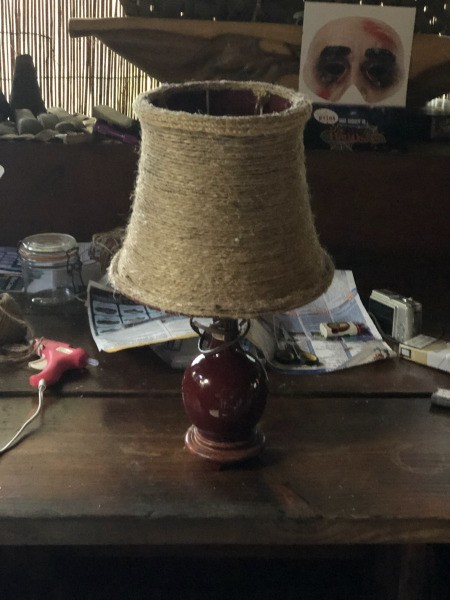
My boyfriend seems to bring home all kinds of discarded items from the clients he works for. This time he brought home 2 small lamps that still worked, but the lampshades were torn and looked horrible. I was thinking to just remove the shades and buy new ones. This was not possible and there was no way to remove them without breaking the bottles they sat on or destroying the lamps. In order to fix them up so they could be used again, I decided to cover the shade with a roll of fine jute to give them more of a local look and fit the décor of my home.

Advertisement

Total Time: 3 to 4 hours

Yield: 1 Small lampshade

Supplies:

  • 1 lamp with the lampshade attached
  • hot glue gun
  • 20 hot glue sticks
  • 320 m fine natural colored jute
  • 50 m medium natural colored jute
  • scissors
Refurbishing A Lampshade with Jute Cord - supplies
 

Steps:

  1. Clean the old lamp. This lampshade had a piece of material on the inside that was ripped and torn. The outside of the shade had some tears in it too. You should clean your lamp and the shade with a damp cloth to remove all the dirt or dust from the lamp. I removed the piece of cloth that was on the inside of this shade.
  2. With the 50 meters of natural colored jute cut 3 equal lengths. You will be braiding the jute for the top of the lampshade. If you don't want this effect it is possible to skip this step and go to the next step.
  3. Refurbishing A Lampshade with Jute Cord - braided smaller cord
     
    Refurbishing A Lampshade with Jute Cord - braid ready to use on top of the shade
     
    Advertisement

  4. Heat up the hot glue gun and get it ready. Now place a dab of hot glue on the top rim of the lampshade. You will need to place your braided cord in the glue and make sure you get all the ends glued so it stays down. Note: if you skipped the first step you will use your medium natural colored jute in place of the braided jute for this step. It works the same and has a different effect on the look of your shade.
  5. Refurbishing A Lampshade with Jute Cord - wrapping and glueing braided cord around the top of the shade
     
  6. Working from left to right, you will be adding a small amount of glue to the top of the lampshade and then pulling your cord tight and placing it in the glue. Note, at first the cord will be long and it makes it a bit harder to work with. I just placed my cord on the table and it seemed to work fine and it was easy to wrap around the top of the lampshade.
  7. Refurbishing A Lampshade with Jute Cord - round two
     
    Advertisement

  8. Continue adding a small line of glue around the top of the lampshade and glueing the braided jute in place. You will do a continuous wrap around the top of the lamp. When you reach the beginning you will just go under the first line to add your second line. The top of my lampshade only needed 3 braided lines.
  9. Refurbishing A Lampshade with Jute Cord - continue
     
  10. Once I finished the braided lines I noticed the top of my lampshade had a lip on it that look terrible if I left it the color of the shade. I used the small natural jute to cover this area. I started next to the braided jute to place my glue and started to wrap the smaller jute around the top lip of the lampshade.
  11. Refurbishing A Lampshade with Jute Cord - lampshade lip on the top
     
    Refurbishing A Lampshade with Jute Cord - adding smaller jute cord to the lip
     
    Refurbishing A Lampshade with Jute Cord - lip covered
     
    Advertisement

  12. Do not cut your jute; leave it in the ball. Pull the cord from the inside of the jute to make it easier to work with. Now place a dab of hot glue on the base of the lampshade right under the braided jute.
  13. Refurbishing A Lampshade with Jute Cord - wrapping the larger gauge cord
     
  14. Place your cord on the glue and make sure the ends are glued and secure.
  15. Refurbishing A Lampshade with Jute Cord - add a line of glue and
     
  16. Now continue adding the hot glue to the lampshade and placing your jute around the entire lamp shade. You can add longer lines of hot glue now to make it a bit easier to glue and to go a lot faster.
  17. Refurbishing A Lampshade with Jute Cord - add longer lines
     
    Refurbishing A Lampshade with Jute Cord - pull taut
     
    Refurbishing A Lampshade with Jute Cord - almost half way down
     
    Advertisement

  18. At the bottom lip of this lampshade I just used my medium jute to cover this area. I did not braid the bottom of the shade. You are now finished covering the lampshade and it can be used on your desk or next to your bed as a small night light. I used an LED bulb in mine and the look is fantastic when the light is lit.
  19. Refurbishing A Lampshade with Jute Cord - finished shade
     
Comment Pin it! Was this helpful? 2
Read More Comments

Questions

Ask a QuestionHere are the questions asked by community members. Read on to see the answers provided by the ThriftyFun community or ask a new question.

July 22, 2010

I have some old lamps shades I'd like to look clean and new. They are the paper type, but one is what I would call accordion or waffle, not smooth. What can I do with it? I live on a very small disabled budget and lamp shades are higher in cost than lamps. Any ideas will be welcome.

I just found this site today and am looking forward to many hours of reading and enjoying and the newsletters to come, especially in gardening, as I do have a good size planting area and am having some problems with preen landscape cloth.

Advertisement


Thanks so much.

By Terri from MO

Answers

Anonymous
July 23, 20100 found this helpful
Best Answer

Welcome to ThriftyFun. Glad to have you with us.

You can't put water or liquid cleaners on paper lampshades, so there is probably no other way to clean them than dusting or vacuuming. If you can't find a way to clean them, you could go to a craft store or WalMart and pick up a couple of small bottles of acrylic paint. I assume your lamp shades were originally white, and now look beige. I would purchase a light and also a little bit darker shade of beige. Cut a square out of a kitchen sponge, tear the corners and some of the edges off the sponge, and pull some hunks out of the middle of it. The idea is not to make it look like you used a square sponge to paint it. Lightly dip the sponge in the lighter color and dab it here and there on the shade, turning your hand a different direction each time. Don't cover the whole shade, just splotches here and there. Then do the same with the darker paint. You can practice on a sheet of paper first.

Another alternative is, you could go online and find instructions on how to make new covers for them, either in rice paper or cloth. Good luck with your project.

Reply Was this helpful? Yes
July 28, 20100 found this helpful
Best Answer

When my shades were looking bad, I measured the height and added a few inches on each end. I cut the fabric (I used a cotton with a pattern which was compatible to my living room) and left the length about twice as long as the shade was. Then I sewed it together along the short end. I then sewed the top and bottom to make a casing of about an inch. I threaded elastic in the top and bottom and it was like having a slipcover for the shade. It can be taken off and washed. Or different slipcovers can be made to change the look. I got compliments on the lamps. The casings fit inside the shade.

Reply Was this helpful? Yes

Bronze Feedback Medal for All Time! 174 Feedbacks
August 2, 20101 found this helpful
Best Answer

I have the same type of accordian type lampshade and a friend told me to put it in a sink (or bathtub) and sponge it off with soapy water. Don't saturate it, just sponge it lightly. The dirt just rolled off! Rinse and let dry. The shade looked like new. Hope it works for you.

Joan from Chesterfield, Michigan

Reply Was this helpful? 1
Answer this Question

May 5, 2021

A couple of months ago, I submitted a reupholstered chaise lounge to this website to put in the den. I had leftover fabric and so I added trim to this plain lampshade to coordinate it with the lounge. They look great together.

The finished lampshade.

Read More... Pin it! Was this helpful? Yes
In This Page
Categories
Crafts Home DecorJanuary 16, 2020
Pages
More
🍂
Thanksgiving Ideas!
🎃
Halloween Ideas!
Facebook
Pinterest
YouTube
Instagram
Contests!
Newsletters
Ask a Question
Share a Post
Categories
Better LivingBudget & FinanceBusiness and LegalComputersConsumer AdviceCoronavirusCraftsEducationEntertainmentFood and RecipesHealth & BeautyHolidays and PartiesHome and GardenMake Your OwnOrganizingParentingPetsPhotosTravel and RecreationWeddings
Published by ThriftyFun.
Desktop Page | View Mobile
Disclaimer | Privacy Policy | Contact Us
Generated 2022-10-25 13:56:43 in 3 secs. ⛅️️
© 1997-2022 by Cumuli, Inc. All Rights Reserved.
https://www.thriftyfun.com/Refurbishing-A-Lampshade.html