
Share on ThriftyFunThis page contains the following solutions. Have something to add? Please share your solution!
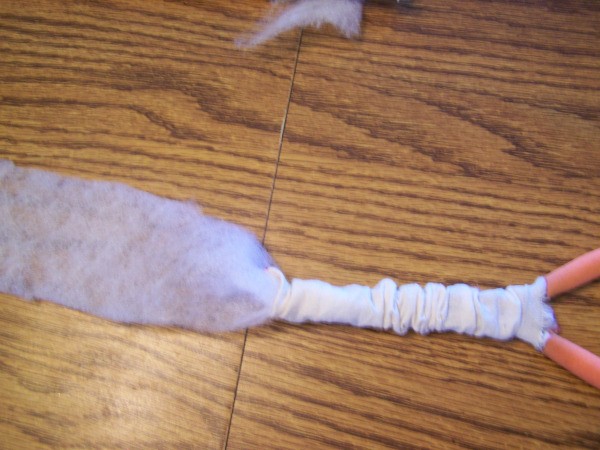
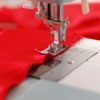
Turning fabric tubes right side out can be very frustrating. I found a way that works great for me and is much safer than the turning tool I purchased, as it makes a hole in some fabrics. I have a pair of needle nosed pliers with 4 inch ends on them, and they are very thin. I just thread my tube onto the nose, grip the other end in the pliers, and gently pull that end through, reversing the tube.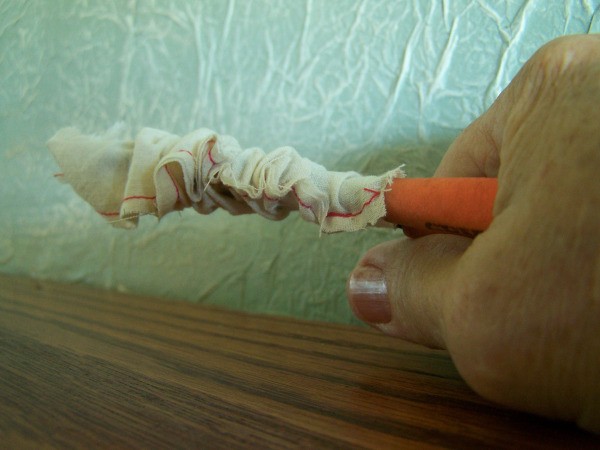
To stuff tubes, I thread the turned tube on my pliers, grip a rolled piece of batting, and pull it through the tube. By making the end of the batting smaller and gripping it tightly, it will pull right into the tube with no problem.
By Ann W. craftingtales.com from Loup City, NE
Ask a QuestionHere are the questions asked by community members. Read on to see the answers provided by the ThriftyFun community or ask a new question.
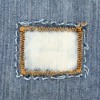
How are these loops made? The dress that I am making for my daughter has these and I've never made these before. Thank you have a great day. Here is a picture:
By adriana from New York, NY
They are just fabric "tubes". The reason they are so sturdy is because they are do skinny. You can buy a tool for turning the fabric right-side out after sewing.
Cut a long strip of the fabric, on the bias, fold right sides together and sew a tube. To turn right side out, attach a strong thread (i.e. embroidery silk) to one end and thread it through the eye of a blunt darning needle. Feed this into the tube and, with care you should be able to turn it completely right side out.
The loops are formed with one continual 'tube'. create a curvy 'zig-zag' as you pin it down the edge of the garment seam line (form the loops around the barrel of a pen or something to ensure the loops are equal in size), overlapping to ensure it is sewn firmly (wrong side of fabric).
lol. I have just realized that I could draw some diagrams, scan them and upload them, so get back to me if you still can't figure it out!


