coville123
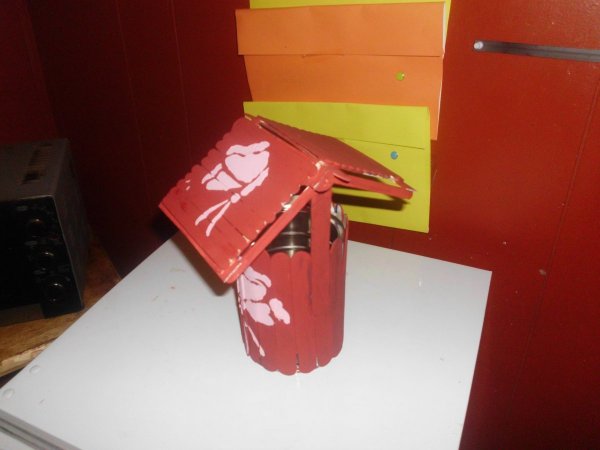
Silver Post Medal for All Time! 433 Posts This was a fun easy kid's craft for making a wishing well. I really enjoyed this one with the kids.
Approximate Time: 1hour
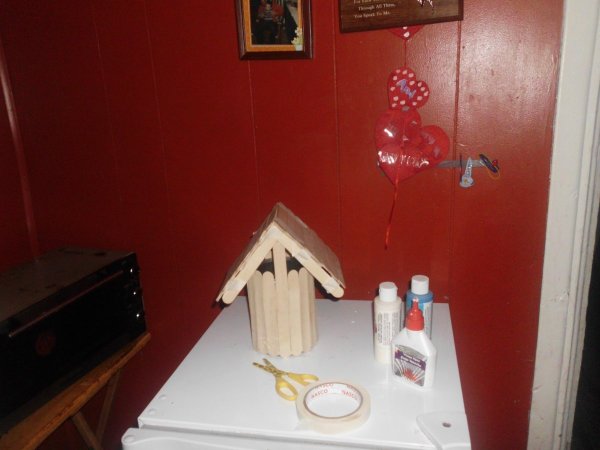
Supplies:
- 5 inch coffee can
- glue
- masking tape
- jumbo Popsicle sticks (5 1/2 inch)
- regular size Popsicle sticks (3/8 by 4 1/2 inch)
- elastic bands
- acrylic paint - red and pink
- paint brush
- stencils - butterflies
Instructions:
- Glue Popsicle jumbo sticks around the can until it is completely covered.
- Once your done, wrap a few rubber bands around the can to hold sticks in place while glue dries.
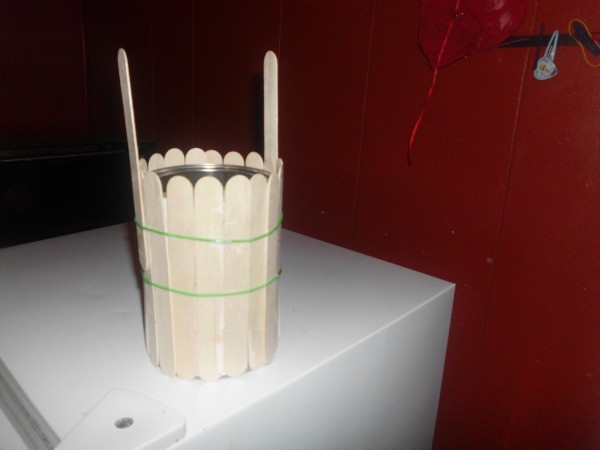
- Glue two more jumbo craft sticks on the sides near the top of your can, directly across from each other.
- While that is drying you can start the roof, using regular size Popsicle sticks. Lay two Popsicle sticks down parallel to each other; put a dab of glue on each end of another stick and lay it across the two you have. Keep doing this until one side of your roof is done. Repeat this again for the other side of your roof.
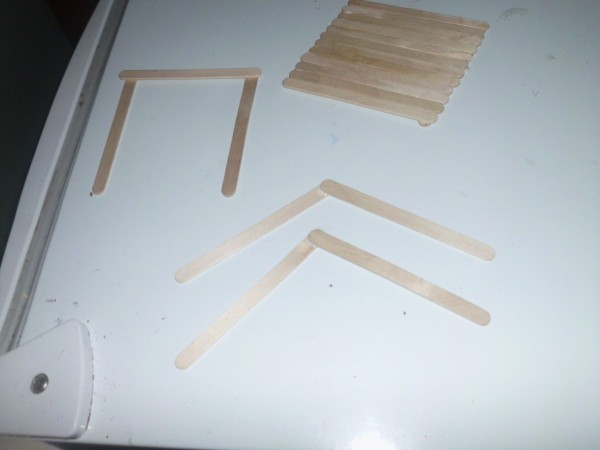
- Also glue two sticks together on a 45 degree angle, you will need two of these. Set all this aside to dry.
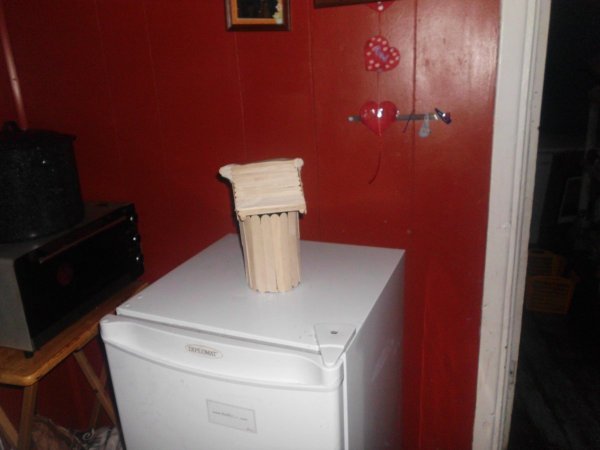
- When dry, glue the two 45 degree angles on the top of the Popsicle sticks you put on the sides of your can; the ones you did directly across from each other at the top.

- Put a bit of masking tape on them until they are dry.
- When dry, glue on your roof pieces.
- Glue one stick on the top of your wishing well's roof.
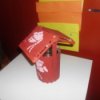
- Once the well is dry you can paint it. I used a decorative stencil to add a design to the finished well.
- Now add pennies or use it however you like.
By coville123 from Brockville, Ontario
Add your voice! Click below to comment. ThriftyFun is powered by your wisdom!
gem
Bronze Post Medal for All Time! 163 Posts February 6, 20120 found this helpful
Nice job and easy instructions. TFS.
Add your voice! Click below to comment. ThriftyFun is powered by your wisdom!