 Using very dry branches, wire, glue and coco fiber mat, I made these two chairs for decorative effect. On the wall behind the one chair with orange flowers on it is a twig trellis on the wall. Twig art is fun as long as you remember to have dry wood to work with.
By Carol from Aurora. IL
This is a page about making useful items from tree limbs. Tree limbs can be reused in craft and garden projects.
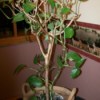
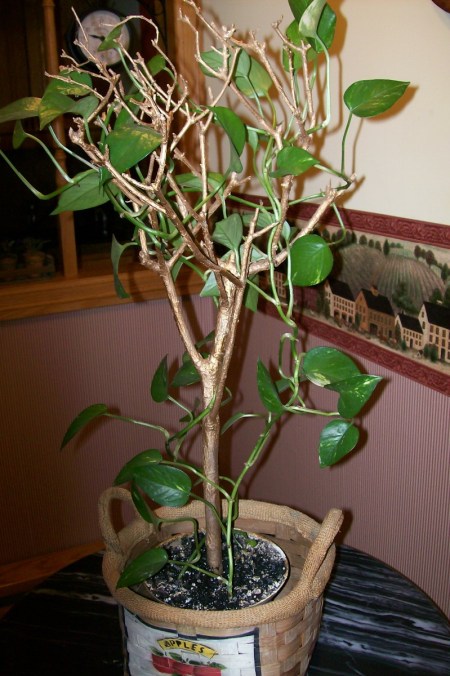
This is a page about making a money tree. A money tree is a nice gift for certain occasions.

This is a page about painting a branch for home decor. You will be pleasantly surprised how nice a painted branch can look when used as part of your home decor.
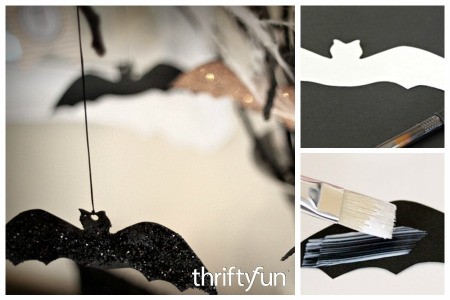
This is a page about Halloween bat branches. For an inexpensive holiday display, decorate tree branches with glittery bats and cobwebs.
This page contains the following solutions.
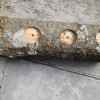
This is a branch that is cut and then cracked in two. Where it is cracked in two, I put duct tape on the top. It will hold clothes.
With many people pruning at this time of year I thought I'd come up with some useful things to do with the pruned twigs and branches. Today a neighbor gave me several large bundles of long supple apple tree branches.
Pretty soon it will be time to clean up what Old Man Winter left behind. I have raspberries and, come every spring, winter has left me broken branches, I'm sure the birds also help in the process.
Here are the questions asked by community members. Read on to see the answers provided by the ThriftyFun community.
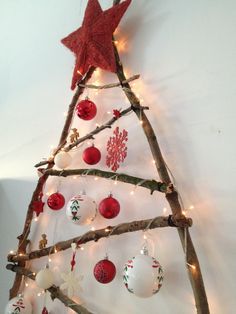
Can I use fallen pine tree limbs for crafts? I wanted to create a Christmas tree craft and want to know if I will have to contend with sap drip or allergen issues inside the home. I have abundant SW Florida pines on my property.
I have never had an issue with allergic reaction to pine boughs, nor have I had a sap-drip problem. You may want to spray the needles with hairspray/sealer of a clear nature to prevent them falling due to the warmth inside your home.
Thank you, these are dry limbs and I feel confident now that I have had some great replies. I plan on making an alternate Christmas tree craft with large cut
place on parchment or foil covered cookie sheet or large pan, bake in 200 degree oven for 30 minutes. This is supposed to remove the sap plus kill and critters.
Spray some clear-coat on them, let dry well, and you should have no problem with any type of leakage.
What can I craft from tree branch slices?
By Shirley from LA
Here is a great site for ideas! Good Luck!
Depends how big around the slices are what u can make with them. If they are small , drill holes for peg legs and make doll furniture like stools, chairs, tables. If larger, make human sized footstools or side tables using the same idea but studier legs. If they are thickish, glue a pretty ceramic tile to one for a trivet.
Note: you may want to router or have someone do it for you around the center in square the size of the tile so it will be recessed in the slice. Seal wood with some sealer before putting in the tile for a neater look.
I have some tree branches I cut down and want to know what I can make with them. I have Cub Scouts and want to make some boy related stuff.
By Tessa from Las Vegas, NV
If your branches are 1 inch diameter or larger, you can cut rounds or ovals for tie-slides. Cut the rounds/ovals, give the boys sand paper or sanding blocks to sand them smooth.
I recently cut off a large branch from my tree. The branch is about 3/4ft high. I would like to use it as a decoration for Christmas.
What is the best way to support it? A board or pot? Do you have any suggestions please?We use a large branch of a healthy tree (eucalyptus, fir, pine etc.) as a "holiday tree". We hang the branch on a wall slanting downward as it would be if still on the tree. We love birds so have many types of bird baubles-little nests with babies, small realistic birds, crochet and cross stitch birds, my naturalist husband's photos, etc. Add clear lights only.
We celebrate the day mainly as a winter's festival break from the cold and dark season.
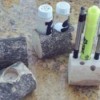
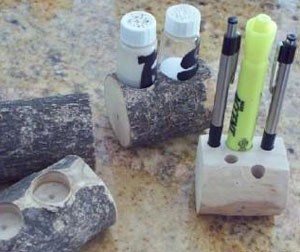
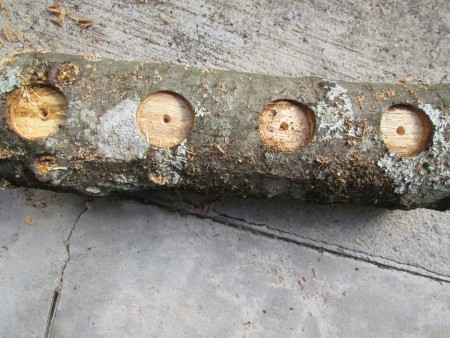
Using a speedbor bit on a fallen branch you can make a tea light holder for your table or fireplace. The project below will show you how.
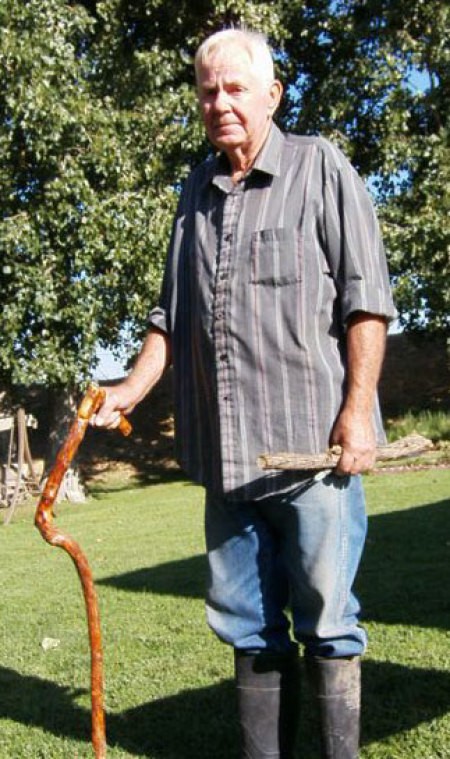
Whether you happen upon a neat branch that has fallen from a tree or chose to remove one from a tree in your yard, it is easy to turn it into a handy walking stick.
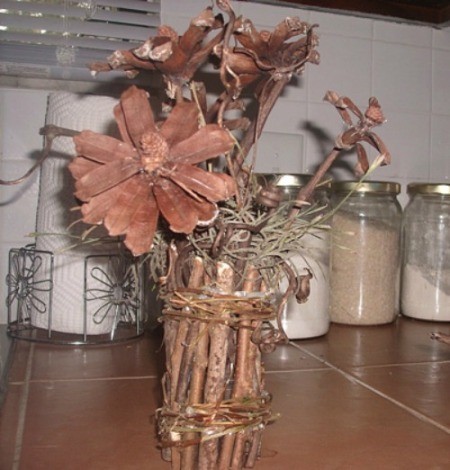
This is a page about making a twig flower vase. Using items you have collected from nature can make this twig vase filled with pine cone flowers.
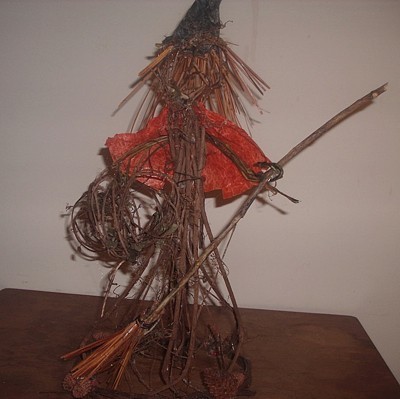
This is a page about making a garden witch from twigs. This cute Halloween witch is made from twigs you can collect from your garden or neighborhood.
This is a page about making a willow wreath. If you or a neighbor have a willow tree you can make your own willow branch wreath.

ThriftyFun is one of the longest running frugal living communities on the Internet. These are archives of older discussions.
We had to get half of our 60 foot hackberry tree cut off and now we have mounds of branches and "logs". Any ideas on what to use these logs for, besides saving it for firewood to sell.