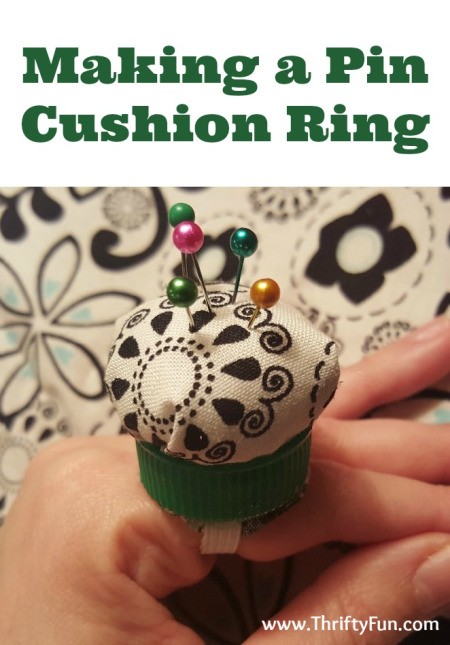
This handy sewing accessory may become one of your sewing essentials. They also are fun to make as a gift for a friend. This is a page about making a pincushion ring.
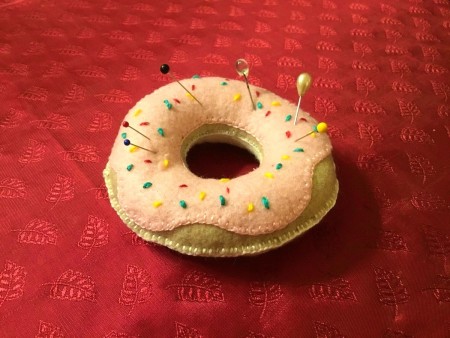
Make a cute pin cushion in the shape of a donut, for yourself or to give a crafting friend. Felt and stuffing are needed and then you can decorate as you like.
This is a page about making a primrose felt pincushion. Make this pretty floral felt pincushion as a gift or for your own sewing room or space.
This page contains the following solutions.
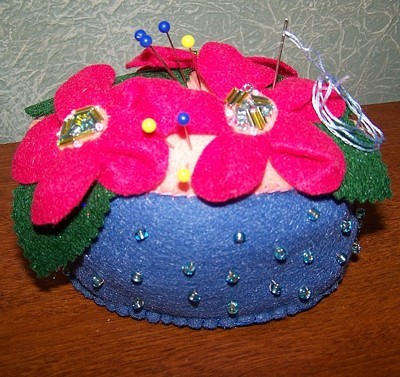
 Pin cushion holder that resembles an ol' fashioned Easter hat.
Approximate Time 45 minutes
It looks like a old time Easter hat and then I glued on a hook on back if I wanted to hang it on the wall someday.
By Sally from West Seneca, NY
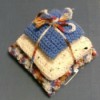
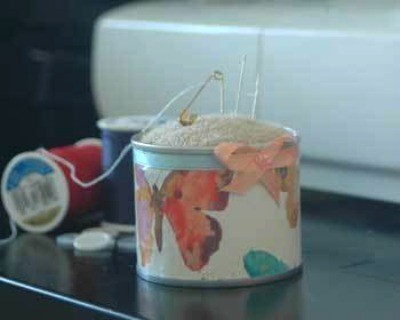
 This pretty pin cushion will keep mother's pins sharp and handy while at the same time giving off a subtle scent. When she wants she can change the bar to another scent and use the last one for bathing. Great for teachers gifts or any woman who sews.
Approximate Time: 10 minutes
Here are a a couple of poems you might want to attach.
Once when I was but your little girl
You took the time to teach me to sew.
Now that I am a Mother with a girl to teach
Where you got your patience I do not know.
Many, many years ago when I was but a girl
Advertisement
You took the time to teach me to sew.
Knowing what kind of child I was back then
Where you found the patience I do not know.
By Ann Winberg from Loup City, NE
For those of you who do a lot of sewing, you will like this second idea: 2nd way to use those socks is to make a pin cushion!
Sewers will love this creative idea. You can buy emery particles for about $6.00 a cup and make your own needle and pin cushion to keep your needles and pins sharp.
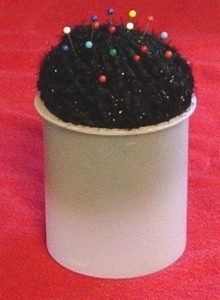
This is a simple way to make a small pincushion from a plastic bottle cap. You could also attach a small loop of elastic band beneath it and wear it on one of you fingers as you sew.
My friend loves canned frosting, so I keep the cans for all kinds of things. If you have a big sewing project, but don't have a pincushion, or just want a larger and better one, try this.
This fun project makes a large pin cushion that would also be pretty just sitting in your sewing room. Any sewing enthusiast would be thrilled to receive a handmade gift such as this.
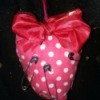
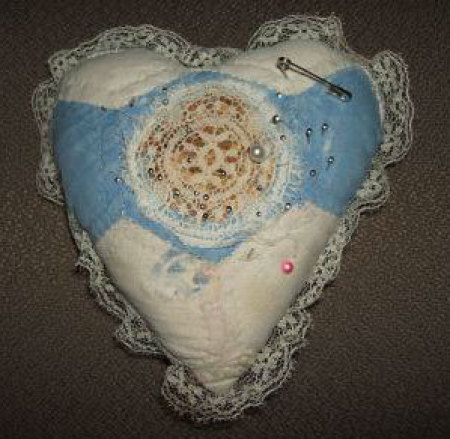
Don't throw away your old quilts; recycle them. Create pretty, heart-shaped pin cushions. You can add lace, buttons, etc.
Save a cap/top from your liquid laundry detergent container. Rinse and wipe dry. To weight the cap/top, fill half of the center with aquarium stones or, if you live near the beach, use some small pebbles from the shore.
Use a piece of sticky-back velcro to attach a piece of kitchen sponge to the top of your sewing machine. Makes a great, always-there pincushion to use while you are sewing.
Make a pin cushion using steel wool as the stuffing. The steel wool will sharpen pins. Use corduroy, felt, or suede as the material for your pin cushion.
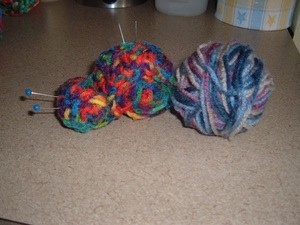
With scrap or regular yarn, you can make a nice little pin cushion. I collect snails, so this was a natural for me.
You can get crafters you know to give you their leftover ends and pieces of pretty fabric, ribbons, etc., and make up little pincushions for small gifts. You don't need a sewing machine, you can make these by hand.
Take a piece of Styrofoam or packing foam and attach this to your sewing table, sewing machine, or wall behind your sewing area with a piece of double sided tape. The packing foam works great as a pin cushon and you'll always have a convenient place to store your pins when you sew!
Here are the questions asked by community members. Read on to see the answers provided by the ThriftyFun community.
Is it possible to use an apple as a pincushion?
By Miranda M.G.
Your needles and pins will rust. I would not recommend this.
Tips and ideas for making your own pin cushion. Post your ideas.

Use cut hair to make a pin cushion.
By Cindy Yasuda
Never use 100% cotton batting. The pins will not go through the cotton batting. Instead, use polyester fiber fill. Mixing the polyester fiber fill with saw dust or hair (as mentioned below) is a good idea.
If you use this idea, pins and needles will stay rust-free and you will be recycling X's two: Fill the toe of a clean sock to desired pin-cushion size with used coffee grounds that have been spread out to dry (on a cookie sheet in the oven is fastest). After putting a cup or so of the grounds in the sock, twist the sock to form a tight 'ball' and knot the sock. Cut off the remainder of the sock (or not). The sock is quick and easy, but you can also sew a fabric pillow-like pin cushion to fill with the rust-preventing dried grounds before hand-sewing the opening.
Because coffee is a good deoderizer, the same basic idea works well in the closet, basement, car, etc. Socks for this purpose can be more loosely filled and knotted.
Another sock and coffee idea is to partially fill and then knot a sock with dried coffee grounds. etc. (see below) to create an 'eye-pillow' that keeps all light out while also forming itself into the hollows of the eyes to provide the feel of a gentle mini-massage. This is especially nice to sooth tired eyes, for afternoon napping, or for getting to sleep in unfamiliar surroundings. I don't leave home (overnight) without it.
In addition to dried coffee, the sock can be filled with a variety of things other than dried coffee grounds depending on preference or availability. Examples to use individually or to blend for pleasant aromas include uncooked rice, popcorn, legumes, flax seeds, etc., plain or mixed with choice of herbs, dried lavender. tiny pine cones, etc. Fancy fabrics and elastic, (to keep the eye-pillow in place if trying to sleep an airplane, for example), can also be used. Still, as with the pin-cushion, the simplicity of a clean knotted sock is hard to beat...and the weight of the eye-pillow seems to keep it in place in most situations.
Would any of you crafty people have a pattern for different pin cushions. I think my dear daughter is now a collector. Thanks.
There is a big list of pincushions to make at Tipnut:
Try a finger pincushion. Easy and fun. Here is a pattern ths.gardenweb.com/
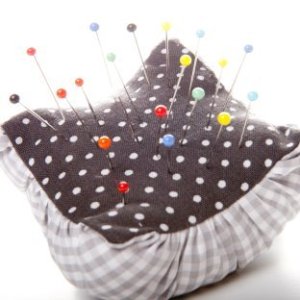
How to make your own magnetic pin cushions? I am always sewing and using straight pins for patterns etc. While I have plenty of fabric pin cushions, I find I am always dropping the pins and finding them later when I get stuck with them painfully. I have seen the magnetic pin cushions in stores that cost $10-$15 each.
I would like to know of a way to make my own even in different sizes, so I do not have to keep up with the pins so much. If anyone has any ideas for making these magnetic ones I'd love to hear about them! :) Thanks!in a small jar or other container like margarine bowl or baby food jar, tape or glue a magnet inside the lid & presto ! There you have it !
to make a magnetic pin cushion just slip a magnet inside the cushion and the pins will stick
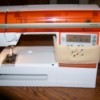
Do not put a magnetic pin dish near a computerized sewing machine it will ruin the program and the machine.
Can pecan shells be used for pin cushions?
I am looking for a granny pin cushion that came out in Crafts n' Things magazine in 1989 or the 1990s. I made it and it is great, but I can't find the magazine. Can you help?
By Minnie from Mcquady, KY
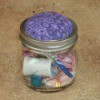
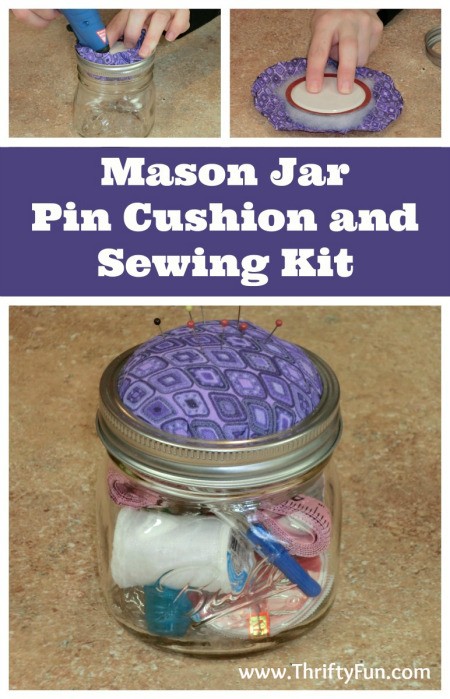
An easy project to customize for a gift. People of all ages need a needle and thread for mending or to replace a button. This is a page about mason jar pin cushion and sewing kit.
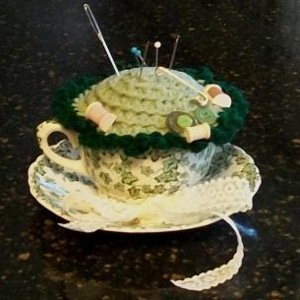
Pincushions are a necessity for many crafters. Making your own is a craft in itself. One lovely way to design a pincushion is to use a pretty tea cup and saucer. These cushions make a nice addition to your craft area or unusual gifts. This is a page about making a tea cup pincushion.