beads: glass beads in red, white, and blue - Size 10MM
Directions
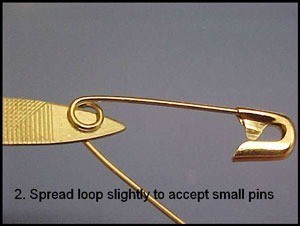
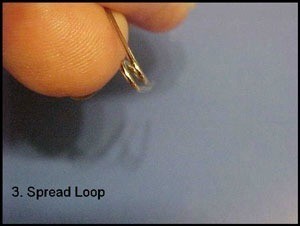
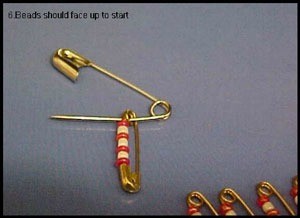
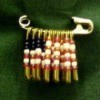
Using the photos as a guide, spread the loop on the large gold pin and set aside.
You will need a needle nose pliers and something to spread the loop end of your large safety pin. I find that a metal fingernail file works well for this, or perhaps a small letter holder.
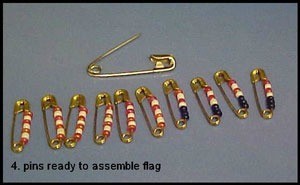
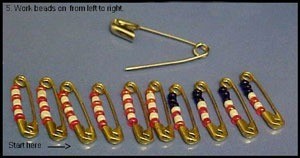
Prepare the small pins with the appropriate color glass beads. Each pin holds 7 beads. (Note: Beads may vary slightly in size, so you may have to change a bead or two so they will fit.)
Advertisement
Six of the pins will have red and white alternately. The remaining four will start with 3 blue followed by four white and red alternately.
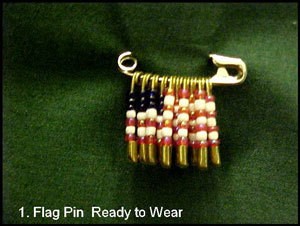
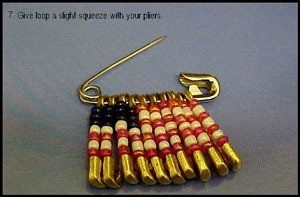
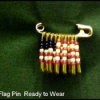
Arrange as in photo 4 and assemble your pin using the photos as your guide. Wear with pride!