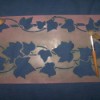
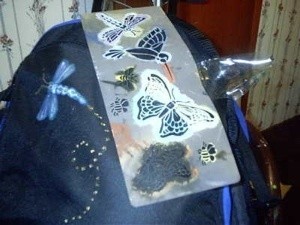
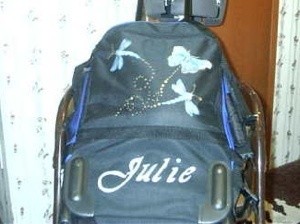
Turn your otherwise boring solid color backpack into a work of art using stencils to add your own touch and design to it. This was my boring rolling back pack that I love to use for traveling but was a darker color of solid blue and not very feminine looking at all. So I used stencils to create new look to it.
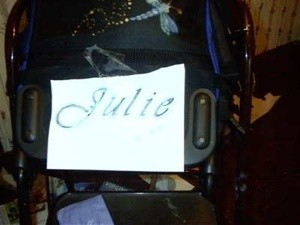
I used store bought stencils for the dragonflies and butterflies and made my own for my name just printing a pretty font for my art program then just cut out the lettering to create a perfect font stencil. Great project to revamp old backpacks or any kind of luggage
Approximate Time: 30 minutes or less
Your item can be a backpack/luggage, etc
First make sure the area you intend on stenciling is free of dust or dirt by wiping it with a damp cloth. Then choose your stencil and place it where you like it and secure the edges of the stencil with tape while you put on your colors of paint.
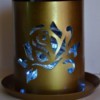
Use a stencil brush to add on your colors in very light amounts applied to your brush tip and even wipe or dab some off on a paper towel then apply the paint to your stencil by going in a circular motion onto the stencil and change colors to each area you want to be different colors. Remove your stencil and let dry well.
You can make your own stencil for names or phrases by printing a font you like from any art program and just make it the size you like. You can find free font sites on the internet and even stencils of lots of things in silhouette form.
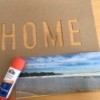
After your paints have dried, you can spray your surface you stenciled with clear spray coat paint in a can to keep it free from water exposure.
So create your own look and give those boring back packs a new look!
Add your voice! Click below to comment. ThriftyFun is powered by your wisdom!
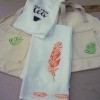
I've done the same thing with my childs clothes, except I mix acrylic paint and glitter fabric paint together to give it a nice sparkle and I don't use clear coat paint on them. By using a stencil and acrylics on clothes you can turn hand me down clothes into newer looking clothes or plain jeans into designer jeans without the designer price tag.
Zig
Thanks for the nicely done tutorial. I really like the idea of giving (or keeping) something that isn't commercially designed. Individual rather than one of one million or more in your neighborhood. Thank you.
This is beautiful and great for adults, but be careful putting your child's name on something that a child predator could use to strike up a conversation such and them knowing your child's name.
Add your voice! Click below to comment. ThriftyFun is powered by your wisdom!