deenagoodale Bronze Post Medal for All Time! 221 Posts
November 21, 2020
These have always been a hit for gift giving.
Advertisement
Total Time: 1 hour
Yield: 1
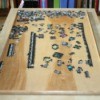
Supplies:
1 1 x 2 inch pine
1 1 x 4 inch pine
2 l/4 inch fluted dowel
canning jar with canning ring (any size, but small mouth preferred)
hammer
2 extra-long finishing nails
12 long finishing nails
4 short finishing nails
drill
glue
Steps:
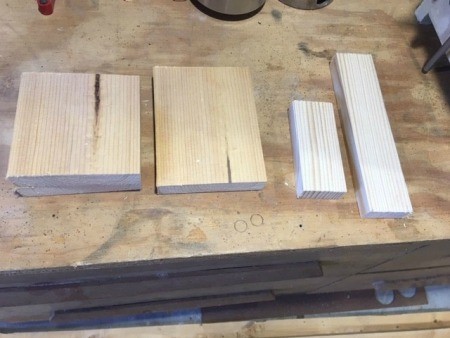
For the top and bottom, cut two 1 x 4s, 4 1/2 inches long. For the sides, cut two 1 x 4s, 3 1/2 inches long. For the "candy dispenser", cut one 1 x 2, 6 1/2 inches long. For the candy stopper cut one 1 x 2, 3 1/2 inches long. For the ramp, cut one 1 x 2, 3 1/4 inches long.
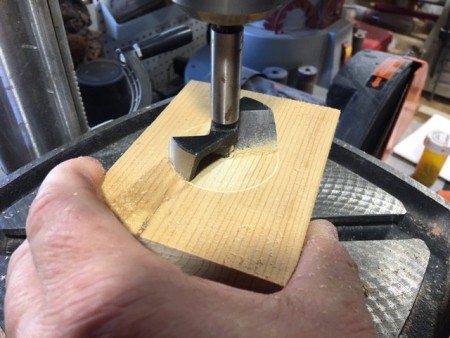
Drill a 2 inch hole on the top, centered. Drill a 3/4 inch hole, centered 2 inches from the end, on the "candy dispenser".
Advertisement
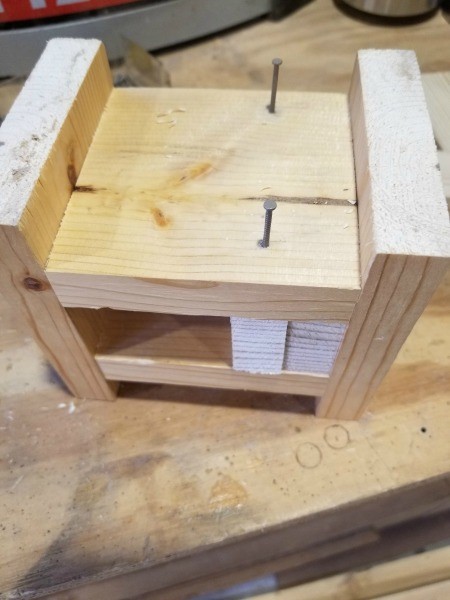
Assembly: Use clamp to temporarily hold the left side of the 1 x 4 to the "candy dispenser" and "stopper" to the right side of the 1 x 4. Nail the top 1 x 4 piece so that it is centered to the clamped sides. (Pre-drilling the holes for the nails is suggested.)
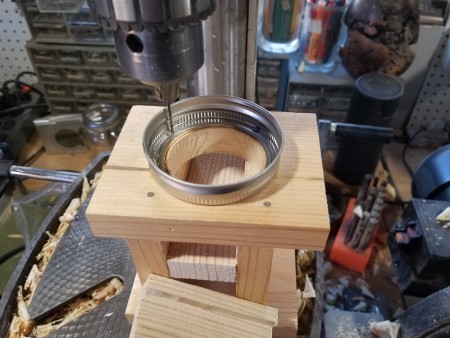
Turn the project upside down and repeat steps to nail the bottom to the sides. Next nail the "stopper" in place under the "ejector". Make sure to allow the "ejector" to move freely. Nail the canning jar ring to the top, centered over hole, using 4 small finishing nails.
Advertisement
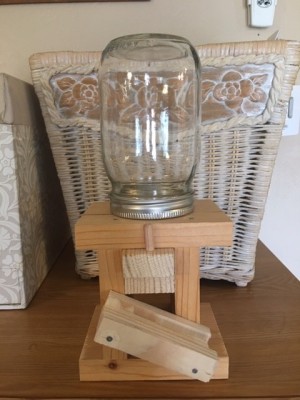
Drill holes for the fluted dowels on the "candy dispenser". The front will have the dowel on top and the back will have the dowel on the bottom. *Make sure you insert the "candy dispenser" above the "stopper" before gluing the dowels in place.
For the ramp, router a groove onto the top of the ramp piece so the candy will not fall off the sides. To attach ramp, angle the ramp directly below the "stopper", using two extra-long nails to attach. This allows the candy to roll down the ramp into awaiting hands!
 These have always been a hit for gift giving.