social

DIY Oil Slick Nails


Diamond Post Medal for All Time! 1,246 Posts
November 29, 2021

A hand with an oil slick manicure.
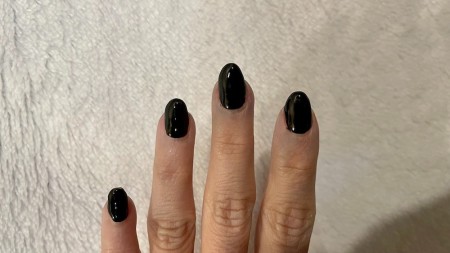
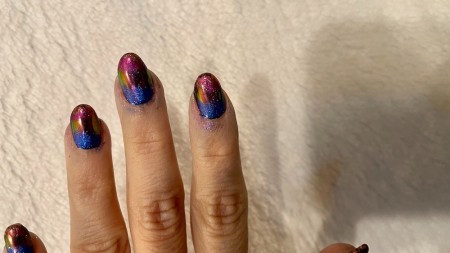
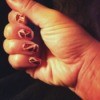
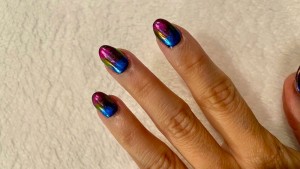
Oil slick nails are super cute, but the price you pay to get them done at the salon is insane. You can do them yourself at home for a mere fraction of the price. Plus, you get enough chrome powder to do them many, many times over.

Advertisement

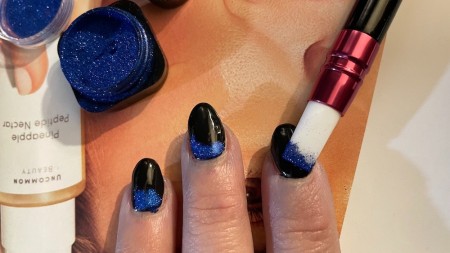
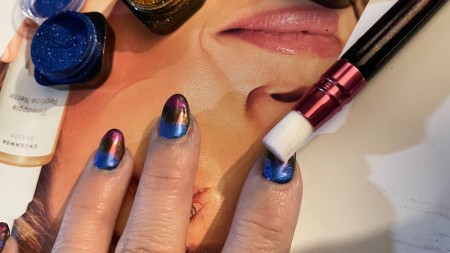
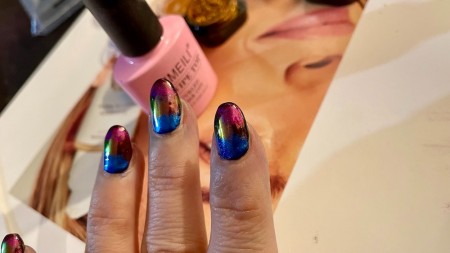
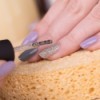
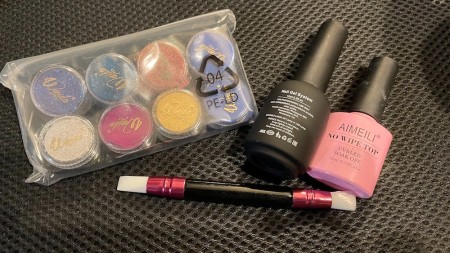
I used gel polish and cured with a UV light, but you can use regular polish for this. If you do use a regular polish clear topcoat, make sure it is water-based or else your chrome powder will look glittery and will not have as much of an awesome mirror effect. A great water-based topcoat is Little Ondine.

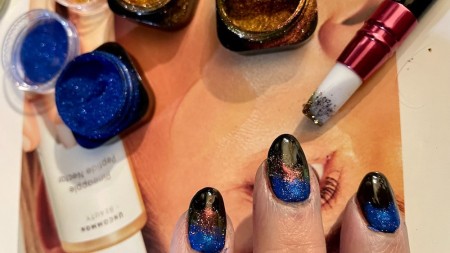
I've added a link to some awesome chrome powders below. The applicator and brush come with this set. You can also just use a foam eyeshadow brush to apply it and a fluffy paintbrush to remove excess powder.

Total Time: 45 minutes

Supplies:

  • black nail polish
  • chrome nail powders (I used 4 colours)
  • applicator or foam eyeshadow brush
  • fluffy brush or makeup brush
  • paper towel
  • clear topcoat
Supplies for DIY Oil Slick Nails
 

Related Product: 

Steps:

  1. Paint nails black. Let dry (or cure with UV if gel polish).
  2. A hand with nails painted black.
     
    Advertisement

  3. Apply your first chrome colour to the base of your nails. Rub them in with the applicator.
  4. Adding chrome powder to the nails.
     
  5. Make sure to remove excess chrome powder from your applicator between each colour change by rubbing on paper towel.
  6. Cleaning off the soft paintbrush.
     
  7. Apply your second colour of chrome above the first. Rub it in.
  8. Adding chrome powder to the nails.
     
  9. Continue adding more colours above until you get to the tip of your nail. I like to just barely overlap them to make them look more oil-slicked. If you mix them together too much, they will just look like one muddy colour.
  10. Adding chrome powder to the nails.
     
    Advertisement

  11. Gently brush off any excess powder from your nails. This is crucial in order to get that mirror effect.
  12. Removing excess powder from the nails.
     
  13. Add your water-based topcoat and allow to fully dry. If using a gel topcoat, cure with UV lamp.
  14. The finished oil slick nails.
     
Comment Pin it! Was this helpful? 5
In This Page
Categories
Health & Beauty Beauty Nail TipsJanuary 7, 2022
Pages
More
🎃
Halloween Ideas!
🍂
Thanksgiving Ideas!
Facebook
Pinterest
YouTube
Instagram
Contests!
Newsletters
Ask a Question
Share a Post
Categories
Better LivingBudget & FinanceBusiness and LegalComputersConsumer AdviceCoronavirusCraftsEducationEntertainmentFood and RecipesHealth & BeautyHolidays and PartiesHome and GardenMake Your OwnOrganizingParentingPetsPhotosTravel and RecreationWeddings
Published by ThriftyFun.
Desktop Page | View Mobile
Disclaimer | Privacy Policy | Contact Us
Generated 2022-10-25 20:19:39 in 3 secs. ⛅️️
© 1997-2022 by Cumuli, Inc. All Rights Reserved.
https://www.thriftyfun.com/DIY-Oil-Slick-Nails-1.html