social

Distressed Chandelier

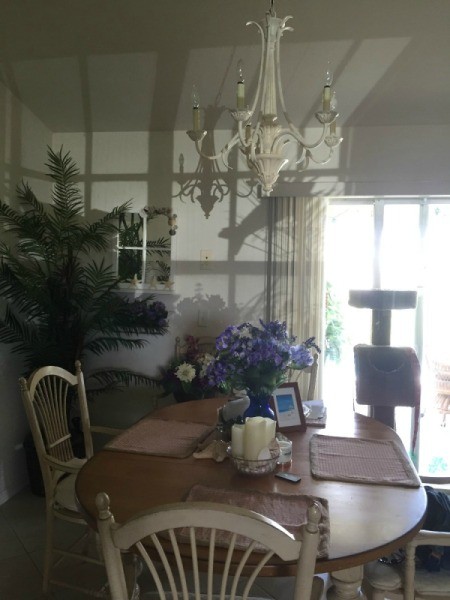
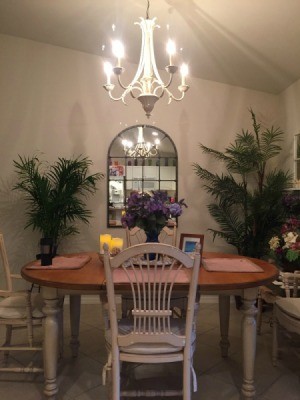
Distressed ChandelierI saw this chandelier at a yardsale for $5 so I bought it thinking this would be great for my dining area if it were distressed to match my dining room table.

Advertisement

Total Time: 4-5 days

Yield: 1

Supplies:

Steps:
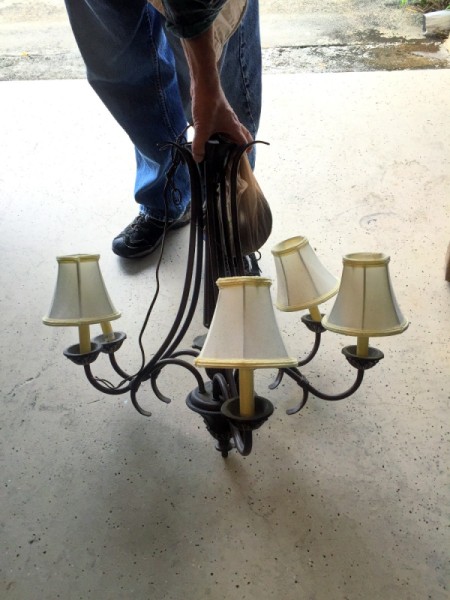
  1. First I bought the chandelier at a yard sale.
  2. Distressed Chandelier
     
  3. Then I ordered six new sleeves with candle drip appearance off of eBay so I would have these before the chandelier was finished.
  4. Advertisement

  5. Now I began redoing the chandelier.
  6. Clean the fixture before painting. Mine was black so after cleaning it up, I used masking tape to cover up the electrical parts.
  7. Distressed Chandelier
     
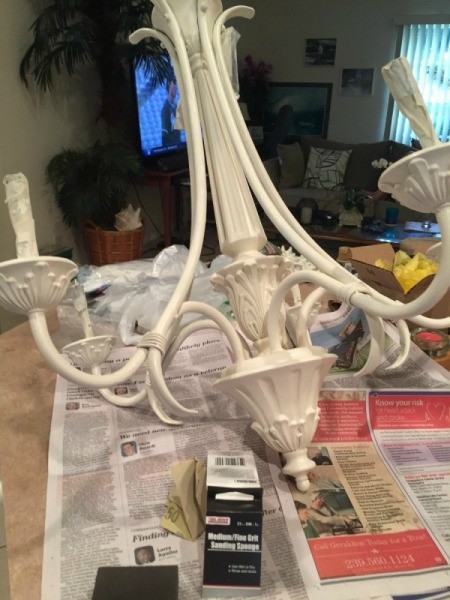
  8. I then spray painted it all white (any brand of white matte spray paint for wood/metal/plastic will do). This included spraying the base and chain.
  9. Distressed Chandelier
     
  10. Allow to dry for 24 hours. This is more than enough time, but I want all spray painted areas to be completely dry before moving onto next step.
  11. I used the paint brushes to paint and completely cover the chandelier with folk paint (this is the color you want to show through) with the color cafe au lait/light brown as this would give a wood like appearance underneath.
  12. Distressed Chandelier
     
    Distressed Chandelier
     
    Advertisement

  13. Again, I let it dry 24 hours.
  14. Next I applied the next coat by completely spraying it with Krylon ColorMaster Modern White Matte paint. This color is amazing as it is warm vanilla white appearance.
  15. Distressed Chandelier
     
  16. Again, I let it dry 24 hours.
  17. Now comes the sanding with fine grit sandpaper. I lightly sanded the detail areas of the chandelier so the coffee color paint comes through. A light touch is needed as you only want to try and go through the top layer of spray paint (vanilla white shade) down to the brown layer).
  18. Distressed Chandelier
     
    Distressed Chandelier
     
    Advertisement

  19. To protect the spray painted areas, the last step was to use Minwax finishing wax in the natural color. Apply lightly with a small foam brush.
  20. After this step it took about a day and a half to fully dry.
  21. Once dry, take off the masking tape, and slide on the sleeves and put in the light bulbs.
  22. The last step takes 2 people and that is lifting the chandelier to where it is to be installed, positioning it and attaching the electrical wiring.
  23. Distressed Chandelier
     

This looks very pretty, but even better if you use a dimmer switch on the wall switch, that way you can still use some candles on your dinner table too if you like.

Add your voice! Click below to comment. ThriftyFun is powered by your wisdom!

September 10, 20161 found this helpful

Absolutely gorgeous!

Reply Was this helpful? 1

Gold Post Medal for All Time! 677 Posts
September 10, 20161 found this helpful

Excellent job!

Reply Was this helpful? 1
September 10, 20161 found this helpful

This is absolutely beautiful and you did a GREAT JOB! It looks wonderful in your dining room!! And your article comes right on time for me personally- I have 2 chandeliers, also picked up inexpensively, & am just about ready to start them off on their new life!

Advertisement

I appreciate your listing the colors & brands you chose, because this is exactly what I had in mind as well ( great minds think alike!!) & you've saved me money & lost time searching for the perfect colors! Thanks again!!

Reply Was this helpful? 1
September 12, 20161 found this helpful

Happy to hear from everyone that they like it. While some people must skip steps and just make it one color, if you look at the finished product, it does not show the detail if you choose one solid color. That end result would be a little drab. By distressing using the multiple colors given above, when you lightly sand around the details, the other color comes out and then from a distance your eyes see the chandelier's details.

Advertisement

My husband does not like glitzy showy chandeliers but you can add more decoration like strands of crystals, beads or seashells to make more formal or just fun. I like my finished product as it fits with the french country look I was going for. These metal chandeliers are great for doing 2 colors too - as in a nautical look - blue and white, etc. Thanks for your comments!

Reply Was this helpful? 1
September 19, 20161 found this helpful

Wonderful job very well executed. Congratulations.

Reply Was this helpful? 1
September 21, 20161 found this helpful

Thank you very much on your lovely compliment. I hope to post other craft projects in the future. My next one will be an entry table.

Reply Was this helpful? 1

Add your voice! Click below to comment. ThriftyFun is powered by your wisdom!

In This Page
Categories
Crafts Recycled Crafts DecorSeptember 8, 2016
Pages
More
🍂
Thanksgiving Ideas!
🎃
Halloween Ideas!
Facebook
Pinterest
YouTube
Instagram
Contests!
Newsletters
Ask a Question
Share a Post
Categories
Better LivingBudget & FinanceBusiness and LegalComputersConsumer AdviceCoronavirusCraftsEducationEntertainmentFood and RecipesHealth & BeautyHolidays and PartiesHome and GardenMake Your OwnOrganizingParentingPetsPhotosTravel and RecreationWeddings
Published by ThriftyFun.
Desktop Page | View Mobile
Disclaimer | Privacy Policy | Contact Us
Generated 2022-10-23 06:34:54 in 2 secs. ⛅️️
© 1997-2022 by Cumuli, Inc. All Rights Reserved.
https://www.thriftyfun.com/Distressed-Chandelier.html