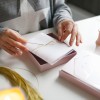
A darling gesture of love mixed in with a bit of patience for a beautiful inexpensive baby invitation set.
Approximate Time: 30 minutes per set of 25 invitations and cards
Supplies:
- white computer paper
- computer
- printer
- blue paper
- clip art of your choice
- white glue
- glue stick
- scissors
- several pieces medium weight cardboard
Instructions:
- First take a piece of paper and write on the far right side of the long end baby boy in a row downward, (I used the "Cerebral" font as it fit well for what I needed it to look like. Then add in the information of who and what you want your recipient to know. (landscape on printer) I chose the "Chancelor" font for my script. I centered it on the right half of the page (In this case we are having a baby shower for the son of Ashleigh and Matthew.) Print the page off and set aside.
- On another piece, write the important information of where, what time, when, and an address. You can put an RSVP here as well. Make sure it is done on the left side of a sheet of paper. (Again you will use the landscape method of printing.) I aligned it by highlighting it and used the centering so it would look nice. I put a slight pencil mark on the paper to see if it printed upward or downward.
- After figuring it out I ran another copy of the first page and then flipped it to use the back for the rest of the invitation. (Sometimes this is the trial and error of how to do your invitation in the proper ratio to the information on the back.) I made sure everything was lined up and ready to use. If you have a two sided printer add your blue paper and run off the invitation onto the blue paper. You can also use a copy machine to do this, but test it first and see if it will take the blue paper. If it is grayish in color you will need all your information on a white sheet.
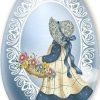
- Next I cut around the words BABY BOY.
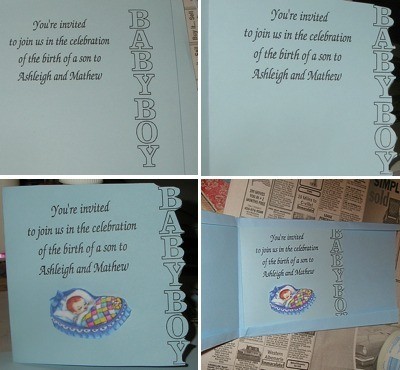
- I trimmed the piece and found some darling clip art that suited the situation. I made up several of these on one sheet and printed them out. I cut around the clip art and laid it aside for later use.
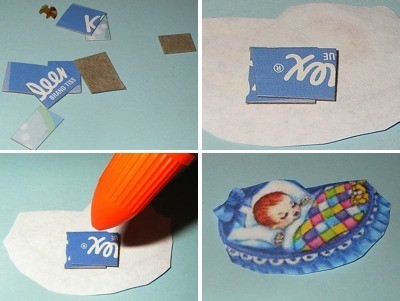
- Next I took a tissue box edge and cut several 1/2 inch strips and from there I cut several pieces about 1/4 inch each.
- I took three of these and pasted them one by one on top of each other to the back of the clip art picture I had prepared with white glue. I added white glue to the bottom of the third one and put them gently on the card so they didn't slip out of place. This gave the front a 3D look. I laid them aside to dry.
Making An Envelope:

- On blue paper I fitted the card onto the sheet and drew up the bottom to just touching the top edge of the card.
- I removed the card and trimmed the paper down so I had about 2 extra inches.
- I folded over the edges of the blue paper and fitted the card a second time, but I also turned the top flap in so it fit.
- I removed the card and cut a triangle off each top end.
- I then cut a small place in the fold of the card at the middle.
- I cut away the top edging and left the bottom. To this end I added glue from a glue stick and gently folded the bottom up to meet the top. I laid it aside to dry.
- After everything dried I addressed the envelopes and put the card inside. I used the glue stick to glue the flap to the envelope.
** If you have a paint shop or photo program this would make a great project to do quickly. You can use any kind of light to medium weight cardboard to make the clip art set up a touch thus giving it a 3D effect.
You can make this project a lot cheaper if you have access to a copy machine. Just do it as a two sided page or flip it to make the inside fit. It may take a little practice to get it right so be prepared for a little trial and error.
Suitable for girls also. Just tweak the information above using pink paper.
For privacy aspects I did not show the inside wording of the invitation.
Have fun and enjoy making your baby invitations.
By gem from VA