Materials:
- container (preferably clear)*
- potting soil
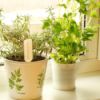
- seedings or seeds for your Herbs
- gardening gloves (optional)
- something sharp to poke drainage holes (like a box cutter or knife)
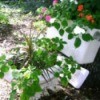
*I used a plastic container with lid from the grocery store that originally contained spinach. The lid is a bonus because it can be used as a drip tray.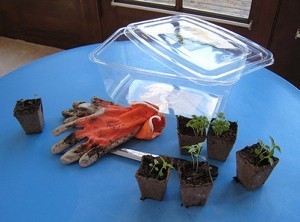
Time To Complete: Approx 30 minutes
Instructions:
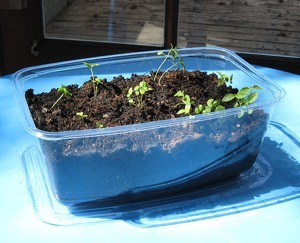
- Wash and dry your planting container. Tell the kids that by reusing a container, you are both keeping material out of a landfill and reducing usage of resources by not purchasing a new container.
- Poke holes in the bottom of the container for drainage. Explain to the kids that while plants need water to live, too much water will suffocate them. Placing the lid below the holes will catch the water that runs through.
- Fill the container nearly to the top with potting soil. Any potting soil without chemicals or pesticides added will be fine. For the kids, show them what is in the potting soil by examining it and looking at the bag. Soil is not just a "bag of dirt", it is a careful mix of the right ingredients, just like following a recipe when you cook, that help the plant to grow healthy and strong.
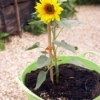
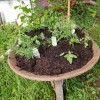
- Make small indentations in the soil and place seeds in, or bury seedlings in the soil. Mine were seedlings that we started from seeds ourselves in biodegradable pots, so they could be put straight into the soil with or without removing the pots. For an added lesson for the kids, place the seeds or seedings near the edges of the container so they can see the plants and roots growing. You can find plant diagrams on the web to discuss how the plants grow, and what parts live below and above the ground level. Every part of the plant has a role to play to help the plant grow!
- Gently cover up the seeds or push the dirt around the seedlings to secure them.
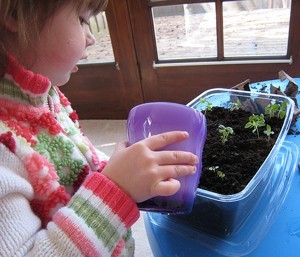
- Water your plants. Don't soak them, but also don't let the roots dry out.
- Place your plant in a sunny location. The sunlight will provide both energy for growth and warmth to your plants!
- (optional) Add a bit of organic material between the plants monthly to add nutrients to the soil. Discuss how feeding the soil helps the plant to pull these nutrients from the soil and into their roots. Compost provides not only organic nutrients, but microbes and other organisms that keep the plants healthy.
- Feel free to decorate your container if you wish!
- Harvest your plants and use them in cooking as needed. For my project, I used basil, which you can just snip the tips off and use as they grow. Many herbs like chives, rosemary, oregano, lemon balm and mint can be used in this way. (Pull off the leaves and discard the stems to use in cooking.)
Happy gardening and remember, we can make Earth Day every day!
About The Author: Nikole Gipps is a web developer and mom of two in Eugene, OR. You can
catch more of her gardening adventures at Oregon Treehugger.
Add your voice! Click below to comment. ThriftyFun is powered by your wisdom!