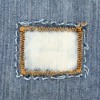
 Free denim? We are a short family. It is hard to find the 29 inch length jeans that my husband wears for work and play. I have become an expert at cutting off and hemming the 30 inch to fit. I decided if I had to cut and hem, why not buy the longest length possible 36 inch or longer. I now have extra new denim for patching or other crafts. I also do the same for my own jeans.
By MaggieGrace from Pittsburgh, PA
This page contains the following solutions.
I used to do a lot of sewing and it was so hard to get the patterns back in the package, so just put them in a large baggie and it keeps them nice and neat.
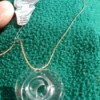
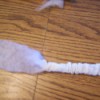
Turning fabric tubes right side out can be very frustrating. I found a way that works great for me and is much safer than the turning tool I purchased, as it makes a hole in some fabrics.

Use dollar store plastic or vinyl tablecloths to transfer sewing or craft patterns onto. They last a lot longer by doing this.
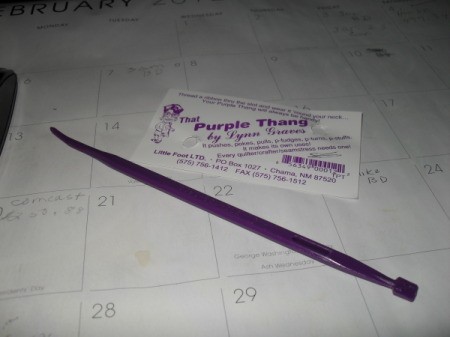
I found this at J Hittle in Louisville, Kentucky. I buy a lot of my supplies from them because I am not to be trusted in a fabric store.
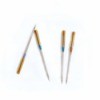
One of my favorite hobbies is sewing. I create new items and also do a lot of repair for my family. Today, I could not find my seam ripper anywhere. While looking for it, I found a cuticle trimmer. This trimmer worked just as well if not better than a seam ripper.

Make large pattern pieces from inexpensive shower curtains. The pattern pieces will last much longer than paper patterns.
If you're ever stuck with a tent, tarp or piece of leatherwork to repair and you don't have a thimble on hand, tape a coin to your finger to help you push that heavy needle through the heavy fabric or leather.
Sewing heavy material like canvas can be as hard on the needle as it is on your hands. If, however, you rub the fabric well with soap before you stitch, the job will be a lot more comfortable and the needle will slip through the cloth without nearly so much danger of breaking.
I am adding iridescent ribbon to the ruffles on my daughter's prom dress and was having a difficult time seeing to sew. I found that using a head-lamp, the kind that you strap onto your head for hiking, etc.
Accidentally forgetting to leave an opening to turn a sewing project right-side out can be very frustrating. At a recent sewing class, the teacher gave me this fabulous tip to keep from sewing your project shut. Determine where you want your opening to be then mark the beginning and end of the opening with 2 pins.

Keep a hemostat in your sewing kit if you know a nurse you could get one from. It is handy for pulling/grabbing needles through thick fabric.
As I become a WOW (wise older woman), I find it easier to see if I mark the slot on a spool of thread (the little slot that holds the thread to keep it from unwinding) with a dot of red nail polish.
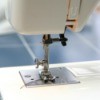
I put up a shelf above my sewing machine and attached a 24 inch light from Walmart to the bottom of the shelf for additional lighting on my sewing project.
Another use for rubber shelf liner is to place a scrap piece under your sewing machine. This is handy and keeps my sewing machine from moving while I'm using it.
When using thread, take a dryer sheet, and run it up and down it. The thread will have less knotting.
When sewing if you need to rip out your work, when you are done run a lint roller over the thread and all the little pieces come right out.
Elastic around your waist should be your waist size minus 2 inches. It works every time.
Those little pins for sewing and holding fabric together are so small!
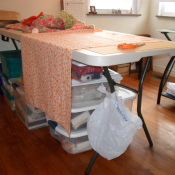
When I am doing machine sewing, I set up 2 small wastebaskets - one on each side of my chair. That way I can drop scraps, thread, etc. with either hand. Saves a lot of time and waste motion.
When making coffee cozies, I needed something for a closure that would work with a big button I was using for the design. Since I didn't want to make a large button hole, I discovered the perfect thing for it was a thin elastic hair band.
I really enjoy sewing, but lack the finances to buy some things I would like to have. For quite some time, I have wished that I could afford to buy a clapper, like I have seen on some sewing shows.
This tip is for all sewers! I'm 65 and I learned this from my mother when I was about ten or twelve. Many times it is hard to sew a straight seam because your machine's markings aren't clear or easy to see.
I use an easy way to gather fabric without the gathering thread breaking. Pull out both the bobbin and the top threads to a length longer than the piece to be gathered, and pull them to the right of the needle.
I've seen others make things that looked great and with which they seemed very proud. However, I have not ever been totally pleased with everything I have sewn, usually because of the fabrics chosen.
Being the frugal person I am, instead of buying a spool of thread to match the item I am hand sewing, I keep on hand a bag of embroidery 6 strand thread that has many choices of colors to chose from.
For those of you who sew: I've found that tuna cans and small cat food cans work great as "weights" to hold patterns down when cutting them out. This way, no pins are needed! And when you're done, back in the cupboard they go!
Ever change your mind on what ribbon you would like to use or find that the tube you made for the drawstring is too small to run the safety pin through?
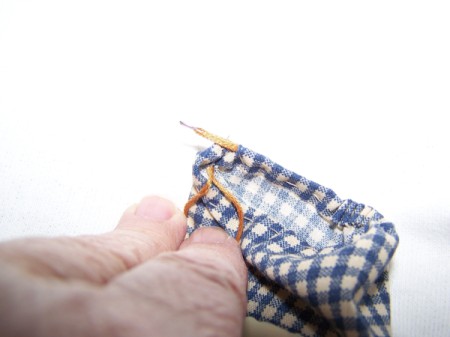
Use leftover crepe paper in sewing by placing over thick fabric like fleece or textured material that has a tendency to get caught in the feed dog or presser foot, depending on the type or loft of the material. Just sew right over it and when finished, tear if off.
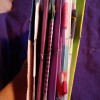
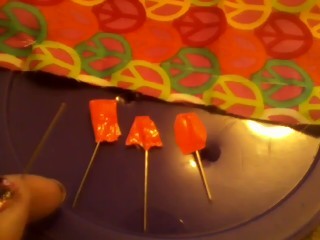
I have two new toys in my sewing stuff. Each one costs less than 5 dollars.
I used to do this when making pull on pants for the toddlers in my life to make it easier to insert the elastic. After pressing the seams open I just sewed a few stitches on either side of the open seam ...