 Here is a way to upcycle those food cans/containers into functional and decorative pieces.

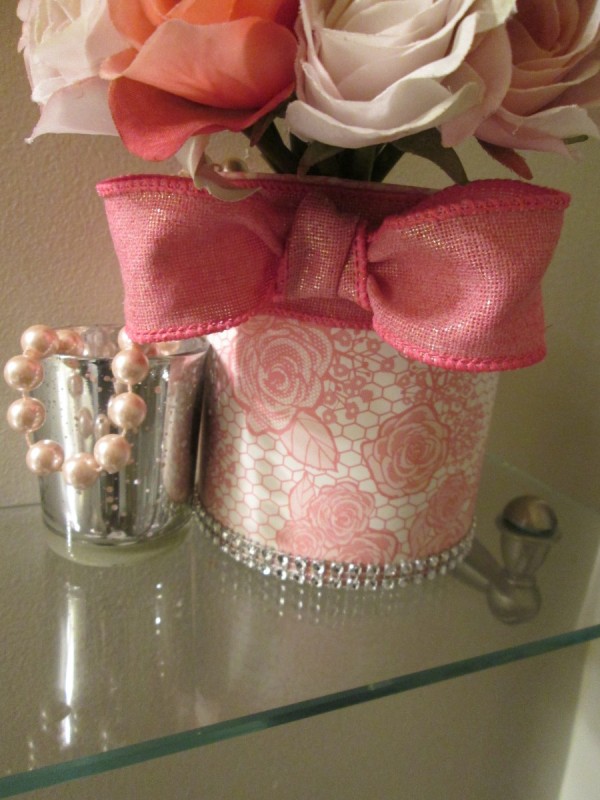
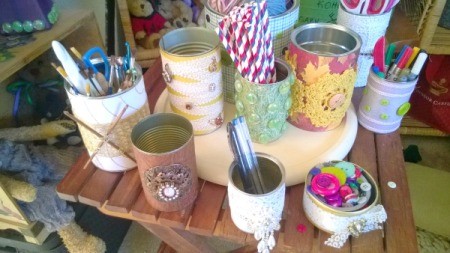
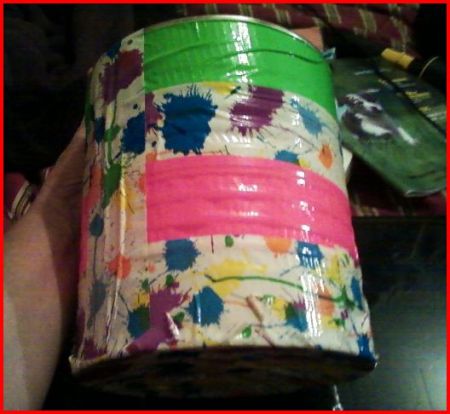
You can take food cans and make functional pieces like planters, office or desk supply holders, or a decorative container for a shelf.
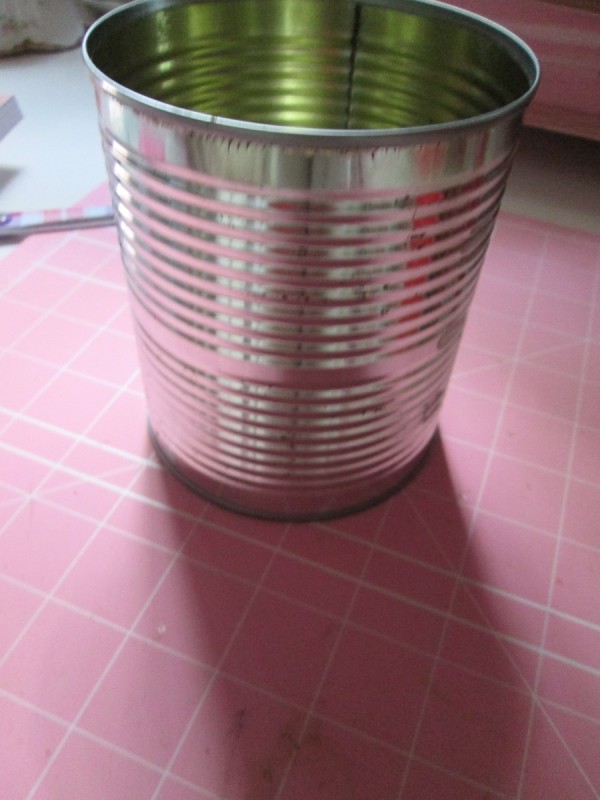
The possibilities are endless for little to no money! All that is needed is to pre- clean the cans. You can use card stock paper, fabric, or even wall paper, cut to size and then hot glued seam to seam.
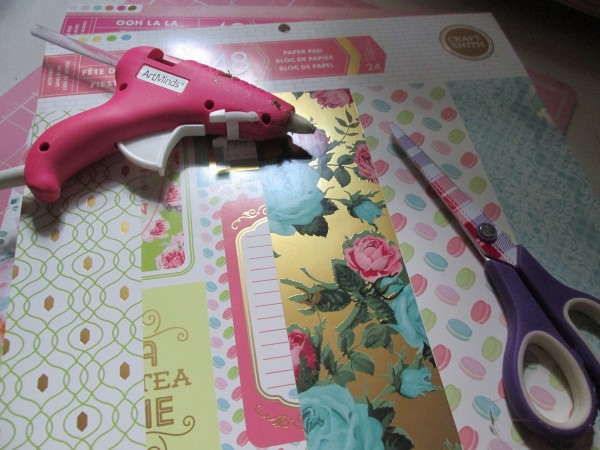
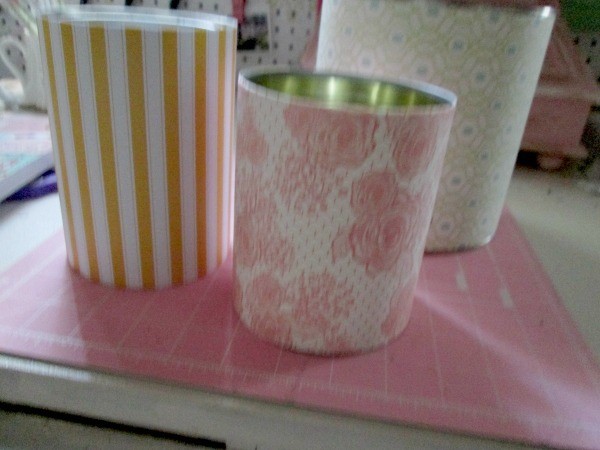
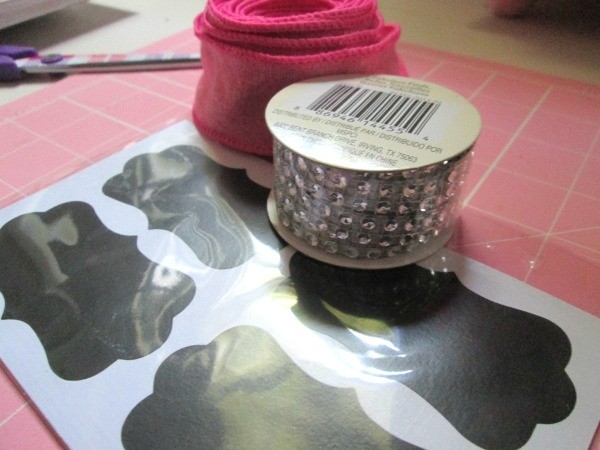
As an option you can embellish with ribbon, washi tape, etc. This can be done in a matter of minutes, for the whole family to do as a fun craft.
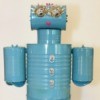
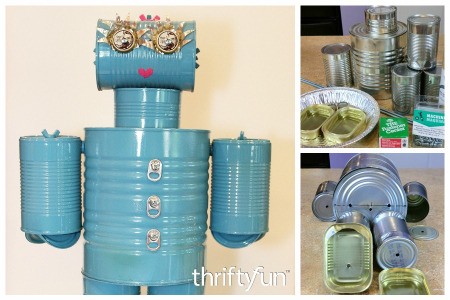
This is a page about making a tin can robot. This is a great recycle project for you and the kids to make together.
This is a page about making a tin punch lantern. You can easily turn an empty tin can into a beautiful lantern. Simply punch a pattern into its surface and place a candle inside to illuminate it.

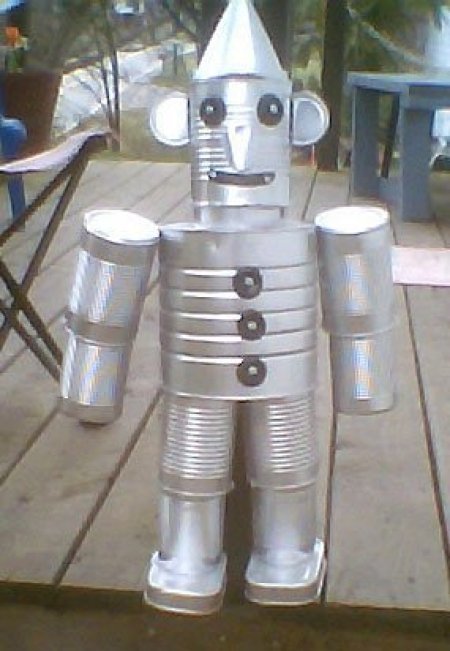
This is a page about making a recycled tin man. Recycle clean empty food cans into a delightful tin man for your home or garden.
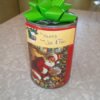
This is a page about making a red floral tin can teacher's gift. Fill a decorated recycled tin can with fresh or paper flowers as a special gift for a favorite teacher.

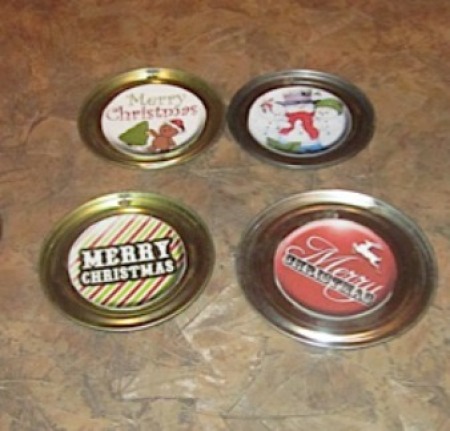
This page is about craft using tin can lids. A fun way to recycle is to make crafts using metal can lids.
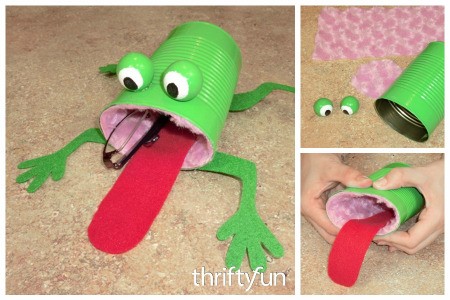
Learn how to make this recycled tin can craft in this step by step tin can frog container guide.
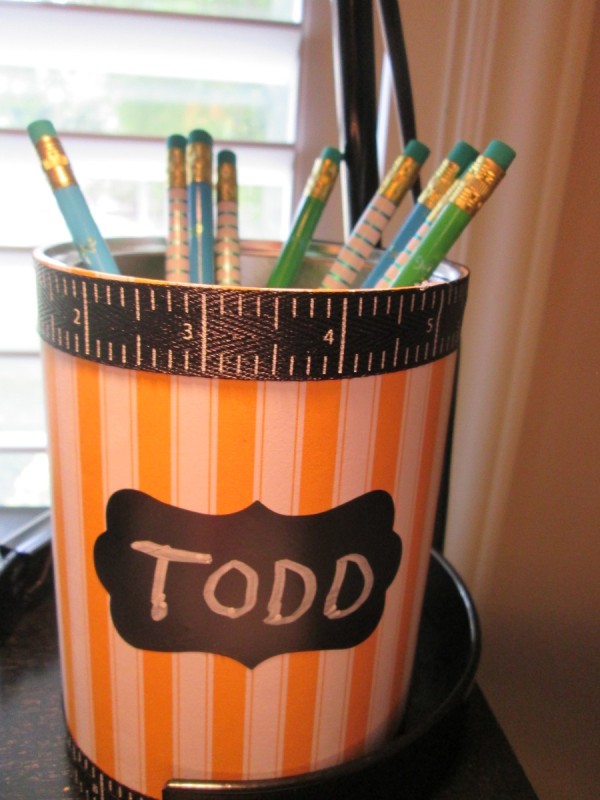
Recycle clean food cans into attractive desktop or craft tool organizers by decorating with wrapping or scrapbook paper. This is a page about how to make make paper covered tin can organizers.
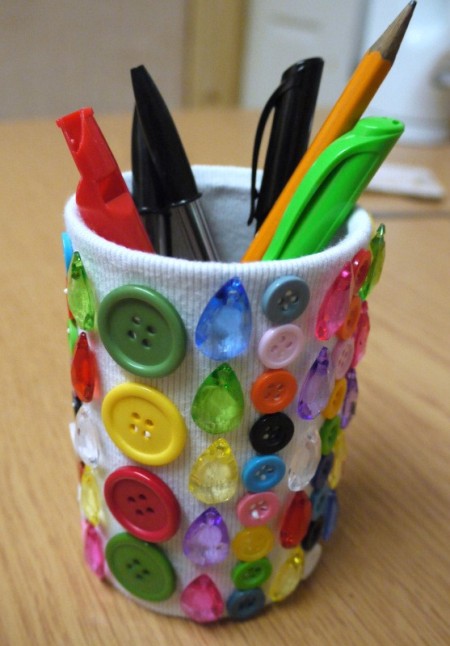
Use buttons and broken costume jewelry to decorate a pencil holder for your desk. This is a page about making a button and jewel pencil holder.
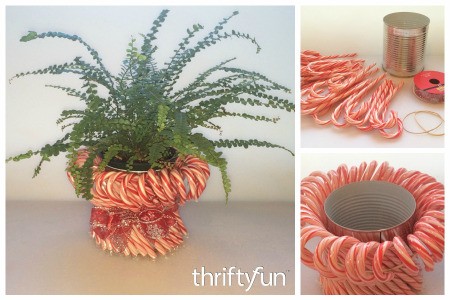
This is a page about making a candy cane planter. Create this cute planter for the holidays and then eat it later.
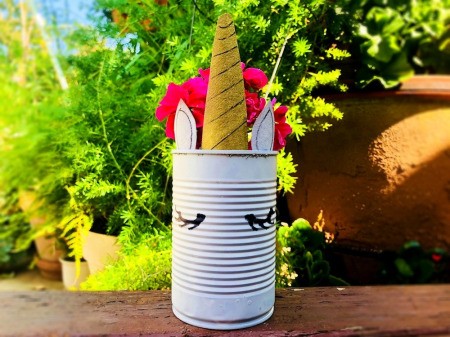
This adorable tin can unicorn planter is easy to make with items you have at home. It would be perfect as a table centerpiece or could even be used as a holder for other items.
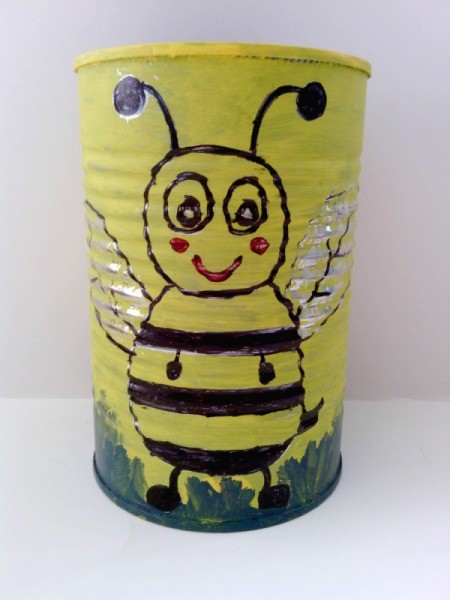
Creating decorative storage from recycled food cans is fun and allows for a lot of creativity. Painting your can with a happy little bumblebee is one idea.
Reuse a clean tuna can for change or other small items. Decorate it with fabric for a simple or more elaborate container. This is a page about making a fabric covered tuna can.
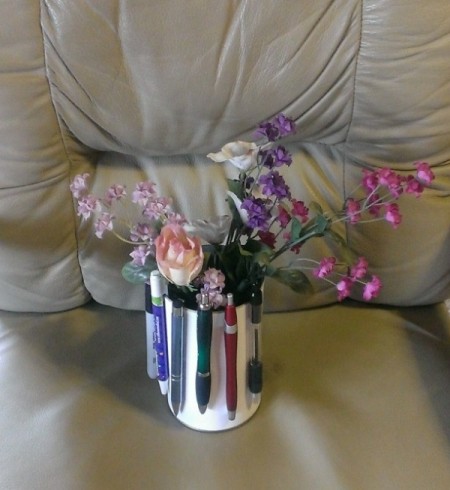
By decorating or painting a clean soup can you can make an attractive and useful pen holder for your office or craft area. This is a page about recycled soup can pen holder.
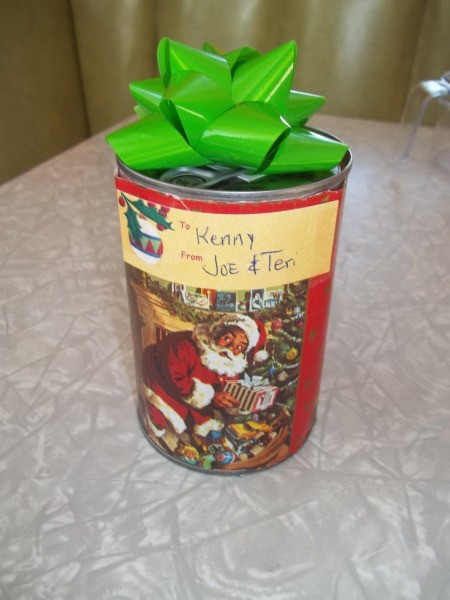
This is a page about recycled tin can gift wrap. Repurpose your cans into great little gift containers.
This page contains the following solutions.
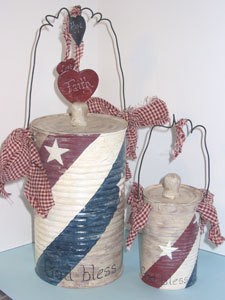
These cute and inexpensive tin can decorations are perfect for a country themed wedding. Just clean ordinary tin cans and hot glue a square of styrofoam into the bottom, adding whatever silk flowers you choose.
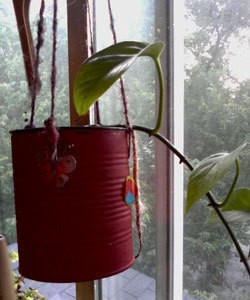
One day I was looking at a large empty can of tomatoes that I was ready to throw in the recycling bin then for one reason or another I decided to paint it. This led to me making a hanging planter for a friend who I was giving a plant to from cuttings. Here's how to do it!
This is what I do with old cans. They make great gift "buckets".
Use extra large vegetable cans.Take the top and bottom off of all but one. Keep the can with the bottom on it on the bottom.
We use lots of extra large sized tin cans of cheese and green beans. We put them in the refrigerator, and cover them with a margarine lid.
Here are the questions asked by community members. Read on to see the answers provided by the ThriftyFun community.
Don't throw out those soup, vegetable, and fruit tin cans. You can use them to recycle into wonderful crafts.
You can make pencil holders. Just cover with fabric and ribbon with a hot glue gun.
Fill a clean can with water, and put it in freezer until it is frozen solid. Remove from freezer, and use a hammer and nail to tap holes through can to make patterns such as a heart, cross, etc. Make a hole on each side at top and thread a thin wire through to use as a handle. Melt ice, throw in a votive candle, and you have a instant illuminated candle holder. Great for porches or walk ways.
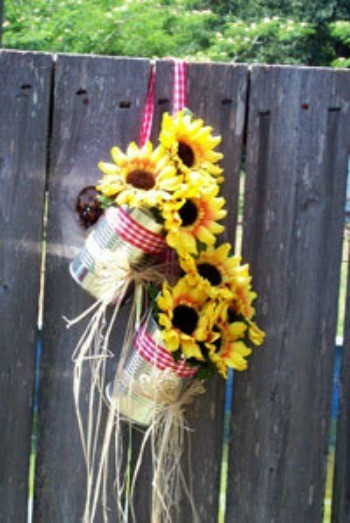
You can use the larger cans for the base of a wind sock. Just cover the can with ribbon using a hot glue gun. Make a handle by gluing a piece of ribbon on both sides. Next cut strips of ribbon off at same lengths. Glue these on the inside of can so they flow down. Hang from porch, and let the breeze do the rest!
By Carla Vaught from Shelbyville, IN
I am just about to start making some tin robots from assorted cans. But I am wondering how to remove the logo from the tin coffee cans.
By Bonnie H
I soak them in warm water and most of the label comes right off. After taking the label off, we sometimes run them through the dish washer.
Looking for directions on how to make animals about drinking cans.
Editor's Note: I am not sure if this poster is referring to aluminum cans or tin cans. Feel free to elaborate on this if this is your request.
I found some sites about tin can crafts, I am not sure if this is what you are looking for but it is interesting, nonetheless!
www.craftygal.com/