Craft Projects > Home Decor > WallsAugust 04, 2009

Craft Project: Stenciled Borders

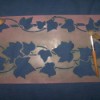
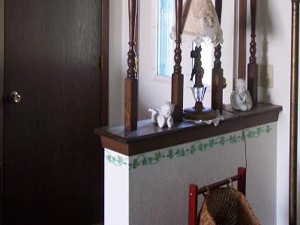
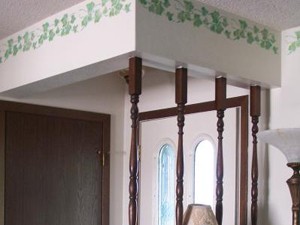
I stenciled a border in the living room instead of using a wall paper border.

Approximate Time: 5 hours

Supplies:

  • Stencils
  • Stippling brushes
  • Stippling paints*
  • Masking tape
  • Patience and steady hand
  • step ladder
*I used 3 colors of paint to blend the colors to make the ivy look real.

Instructions:

  1. Tape the stencil to the first corner of the wall up against the ceiling.

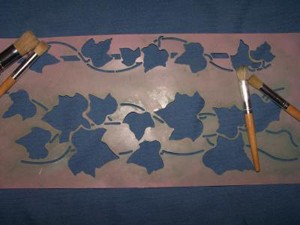
  2. Paint using a stippling brush and tap, tap, tap the colors on, blending each into the other.

  3. When done filling in all the places on the stencil, remove and carefully match the design up when moving the stencil onto the next blank section you are doing, so you cannot see where the first stopped and the next begins.

  4. Do all the way around until done.

I did not do it all in one day. You must rest your neck. I also did the top of the room divider in my room.

By Little Suzy from Ohio

By

Craft Project: Stenciled Borders

Craft Project: Stenciled Borders

Feedback

No feedback yet. Click here to post feedback.

Related

Post Feedback

Your thoughts are welcomed and appreciated. Be the first to post feedback!

Feedback:

Image Upload:

Add an image to your post! Click the "Browse" button above and select an image from your hard drive. Please only select gifs or jpegs. If you have any problems, please contact us.


facebook like arrowLike ThriftyFun on Facebook

Browse Topics

Over 80,000 tips, recipes, questions & crafts.

Ask a Question

Submit a question to the TF community.

Subscribe to ThriftyFun Newsletters!

Email: