social

Faux Hornets' Nest


Gold Post Medal for All Time! 969 Posts

Faux Hornets' Nest - hanging on balcony
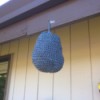
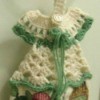
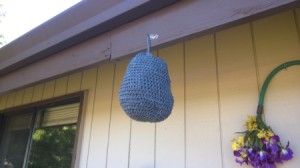
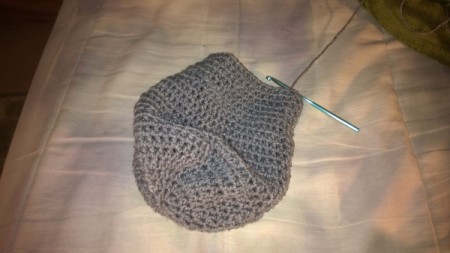
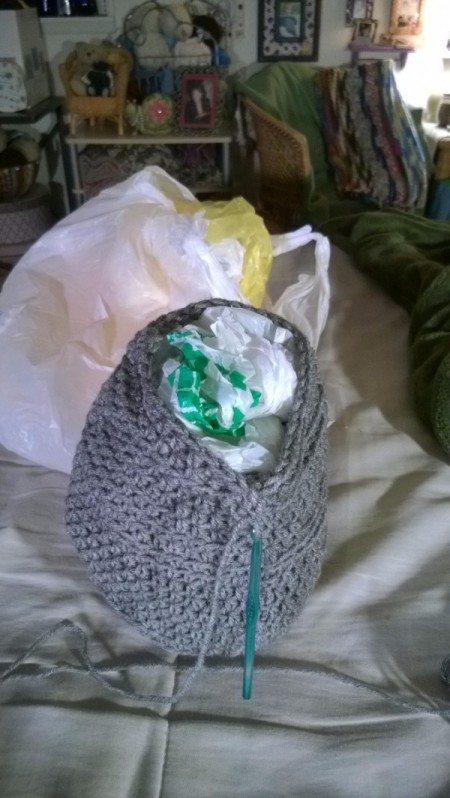
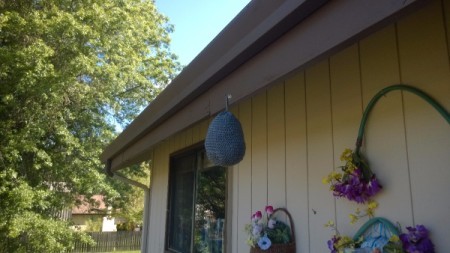
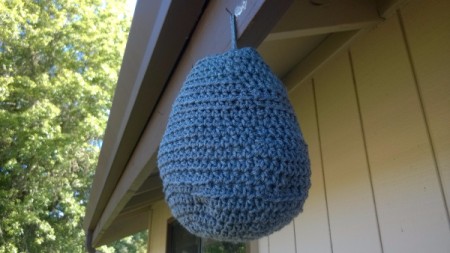
Hornets and wasps are territorial. When one sets in the other pretty much doesn't. So, to keep both away from my balcony, I crocheted a faux hornets' nest to keep my balcony "nasties" free.

Advertisement

You can buy inflatable ones or patterns for these, but I made my own.

Find inflatable ones here: https://www.amazon.com/Lost-Wasp-Natural-Non-Toxic-Deterrent/dp/B000W93LUU/?tag=thriftyfun0b-20

Total Time: 2 hours

Yield: 1

Source: I have seen patterns for these but made my own.
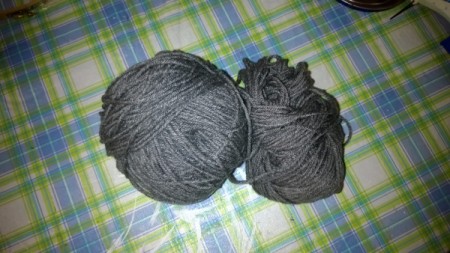
Supplies:

Faux Hornets' Nest - yarn
 

Steps:

  1. With your yarn, chain 2 and make 12 more half doubles and join. By kind of "passing over" the chain 2 and slip stitching in the first stitch of the first half double, you are making a smoother join. Thus the 13 actually comes out to be 12.
  2. Faux Hornets' Nest - chain 2 and work 12 half double crochet stitches, join
     
  3. For rows 2-8 increase the number of half doubles by 12 for second, 12 for third and so forth. In other words, make 24 for row 2, 36 for row 3, 48 for row 4, etc.
  4. Faux Hornets' Nest - rows 2 - 8 increase doubles by 2
     
    Advertisement

  5. By row 8 you should have the same base as you would for a hat. Now, you begin making a half double in each around for about 12 rows.
  6. Faux Hornets' Nest - now begin making a half double in each around for about 12 rows
     
  7. I used a stitch where I randomly used the two in the stitch below and the back loop "and the loop behind that one" for some of each row. This not only gives it a look of authenticity, but makes it stronger.
  8. When I say "the loop behind it" I mean that loop you can't see, but can catch with your hook. I never trust using just one loop of the stitch I am working in, as it stretches too much.
  9. Faux Hornets' Nest - loop behind explained
     
    Advertisement

  10. As for "authenticity", I mean that no two nests are the same. So this makes them seem "real".
  11. Faux Hornets' Nest - authenticity  explained
     
  12. When your work is about 9" long, begin decreasing by 2 per row. This means you make a stitch into the next stitch, draw up one loop, then do that again for the next stitch and draw them both together. This decreases your stitches as you go. Leave enough room to stuff with bags. Make the bags a bit "un-uniform" as they make it more authentic, too.
  13. Faux Hornets' Nest - stuff with plastic bags and pull closed
     
  14. Leave an 8" or so tail and then use your darning needle to weave the tail around the edge and draw string it closed. Keep a small loop to hang. N-JOY!!
    PS: I highly recommend doing a good coat of either shellac or Scotchgard. This will keep it nice for summers to come!
  15. Faux Hornets' Nest - hand by loop and consider using lacquer of Scotchgard to protect
     
    Faux Hornets' Nest - closeup of hanging nest
     
    Advertisement

Add your voice! Click below to comment. ThriftyFun is powered by your wisdom!

 
April 23, 20200 found this helpful

Where do you do the 12 double crochets in the beginning after the chain 2?

 
June 30, 20200 found this helpful

Did you ever figure this out??? Thank you.

 
May 11, 20200 found this helpful

You say chain two then do 12 more hdc. More than what? We haven't done hdc yet. Do we just divide them and do 6 in each chain, or all 12 in the second one back?

Advertisement

I'm self taught and newish so this makes no sense to me.

 
Anonymous
May 11, 20200 found this helpful

You say chain two then do 12 more hdc. More than what? We haven't done hdc yet. Do we just divide them and do 6 in each chain, or all 12 in the second one back? I'm self taught and newish so this makes no sense to me.

 
July 15, 20200 found this helpful

You say chain two then do 12 more hdc. More than what? Good question! Don't feel bad because I have been crocheting for years and had to stop at that myself and after searching the pattern diligently, I could not find any more instructions pertaining to that and all I could think they must have been using a smartphone and it acted up and changed the instructions.

Advertisement

Step 1
I just used my experience and did what I wanted to you have to have some sort of foundation chain of two or many chains to begin a project.
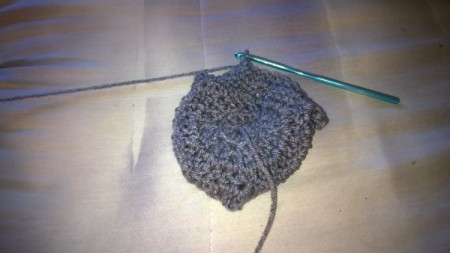
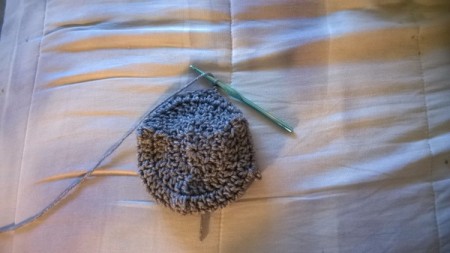
Step 2
I made my slip knot and did 2 chains and then put my hook in the first chain I made above the slip knot and put 12 hdc in that first chain.

Step 3
hdc stands for half double crochet. What you do there is yarn over BEFORE you place your hook in the designated chain (in this case that would be the first chain you made of the chain) and then put your hook in the first chain, yarn over and pull up a loop.

Step 4
Now you have 3 loops on your hook and you just yarn over once more and pull the yarn through all 3 loops on your hook.

Step 5
In the double crochet you pull through two at once, yarn over and pull through a second time.
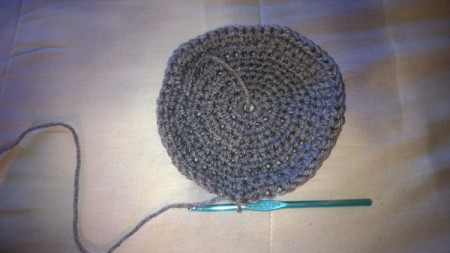
Step 6
In the half double crochet, you only pull through the 3 loops on your hook once and walla, you have a half double crochet.

Don't give up. You have a huge crochet community to teach you anything for free. Be Safe

 
March 28, 20210 found this helpful

Thank you for your help. Your explanation was wonderful!

 
June 4, 20200 found this helpful

Too confusing

 
May 3, 20210 found this helpful

What kind of yarn do you used to make this

 
April 8, 20230 found this helpful

What a great project! Some kids asked me to teach them how to make a mini version of this (about 4-5 inches tall) for their garage door...How would you alter the pattern do make that size?


Add your voice! Click below to comment. ThriftyFun is powered by your wisdom!

 
In This Page
Categories
Crafts Crochet PatternsJune 1, 2017
Pages
More
🐛
Pest Control
🌻
Gardening
👒
Mother's Day Ideas!
Facebook
Pinterest
YouTube
Instagram
Categories
Better LivingBudget & FinanceBusiness and LegalComputersConsumer AdviceCoronavirusCraftsEducationEntertainmentFood and RecipesHealth & BeautyHolidays and PartiesHome and GardenMake Your OwnOrganizingParentingPetsPhotosTravel and RecreationWeddings
Published by ThriftyFun.
Desktop Page | View Mobile
Disclaimer | Privacy Policy | Contact Us
Generated 2024-04-11 03:21:08 in 3 secs. ⛅️️
© 1997-2024 by Cumuli, Inc. All Rights Reserved.
https://www.thriftyfun.com/Faux-Hornets-Nest.html