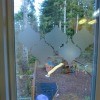
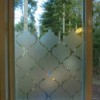
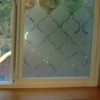
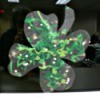
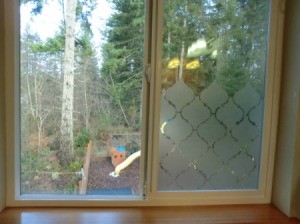
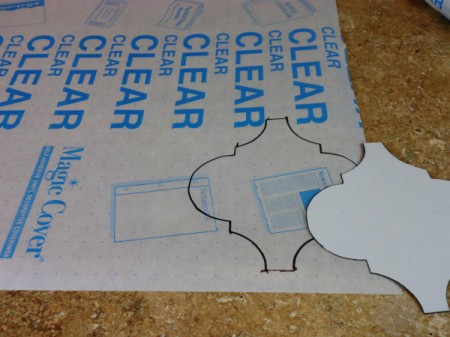
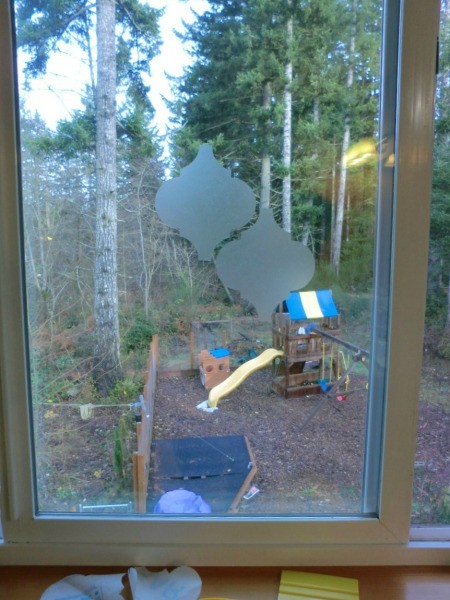
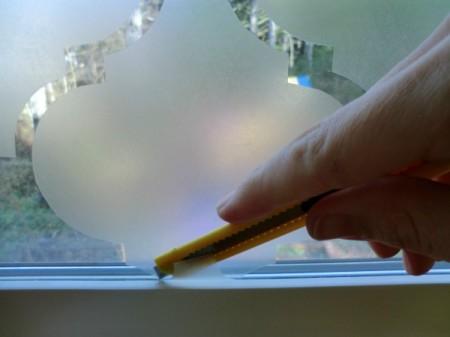
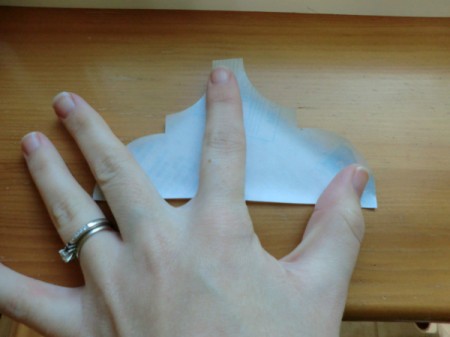
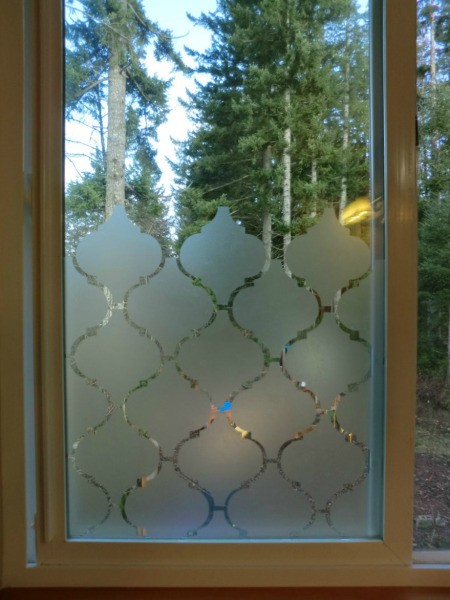
 I decided that I didn't want to use curtains on our bathroom window so I was trying to find an alternative. I looked at the window films that they sell and didn't like how expensive they were. This idea I saw on Pinterest was much cuter and cheaper. So instead, I purchased a roll of contact paper and cut out shapes that nested together. I did just the lower half of the window to allow light in. The neat part is that clear contact paper actually appears frosted on glass. I absolutely love it!
Total Time: 2-3 hours
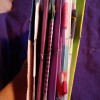
Supplies:
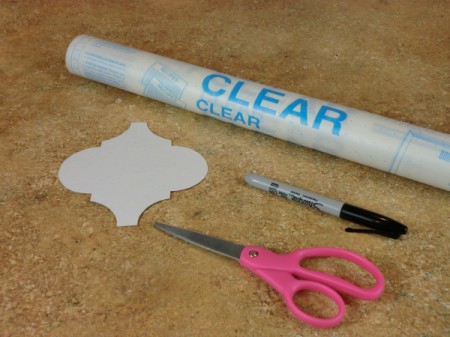
Steps:


Add your voice! Click below to comment. ThriftyFun is powered by your wisdom!
It looks wonderful! Great job.
Love this idea, how creative !! Thanks for sharing.
Way cool! I frosted my sliding glass door with frosting paint. It looks rather good, but I would have liked this better. I bought the house and presumed the door was "dirty" but as it turned out it was damaged (double paned), and also the room where the door is is very dark, so I didn't want much in the way of curtains, but I needed privacy.
Fantastic idea! I too feel the films are much too expensive. Especially appreciate your well thought out tutorial. Thanks so much for sharing and even sharing the particular shape you used!
JUST WHAT I NEED FOR MY FRONT DOOR THANK YOU VERY MUCHLY.
Excellent idea! I never would have thought of this, but I'm always looking for good ideas. Thanks for all the wonderful pictures, and for including the shape template.
I hope you win this contest because this is the best post I have ever seen on privacy windows! I love this and I will be doing this soon!
This is an amazing idea! I have a window that I don't want to put curtains on and that this would be perfect! I even already have all the materials needed! Thank you so much for this idea!
Now that I have had it up a few weeks I thought I would follow up that even with the high humidity in our bathroom, the shapes have stayed on the window. That was my only concern with this solution, but it seems to not be an issue. :)
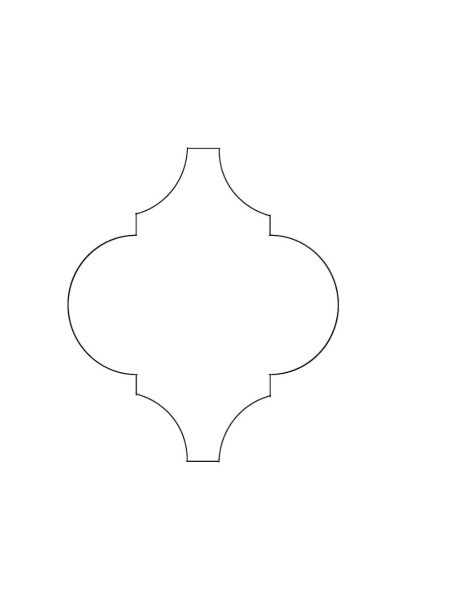
Oddly enough, that is not where we discovered this idea. We had to make our own template since we didn't have the benefit of that page.
Incidentally this ad came up on this page. How do they do that?visionswindowtinting.com/
Would love to see a photo of how this looks from the outside, close up and distance.
I'm in the process of doing this now. It is so time consuming, but I know it'll look great! Thanks for the idea! I don't think someone could pay me $1000 to do it again though lol.
What size is the cut out design? I looks really big on your download page.
Since there seems to be confusion as to whether I stole the template and idea...I never claimed that this was my original idea, nor did I admittedly take the time to look further than the photo I saw on Pinterest. I have sufficient enough knowledge to create my own template in Illustrator and the concept is simple enough. Especially when the Pin I saw even mentioned that it was done using contact paper.
As with almost EVERY idea on Pinterest it all has a source somewhere and has been recreated numerous times by lots of people. What appears to be the original source is mentioned in a previous comment. Here it is again:
7thhouseontheleft.com/
She had a great idea. Hope you all enjoy the results as much as I did. :)
Just wondering does the contact come off the window with the steam and humidity from bath and shower? LOVE the idea
I had brought some sheer curtains now that I have seen this idea I am going to add it for further privacy great idea
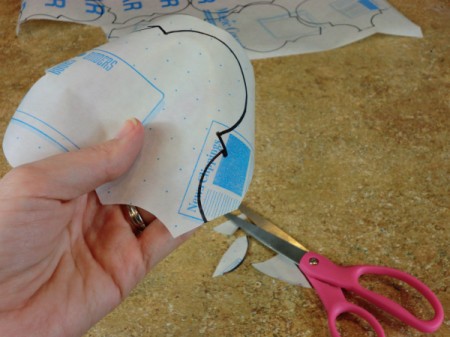
I just did this for my dads apartment! Worked perfectly! My suggestions...instead of creating a cardboard template, I bought matte stencil film sheet (medium weight) and Drew and cut my template from that. I used a ballpoint pen to trace the stencil onto the contact paper. And the other hint I have is how to easily pull the contact paper backing off? If you press a piece of masking tape onto the edge of the backing, it usually pulls the backing apart from the contact film. Worked like a charm!
When you need to remove it does it leave a sticky residue?
Love this idea!! Thanks for sharing. Is this also removable? Love this idea for my apartment.
Great idea! I'm going to use a stencil & frosted spray paint instead! Thanks for the idea!
This looks super! Does the "frosted" appearance help with privacy at night? I'm trying to work with two small bathroom windows that need help with privacy at night.
That looks fantastic, you did a great job!
I used contact paper on our bathroom window. It has "privacy glass", but it just didn't seem private enough. I just cut the sheet to fit the window. I used one of the opaque "marble" designs. Had I known about this technique, I might have tried it. Oh and there was never a prob with humidity either.
Someone asked what it was like to remove. I didn't use the clear/transluscent, so I don't know if that makes a difference.
I had mine up for years and finally the adhesive started to wear out, it was a very sunny window. At that point it had become brittle. Some parts came off easily in large pieces the rest it "broke" into sticky little bitty pieces and I had to use a razor to scrape.
Aside from that tiny annoyance, it worked great.
I would suggest drawing a grid on the outside of the window using a washable black marker to help with positioning the inside forms. When done, wash the outside grid off.
Add your voice! Click below to comment. ThriftyFun is powered by your wisdom!