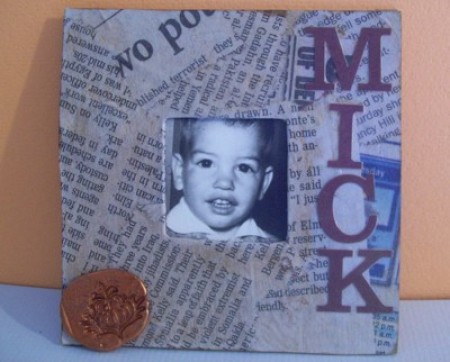
Except for stickers, this complete project was made from recycled items.
Approximate Time: 1 and 1/2 hour
Supplies:
- newspaper
- lightweight cardboard
- hot glue
- stamp
- stickers
- mod podge glue
- foam brush
- paint
- scissors
- craft knife
- ruler
- cutting mat
- old flat fridge magnet
- optional-brown or distress ink and stipple brush
- sticky tape or glue
Instructions:
- Decide how big you want your frame to be, mine is 4x4 inches. I took cardboard from the packaging that came with some scrapbook paper.
You can cut your cardboard with scissors or a craft knife. I measured mine, laid it on a cutting mat and cut it out with a craft knife. Then I just laid the ruler along each edge and drew a line. The square that was left in the middle is what became my frame opening. I used my craft knife to cut this out.
- Tear some strips of newspaper, about 3/4 of a page did it for me. Tear them really ragged and uneven, try for interesting pictures or articles, since you will be able to see the words still you might not want something on there you don't like.
- Apply mod podge, you can use a white school glue, water it down just a bit, liberally to your cardboard. I do it in small portions, it dries quickly. Apply it with a foam brush, lay down some newspaper, apply glue over it, and keep going till completely covered. I just turned over my cutting mat to do this, its easy to clean glue off the back. When I had it covered, I used scissors to cut it even with the frame along the edges. Then I used my craft knife to cut an X in the middle and folded that paper inward to the back of the frame so it would look finished. Let dry.
- Heat up your glue gun. Put a puddle of glue on your cutting mat backside. This is going to look like one of those old wax seals so about quarter size. Take a small rubber stamp and put it into the glue. Leave it there till the underside of your mat feels cool where the glue is sitting. You want to make sure its cooled before removing the stamp.
Peel up the stamp. I used a bronze metallic paint but you can use whatever you like and put a dab on the glue and then used my finger to pat paint over it. You want it down into the grooves left by the stamp but very lightly there so you can see the shape, cover front and sides of glue. Let dry.
- Cut a second piece of cardboard same size as first piece but no opening. Then using glue or sticky tape attach your finished front piece to the back piece only along the sides and bottom. Let dry if using glue.
- Here is where I wanted it to look older so I used a vintage photo distress ink from Ranger and a stipple brush to put ink all over the newspaper. You could use a brown ink and your finger. Just make sure its really light so you can see newspaper.
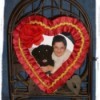
- Decorate. I used stickers down the side to spell his name and glued on "wax seal." Add your picture.
You could go for completely different look, don't antique it, add bright colors. Change sizes easily.
- I used one of those business card magnets you get in the mail, actually mine was attached to my phone book. I cut a strip from it and glued it to the back and put it on my fridge.
By christi from Paducah, KY