attosa Diamond Post Medal for All Time! 1,246 Posts
June 19, 2012
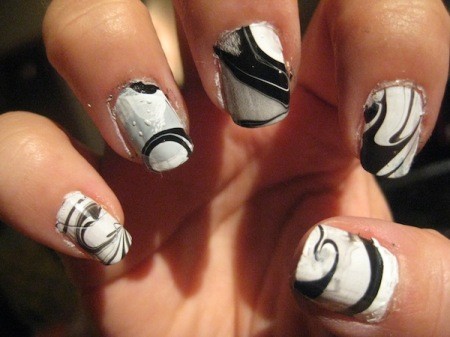
Here's an easy and fun way to do really beautiful nail art at home. I get compliments on them every time!
Supplies:
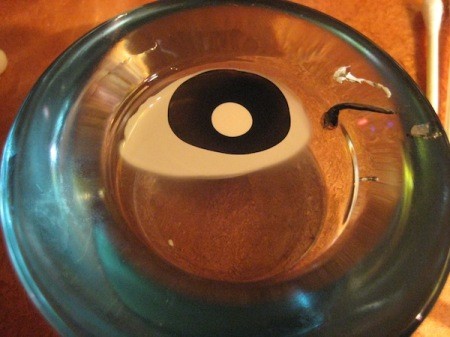
small glass or plastic bowl
Advertisement
water, room temp.
Scotch tape
clear base/top coat polish
nail polish, different colors
toothpicks
Q-tips
nail polish remover
Directions:
Choose a couple colors of nail polish you'd like to marble.
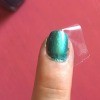
Apply a base coat to your nails. Let dry.
Fill a plastic bowl with room temperature water.
Put scotch tape around your nails to make it easier to remove extra polish.
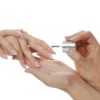
Choose a polish, take out the brush. Hold it over the bowl of water and allow one droplet to fall in (hold close to water's surface). The color will spread.
Do the same with another polish, and drop the polish in the center of the first polish. Keep alternating colors until desired levels are achieved.
Advertisement
Taking a toothpick and swirl around the surface to make marbled designs.
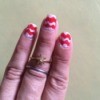
Quickly dip your nail, face down, into the design and pick up. Let dry a few seconds, then remove the scotch tape from around your nail.
Remove excess polish from around your nail with a q-tip dipped in nail polish remover.
attosa Diamond Post Medal for All Time! 1,246 Posts
June 21, 20120 found this helpful
Haha Deeli, that's hilarious! I always know when a post is yours, too! Awesome. Yes, I thought these instructions in particular definitely needed some images. Plus, it looks cool! ;)
 Here's an easy and fun way to do really beautiful nail art at home. I get compliments on them every time!