 I would like some ideas on up dating oak cabinets?
By tbone
Sanding and painting can be a good way to update. Just take the doors down so you can work on them outside. However, if you do not like the doors, you can just replace them with new ones. Changing hardware to something more modern will make a huge difference. Plus, to me what dates kitchen cabinets are the hinges. Adding the hinges that are hidden on the inside would really make a difference. You would have to fill the holes left on the outside and fine a stain to cover it.
You've gotten great ideas all ready. I would add that it is popular to use open shelving, leaving off the doors or even adding glass panels instead of the oak panels would give them a more undated look. Also painting an island a different color is popular or adding bun feet to the cabinets make it look like a separate piece of furniture, you could also paint this a different color than the cabinets.
Ask a QuestionHere are the questions asked by community members. Read on to see the answers provided by the ThriftyFun community or ask a new question.
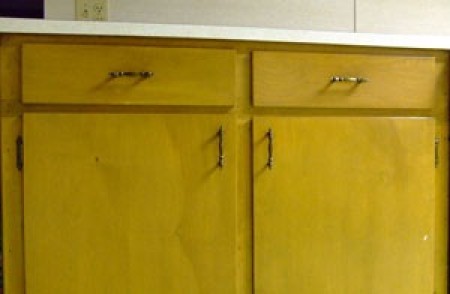
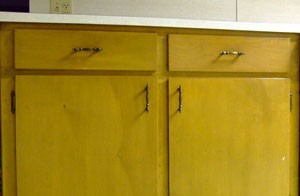
I am looking to update my kitchen cabinets. They are high quality oak cabinets, but from the 70s. I don't want to paint them.
Any suggestions would be very helpful. I will be changing the knobs. These same cabinets are in my bathrooms and laundry room.How about put on peel off adhesive stickers. They appear to have a stencil look that's not forever, because these are removable. many different designs!
What look are you going for? You could have a professional (I would not attempt this on my own) to either bleach them for the farmhouse chic look or stain them darker for the classic neutral look.
Be sure to read reviews of the places carefully and get references before you let anyone do the work. See if you can see their actual kitchen/work so you get a feel for their work.
Post back with updates! Have fun with the reno!! It is so much fun to get a new look!
Change the knobs first and then decide if you want to do more. Our kitchen looked entirely different when we invested only $200 for new knobs.
For the Oak Kitchen Cabinets:
This is what I did to our kitchen cabinets, 1 Cabinet at a time: First things first: Remove EVERYTHING from your cabinets. Including any old liners.
(I would consider painting. There are great colors that are 'in' and makes a great statement that looks great!
I would suggest any of the following, depending on your wall color & back splash: 1. Denim or Slate blue, especially with a Butcher Block type or black counter top, it looks like a 'Modern Country' 2. Medium to light Grey or a Dove grey. 3. If you are really an adventurist, try a medium to slightly toned down (not bright) Red.
Step 5: Lightly "paint" inside/outside with a clear coat Polyurethane,(Or paint) using about a 3" soft (I mean, really soft) detailed, angled brush, using light, even strokes. (Don't forget the inside corners or underneath cabinets!)
Let dry 24 hours.
(You can also use Satin Finish Modge Podge..works great & is less expensive)
Step 6: Replace doors & hardware*.
Step 7: Line the cabinet 'floors' with your favorite contact paper OR (as I did) the 'Spongy', airy type liners.
TIP 1:
*HARDWARE: Instead of replacing your old door hinges, if they can be seen, you may would like a clean, updated look by using the hardware door hinges that are 'invisible'. You can get them at most hardware stores, especially your 'big box' stores.
TIP 2:
Also, change your door knobs & drawer knobs. You can update with all "pull" type or use a combination of both. Depending on your paint selection, should you had decided to paint, I'd go with a 'brushed' nickel look. Or stay with the ever bright & shiny 'chrome' look.
TIP 3:
If you don't have a 'Shaker Style' cabinet, you might try adding the extra wooden pcs to go around the facing of your doors. They are always popular and adds style to older cabinets. OR buy new doors already made.
TIP 4:
If your budget allows, think about topping off your upper cabinets with a 'trim' or cornice pieces, that makes your cabinets really POP!
I took mine a step further. Once my cabinets were done, the rest of the kitchen looked "old" and "wrinkled".
I went to work tiling the backsplash in ceramic small brick-like tiles. Over the stove, I made a "pattern" of the small brick-like tiles, with 5 - 4" square copper tiles and rounded tiles as a border. Came out great! I have to give my husband "Kudos" on the final pattern used!
As always, you can go to the following on How-To's for refinishing or restoring old kitchen cabinets:
YouTube.com
Barkerdoor.com
Kilz.com
Curbly.com
UglyDucklingHouse.com
and more tips and tricks to update old kitchen cabinets.
More great tips online. Just enter into your browser, "how to update old kitchen cabinets".
Enjoy your new kitchen!
ThriftyFun is one of the longest running frugal living communities on the Internet. These are archives of older discussions.
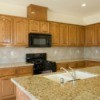
I need to update my kitchen and I do not want to replace the appliances. I currently have the old 70s dark walnut cabinets and doors have been painted white.
I need other ways to update my kitchen cabinets. I made the mistake of painting them brown. I will welcome any ideas.
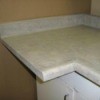
These are my kitchen cabinets. They are at least 30 years old and have sort of a grayish pickled-look veneer, which is cracked, bubbling, and chipped in some places.