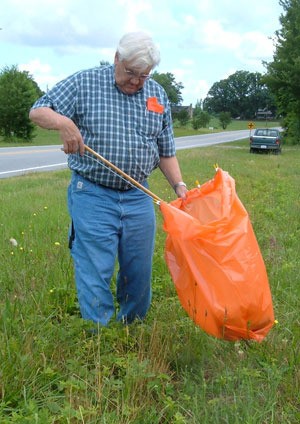
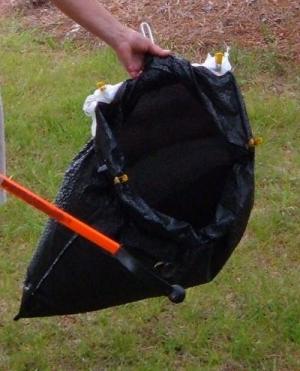
Bag holder for picking up litter! 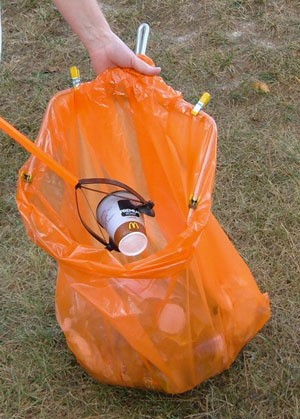
We found all of these materials at Home Depot.
By Betty
Add your voice! Click below to comment. ThriftyFun is powered by your wisdom!
Thanks so much for posting this. Our Lions club does Adopt a Highway and I am sure the members would LOVE to have these to make that job easier.
Great ideas! I think I will print them out and give them to the woman who cleans out local park every morning; these ideas are ones she could use.
Wonderful idea!!1 I have a holder for storing bags which is very simple to make. Take a 22 inch square bandana, fold in half, sew a seam along the edge creating a tube. At either end make a pocket to insert 1/4 inch elastic. Draw the elastic to make a small opening.
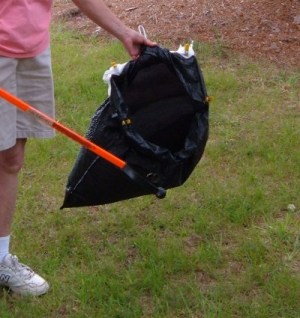
TUBING IS OPTIONAL
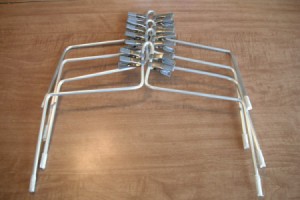
In making this bag holder, you can skip the tubing as I have found it adds cushioning only. I have been testing one made without the tubing and have seen no difference in the strength nor the comfort in handling this device. Leaving off the tubing makes this bag holder very simple to construct and decreases the weight to about 4 1/2 ounces.
Although, it's not been tested for 5 years like the one I've been using that is in the tubing, I do feel it will hold up just as well.
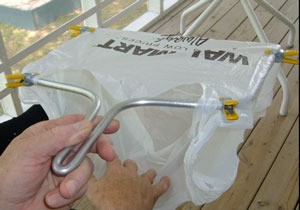
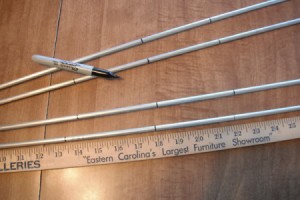
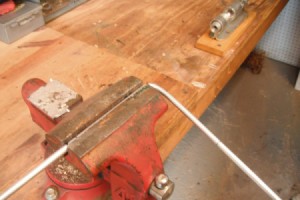
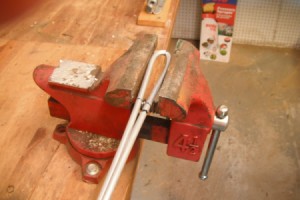
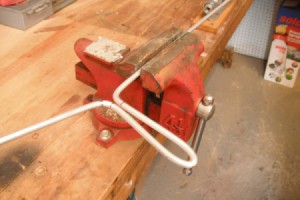
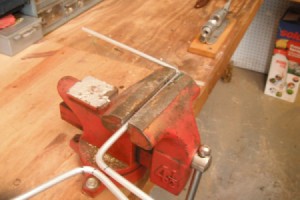
So, all you need to make this bag holder is the aluminum rod, 4 clamps and a vise for bending or a friend that has a vise and can bend it for you.
Before bending, mark the middle of the rod, 4 inches from the middle and 7 inches from each tip. Using a vise, bend the rod together in the middle. Put 4 inches of the fold into the vise and bend to right and left. Then bend 7 inches from the tips. In just a few moments, you have a bag holder.
You can make it for your own use or make it to sell. To sell, you will need to demonstrate it as folks will not know what in the world it is.
THIS BAG HOLDER IS VERY STRONG and believe me, it works.
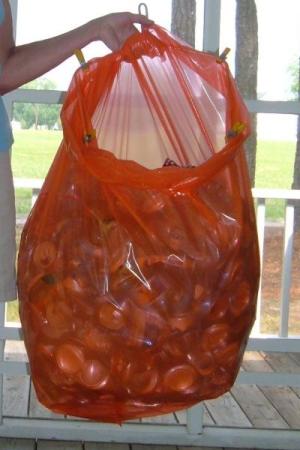
This bag holder is great for picking up litter while getting your walking exercise.. Weighs only 4 1/2 ounces.
I found another use for my bag holder. We just purchased a shredder and I am filling a trash bag with shredded paper. The bag holder is working great for holding the bag open while I dump the container. It's like having an extra couple of hands.

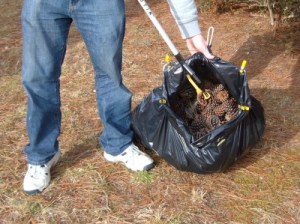
We have pine trees in our yard and picking up the pine cones is so easy with the use of this bag holder. With my reach extender and bag on the bag holder, I can fill a big trash bag with pine cones in just a few minutes. I take them down in the woods and empty the bag and keep it on the holder until the next time I have to pick up pine cones.
This bag holder is so easy to make and so useful.
I helped my neighbor pick up pine cones in his yard. We made a contest out of it to see who could fill a bag first. Of course, I won as I am an old pro at using this bag holder. He was amazed at how easy it was and how quickly we picked up all those pine cones. "Wow!" he said. After getting started, within just a few minutes we filled 2 large trash bags with cones and had his yard looking good. He gave the cones to a friend to use for a fire starter.
I posted feedback on 6-9-08 that in the instructions for making this bag holder for picking up litter, you can leave off the tubing. When I posted that comment, I had only been using the bag holder without the tubing for a short while. I had no proof that it would not bend out of shape after a lot of use.
Just want to post an update to that comment. I am still using the bag holder without the tubing and after 3 1/2 years of a lot of usage, it's still good as new.
My husband still uses the one made with the tubing. He prefers that one but he's one that does not like change. He has been using his bag holder for 8 years and it's still good as new.
If you are concerned about the environment and notice that litter is a big problem, an ugly sight, these are some web sites that are inspiring.
www.roadtrashwarriors.org/about.htm
www.citizensagainstlitter.org/
www.litterheroes.co.uk/
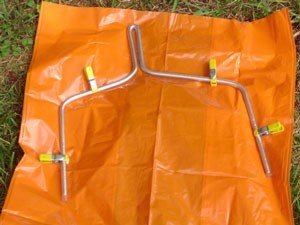
You can skip the tubing in making this bag holder. The materials needed are just the rod and the clamps. I have been using one that's is made without the tubing and it works just as well and decreases the weight to 4 1/2 ounces.
The tubing, listed above in materials needed for making this bag holder, is not necessary. The only materials needed for making the bag holder are the aluminum rod and the 4 clamps. It is still strong without the tubing and not having to put the rod in the tubing makes this bag holder really simple to make. This bag holder does not look very impressive but believe me, it is strong and once you get used to using it, you will not want to pick up litter without it.
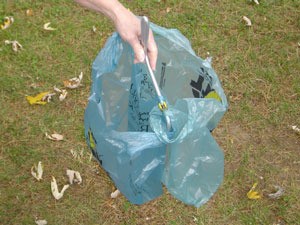
It's surprising how much roadside litter you can stuff into a grocery bag.
I like putting two bags on my bag holder. I put trash in one and the recyclables in the other. I love my bag holder.

I found a large dog food bag on the roadside, while picking up litter. When I got back home with all the other litter, I decided to try the food bag on my bag holder and see if it would work for picking up pine cones. It worked just great so it's going to be a keeper. I have found a lot of useful things on the roadside, mostly good stuff like tools and money.

The vinyl tubing is not necessary so skip step number one.
All you need is the aluminum rod and clamps to make this bag holder. That makes the bag holder much easier to make and lighter in weight. It is very strong and weighs less than 5 ounces. Cost is approximately $5.00.
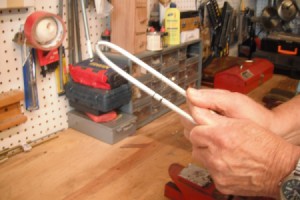
Using a Sharpie, mark the middle of the rod, 4 inches on each side of the middle and 7 inches from the ends. Measure twice to make sure you marked correctly. I made a mistake but marked that line so it would not be used.
The pictures show how to bend the rod using a vise. After making the first bend, which is the middle, you bend it together with your hands.
After making the rods, put some duct tape around the ends for cushioning.

Add your voice! Click below to comment. ThriftyFun is powered by your wisdom!