This page contains the following solutions.
 Tips for creating a craft room from the ThriftyFun Community.
Go to your local Salvage company and get yourself some big shutters or some old bi-fold doors. Get some big hinges to hinge them together. Paint the doors or shutters a color that will compliment your room. You now have a screen to section off your craft area. Now clean out that clutter corner.
Find a small table, the size depending on your space. Try to make it large enough for a comfy chair if you can. Crocheters and knitters will appreciate having a chair. Above your table install a few hanging cork bulletin boards. These are to hang directions on. If you have room, hang a magnetic tool holder or you can get a magnetic knife holder on the net. These will hold scissors, crochet hooks, beading tools, or any thing with a metal base.
Now find yourself 3 fruit boxes that are the same size. You can get these when the produce man re-stocks at the local grocery. You want the tops to the boxes. Put the top on the bottom of the box so that you have a double strength box. With double sided carpet tape, tape all three boxes together. Cover with Contact paper or Spray Paint. Make as many of these as you will need to store your supplies. These can be stacked or put under your table, they also could be used next to your chair for a handy table. Depending on wall space you could hang some shelves.
Now decorate your little space. Pictures can be hung on your screen as long as they are not too heavy. Throw a pillow in your chair and don't forget get a radio or boom box for some mood music. And if you have kids make a cute "Keep out" or "Only girls allowed" sign. Have fun. It's your space.
By Debra in Colorado
By Jayne
Also I got 3 baskets and nailed them to the wall in the corner at different levels with openings facing out. I store a lot of my material in them and they look as if they are decorations. I have a table, serger and sewing machine. I also love to stamp, make cards and quilt.
By K. Smith
By Roberta
Feel free to post your ideas for a creating a craft foom below!
CRAFTING IN SMALL LIVING SPACES
I'm lucky enough to have a tiny, cold damp & drafty craft room, But I consider myself very fortunate to have a room where I can leave my half done craft or sewing projects laying out... & I simply close the door so no one can see the messes I leave for the next day!
I have several ideas for those of you who live in a small home, trailer or apartment & need to carve out a bit of craft space:
-- One way is to use a closet or armoire: What you do is to take a small board & put it on drawer sliders (the kind made of metal usually with bearings) That way you can pull up a chair, pull out your shelve & go to town, crafting away! ... I used to use an armoire for all of my sewing needs. I put my sewing machine on the pull out shelf. but, I found that when I pulled the shelf out, the sewing machine was to heavy for the sliding shelf to support. So, I remedied the situation by using one of those adjustable "Spring Rods" (the kind you twist to lengthen) available in the curtain & blind area of most stores. I simply twisted the curtain rod to the correct length & stuck it under the front left corner of the pull-out shelf. The cool thing is, When you're done sewing, (or crafting) You can just push the sliding shelf back in, & close the doors to your mess. My armoire was quite large & tall, so I could store most of my fabric in the top cupboards & my notions & thread in the 2 bottom drawers. This whole "Sewing Space" fit into a tiny bedroom! You will find that you'll need a good light source in the armoire, so mount a small florescent light above your sewing/crafting shelf. You can purchase an "Under Cabinet" type of florescent light in the kitchen area of your home store. NEVER use halogen or incandescent lighting, as these produce WAAAY to much heat. But, florescent lamps are cool & work wonderfully!
-- Another idea, I got from the Christopher Lowell TV show: He suggests taking 2 inexpensive book cases & facing the sides against a wall & the front shelve area facing each other about 5 or 6 feet apart (or whatever works for your space) Then taking a hollow Core Door & mounting that as a table between your 2 shelves for a work area. If this is in an apartment or living area, you can take a curtain spring rod (they are usually under $5) & spring-mount it, just under the top-most shelf & hang a piece of fabric from it (to hide your mess). You can simply fold a piece of fabric in half, across the rod & this requires no sewing. To really have a cool crafting/scrapbook area: Take 2 filing cabinets (new or from the thrift store) & place these under the core door or thin table (these also can be use to hold the core door up)... If you have several file cabinets under the hollow-core door or table, you'll have quite a lot of room to file your Scrapbooking paper & crafting tools!
-- For those who are REALLY short on space, a roll top desk or a "secretary" work wonders, because you can just shut the top on your clutter! For those of you who don't know what a "secretary" is: It's one of those chests (sometimes with drawers) that have a fold-out top where you pay bills or whatever.
-- If you're lucky enough to live in an area where it's always nice weather like southern California, or you can insulate & put a heater in, a small crafting Storage Shed might work for you in your back yard... Some folks have these small crafting sheds built right next to their home or in their back or side yards, or as a lean-to. These little sheds are especially great for those who do painting projects or are lampwork, glass bead makers, or others who use a torch or small kiln, as if anything catches on fire, Your whole house won't burn down & since you're using flaming torches, your kids are off limits to this area & you can lock it up!
* I had a friend who never did crafts (even though she really wanted to) because she didn't want her home to be untidy when her "Neat Freak" husband came home from work. When she finally carved out a very small section of the garage for herself, set up a table & chair & hung a shower curtain up so her "mess" wouldn't bother him, all was well & she found herself happy & creative again (& happier still, when she left that neat-a-holic man!)
-- It's amazing how much crafts do for our happiness & our self esteem. That's why we should all encourage our children to do arts & crafts! One of the best ways is to have a "Craft Basket". Just use a simple laundry basket & fill it with their paper, crayons, scissors, glitter-glue & other goodies! You can slide it under a table somewhere to keep it out of the way & it's easy for kids to pick their stuff up & put it away. It's fun for children to have a "Crafting Time"... especially on weekends, or after homework... or whenever they say "Mommy, I'm board", & you can buy them new "treats" for their craft basket once in a while to keep things interesting for them! (& it's a much better "Treat" than junk food!)
STORAGE IDEAS FROM MY OWN CRAFT ROOM
-- I have several tricks for organizing my own craft room, Christopher Lowell says, when you don't have the space to go Out, Go UP!... In other words use your walls & ceilings. So, I've hung shelves on most of my walls. I have those light weight white metal closet shelves mounted to my walls with labeled, Plastic Dish Pans (from the dollar store) lined up on them to organize my craft supplies. I also use those 3 sided plastic type of large stacking vegetable bins, stacked 8 high along another wall (I've made sure to bolt them to the wall in case of an earthquake etc).. Also, those Metal "Grids" You can hook together to make cube shelves work great, I've had the guys at the home store cut thin masonite boards 13 inches square to line the bottom of the cubes in some & in others, used dish pans as "drawers". My tables are all folding card tables so I can rearrange them easily, whenever need be. Except where I sew, here, I've used a sturdy "drop-leaf" table that I pull up when I sew. I have grid-shelves & filing cabinets under my card tables & have covered my card tables with plastic tablecloths from the dollar store. Small plastic garbage cans work great for holding rolls of wrapping paper on end. I store my fabric in large, clear plastic bins with lids, turned on their sides long-way & used as "shelves". Another space-saver is to hang shelves in front of your windows. This works for things not affected by moisture. My crafting room has 4 HUGE single-pained windows that constantly drip with moisture in the winter, so, I've cut 2 inch Styrofoam insulation & caulked this into the large windows to keep the heat in, in the winter & out in the summer & this has made a great difference, because, Now, I can use the room all year long. The best way to cut this Styrofoam insulation is with an electric knife, but a jigsaw also works! (it's like thick foam-board & makes great bulletin boards as well) I've hung lamps from my ceiling & made sure to use a good serge-protector to minimize the chance of fire from my cords & lamps. Florescent lamps are safer & use less power. Use care, never have to much draw on your electricity at one time & be sure to turn off things when you leave the room!
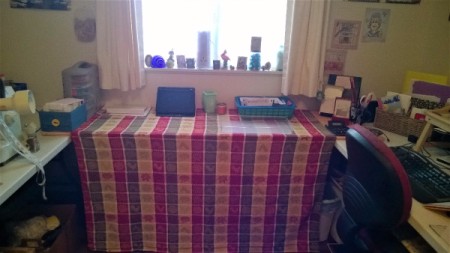
I recently had a small fold-up table between the two longer ones I have in my workroom. I kept hitting my knee on the leg, it would shake, coffee would slop, etc. Plus, I lost work space. I fixed this today.
I tried to clean and organize and ended up writing, instead! I hope you who can relate will enjoy, and those who can't will soon!!