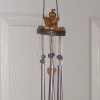
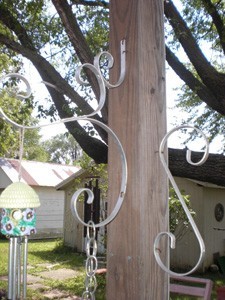
 Upcycle what you have to enjoy in new ways! I am using my broken screen door guard as a bracket in my bedroom to hold a birdcage planter and outside on my back patio to hold a small set of windchimes!
By melody_yesterday from Otterville, MO
Save your juice lids from concentrated juice cans and make these cool recycled wind chimes. This page shows you how to make juice can lid wind chimes.

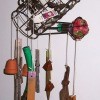
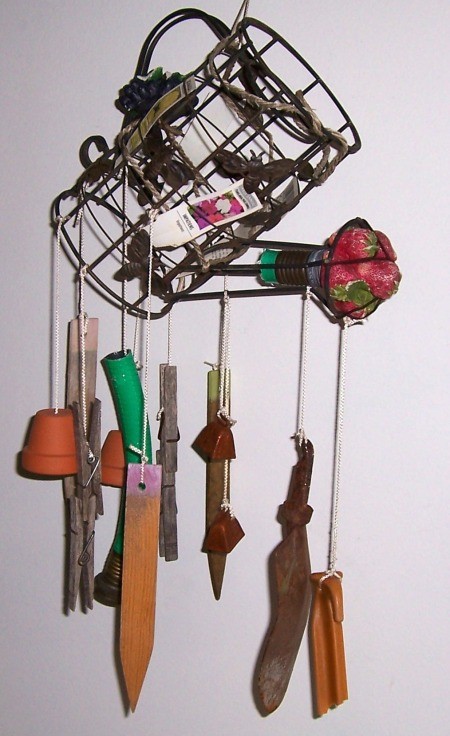
There are many items around the house that you can use to make wind chimes, from old garden tools to silverware. Get ideas for how to make recycled garden wind chimes in this page.
This is a page about key wind chime. Many people enjoy the soothing sounds of wind chimes. You can make your own using old keys.

This windchime is made from a thriftstore brass teapot and plate. To that add beads or whatever else you wish to complete the Moroccan inspired chime.

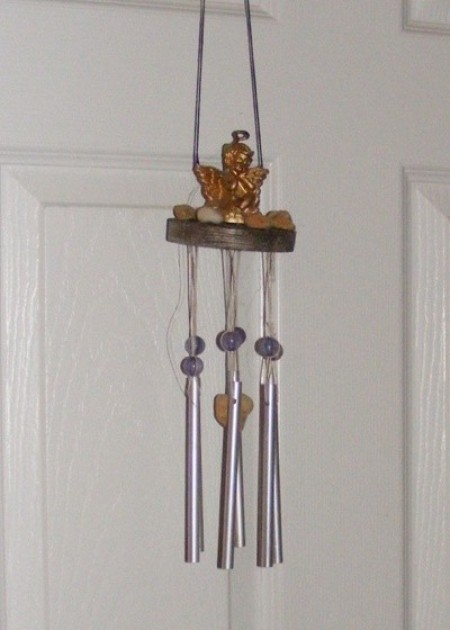
Making your own windchimes is a great crafting project. They will add joy to your garden and can be given as gifts. Learn how to make a recycled angel windchime here.
Make an easy, pretty wind chime from a metal clothes hanger and some bells. This project results in a subtle chime sound; perfect for the patio or garden. The instructions and supplies list follow.

Bamboo is a traditional material for wind chimes, making a soothing sound as they move together. Add this motion and sound to your garden or patio.

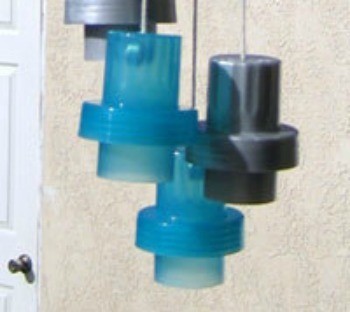
Most recycling facilities don't accept plastic caps. This recycled craft finds a way to reuse them by making wind clackers.
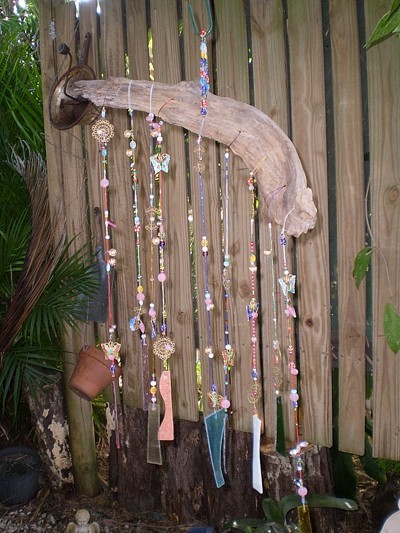
You can make a pretty, unique wind chime with leftover craft beads and odd pieces of jewelry. This is a page about make a wind chime with old beads and jewelry.
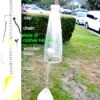
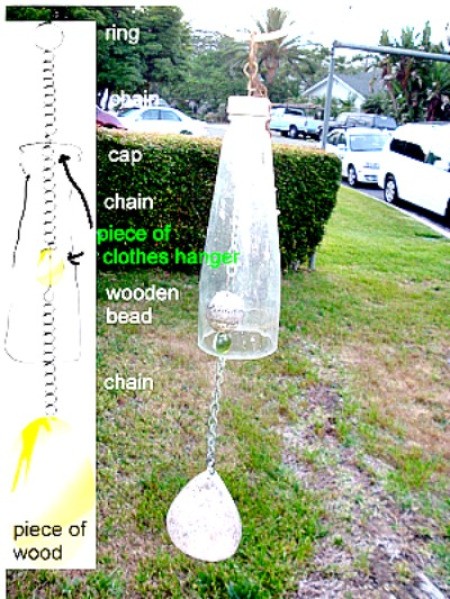
Vary up the finished wind chime by using different shaped and colored glass bottles to make several of these lovely chimes. This is a page about how to make glass bottle wind chimes.
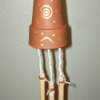
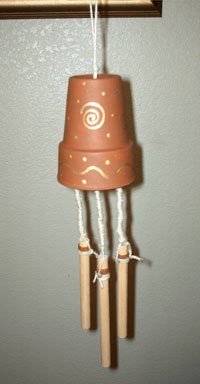
This page is about clay pot wind chimes. Making your own wind crimes can add thrifty, beautiful sounds to your yard and garden.
This page contains the following solutions.
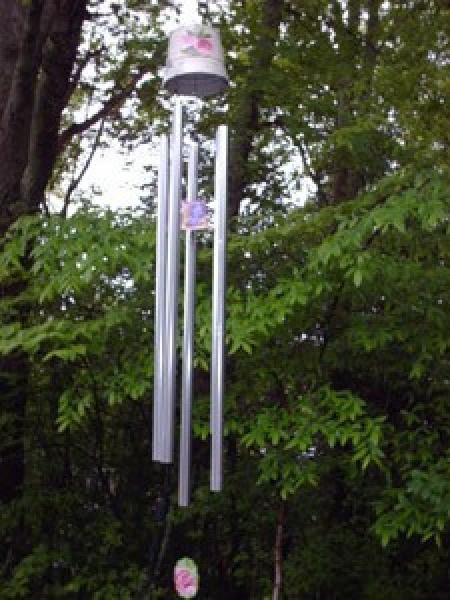
Make use of old tin buckets and turn them into wind chimes. When the large chimes I bought broke from the wood ring on top that had rotted from the winter weather, I used my tin buckets as the base and bonger to give them new life and a prettier look.
Tips and ideas for making your own wind chimes. Post your ideas.

We made a circle of beads with wire and hooked them together.

Here are the questions asked by community members. Read on to see the answers provided by the ThriftyFun community.
Where do you all find nifty centerpieces for your homemade wind chimes? I am so not creative, so beyond gluing a couple flat sticks together or old CDs drilled around the edge, I have no idea where to find these things. Thanks for any help!
By BonnieAlice
I always look at garage sales and thrift stores for all of my makings for wind chimes.
Have you thought of using old teacups, or mugs? Just take a glass cutter and make a hole for your wire.
I was making wind chimes a year or so ago. I used empty tin small boxes that candy came in such as certs and different kinds of mints. I also used Fishing Anchors or weights . So many things you can think of to use.
I live next to Ocean, so I always a breeze. I'm not that creative about certain things either but I have seen so many great ones. Hey Cd's aren't bad you can spatter paint them cut in different angles etc. so don't be afraid to use your imagination. I saw one I want to do and its perfect time of the year for it; old, broken or on sale; yard decorations.
CDs in colorful onion bag sleeves last many years. I found that drilled CDs shatter in the first good storm.
Different lengths and thicknesses of wooden dowels make a fairly pleasant sound in the wind. You can stain them, but don't paint them. Paint ruins the sound. Have fun!
DearWebby
http:/webby.com/humor/blog
When making and putting up wind chimes, please remember that your neighbors may not enjoy the clatter and/or dissonant sounds made by some of them. Be sure they are musical and in tune and not very loud. There are still some out here who really enjoy the "sounds of silence."
I need to find the plastic inside that goes in the metal pipes that the cord go into. Do you know were I can get them?
Straws or conduits from the home supply store :)
Go to a craft store like Michael's.
Wind chimes are made in several different ways but usually Michaels' has something you could use.
Here is a link to find a store near you so you can give them a call and see what they have. Most items can also be ordered on-line.
www.michaels.com/
Here is a site that shows some repair ideas:
www.hunker.com/
I'm making a handmade wind chime, but instead of hanging any object I'm hanging photos. Can you please suggest to me how to give sound with photos and what should I use to hang those photos? Please reply asap, I have to complete it by tomorrow.
By vibhuti
Well it might be a bit late for this....I got a hanging mobile body on Amazon that had clips on it for hanging photos. I also got tiny wind chimes from a craft store that make a sweet sound. These would make a pretty mobile together for sure. Once again, it is most likely too late to order these items. But for future reference you can Google both items.
Amazon has mobile frames with pinchers on the ends, or metal clips, that hold photos.the frames them selves could be googled with 'mobile frames for photos' or something similar. There are such a thing as tiny chimes, but the sound they make is quiet because they are so small. There are also some beautiful sound bells of various sizes that make pretty sounds. You could also use a wooden embroidery hoop with fishing line. Tiny painted clothespins at the end may hold photos. Pretty bells could be interspersed among the photos.
Hang a few bells from it.
I located instructions on how to make a tin man out of cans. How would I go about making a tin man wind chime?