This page contains the following solutions.
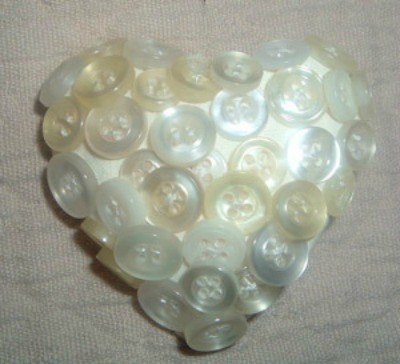 This is a pin I made from saved pearl type buttons. It is very easy. Use any buttons that you have cut off clothes. The white pearl buttons are easy to find. Use different sizes to keep it interesting but fairly close in size.
First cut out a piece of tightly woven cotton fabric in a heart shape that is approximately 3 by 2-1/2 inches. If you wish, you might put some fray check on the edges to keep from fraying or some clear fingernail polish would work also.
Starting from the middle sew on the buttons snugly, keeping the fabric cupped so that when you are done you have a 3-D dimension. Then when all done, glue a piece of matching felt on the back and on that glue on a pin fastener. With the right jewelry findings, you could also make a necklace of it.
By Elaine from IA
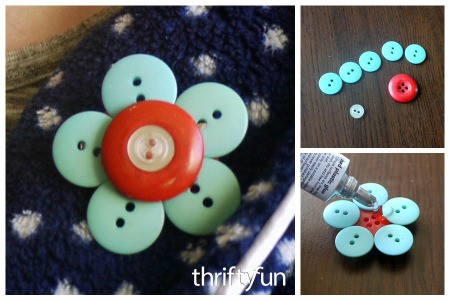
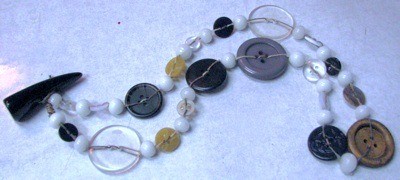 Recycle mismatched and extra buttons to make this unique choker; a wonderful gift that costs less than a dollar to make!
Approximate Time: 15 minutes
By Brianna from Dutch Harbor, AK
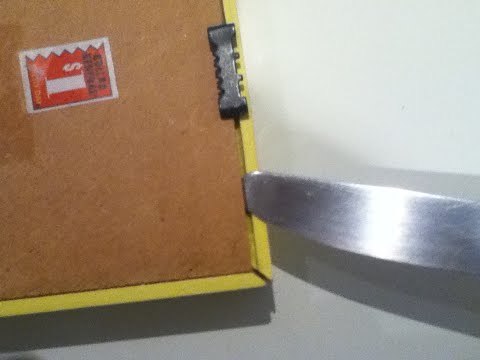
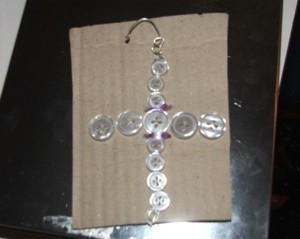
This cute framed button art is the perfect gift for a loved one this holiday season. Made with items easily found at most dollar stores.
Approximate Time: 1 hour

By Teri M from Omaha, NE

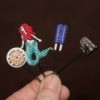
I love buttons! I also save lots of things you might consider junk, which I re-use to make beautiful household items and jewelry, like my button and earring trees.
Decorate with buttons by gluing them to a lamp shade, picture frame, or clock. Use wire cutters to clip off the shank of any buttons that have them.
Sew 8 buttons with wire, then sew 3 buttons. Next, sew the 4th button onto the first string, then 3 more buttons.
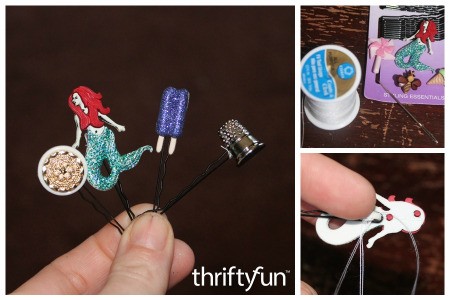
I saw an easy way to decorate your hairdo, put a button (or 2) on a bobby pin to hold back hair at the front!
I use buttons for eyes, etc. for toys for my grand people. I affix them with clear nail polish. I also use the larger pretty ones for closures on my purses, totes, and beach bags.
Here are the questions asked by community members. Read on to see the answers provided by the ThriftyFun community.
What can I do with 5000 mixed buttons? I like to make craft items to sell for charity. Has anyone any ideas please? Thanking you.
By Ann
I have seen directions different places online that tell how to make necklaces and bracelets with buttons. You can also cut thin cardboard to the desired shape and cut a piece of ribbon to length and glue it to the top, then glue flat buttons to the cardboard and use as tree ornaments.

Request:
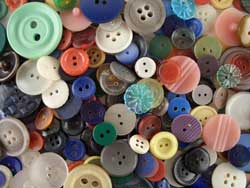
Doesn't everyone have a tin or drawer full of mismatched buttons? I sure do. What are some creative & crafty uses for them?
Jayne
Answers:
Crafty Button Ideas
You could:
- Sew the buttons in a design on a homemade purse (Time consuming but fashionable).
- Glue in patterns on cardboard and make a modern art mosaic.
- Button earrings, necklaces, etc.
- Donate to elementary art classes.
Lots of fun stuff!
Post by GoPittLaw (Guest Post)
Decorate a Waistcoat
You could get an old waistcoat and sew pretty buttons on the front, guaranteed no-one else would have a waistcoat like yours. You could also make a motif for the back if its a plain one with a little glue and glitter. Maria Bath UK
Post by reb1234 (Guest Post)
Let Kids Make Frames
Let children make gifts with them. Simply embellish a dollar store frame with buttons for a delightful "I did it myself" craft.
Post by gazookeeper (Guest Post)
Shabby Chic Art!
You could purchase those small frames, almost like a shadowbox at the dollar stores, take them apart and make shapes out of the buttons by gluing them to the back. I've made hearts and stars, you could even do someone's name. Put the frame back together and voila, instant art that looks very shabby chic. You can change the background color with construction paper or leftover framing matte.
Post by Andrea Hart
Many Creative Ideas
Cover a lamp shade, glue on the edge of picture frame, light switch cover, planter, or you could use them with grout and cover a table top.
Post by Barbie (Guest Post)
Tie Things Together With Buttons
Instead of quilting together the layers of a patchwork bed cover, wall hanging or knee rug they can be 'tied' together with buttons attached through all layers. Place in a nice geometric pattern to complement the patches and sew on as normal with decorative thread.
Regards
Jo
Decorate a Clock
I glued buttons around a cheap clock and turned it into an eye catching "one of a kind" designer item.
Post by Linda L.
Decorate a Picture Frame
You could buy cheap, clear plastic frames at the store (the small ones that cost about $1 and stand up) and put kids pictures in them. Then glue the buttons on the outside and "frame" the picture. I did this one year and made Christmas presents for the grandparents.
Post by MB in WY (Guest Post)
Dishcloth
Sew a button to the corner of your dishcloth to help scrape stuck on food -- maybe you would rather it be a metal one - but be careful not to scratch!
If you have a HUGE amount of them, maybe you could string them and attach them to a dowel rod for an interesting window hanging instead of love beads
Post by melody_yesterday
Shadow Box
I was in Ohio at an Art Museum and saw a Shadow Box with old watch parts and buttons glued in a neat design and then matted put in the shadow box. It sold for $175.00
Post by Joan (Guest Post)
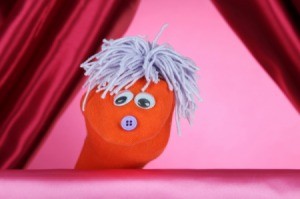
Button Snowman
Here's a button snowman pin that I thought was really cute.
www.crafterstouch.com/
Post by Jessica
Here are some instructions for making a Button Bracelet:
www.thriftyfun.com/
Buttons can be added to the wax on the outside of homemade candles or in homemade snowglobes (if the buttons are small). I have also used them with ribbon to decorate greeting cards. Some beading crafts, like making stars or bears for keychains, etc., can use buttons instead of beads.
I replace plain old white buttons with alternating colored ones on shirts. The plain white ones make nice pearly necklace/bracelets for the girls.
gretta in OK
I made earrings out of some of mine. I got a lot of compliments. buy the earring studs or clips from a craft shop and use super glue or some other industrial strength glue.
Can anyone tell me where I can find like buttons you would use on baby clothes? I am wanting to make some bracelet/necklace sets for little girls, but am looking for the smaller buttons. I can't really afford to buy lots of the little cards of buttons. Any suggestions would be appreciated.
You can glue or sew them on sweat shirts. A large trangle tree ( all geen or white) with a few odd colored buttons for decorations on the tree and a brown retangle or square at the bottom, for the trunk. White buttons in three circles for a snowman and orange button for nose and black buttons for eyes mouth pipe and front buttons. Some white ones below the snowman for snow on the ground.
You can decorate a flower pot with them.
Glue them or pin them on styrofoam balls for xmas decorations. Glue a lot of green ones on a styroform wreath and glue on a big red bow.
Fill a small jelly canning jar with different buttons, put on the flat lid cover with cotton and a circle of fabric like gingham and then screw on ring ,now you have a pin cushion and spare buttons. Nice gift for a sewer.
"Write" your name or initals on a draw string bag with buttons. Either sew or glue. Now everyone knows it's yours.
Dress up a plain purse or pocketbook with buttons and charms. Got a plain pair of shoes, dress them up with buttons.
I have been collecting buttons(got large canning jars filled with them) and button craft ideas (put them in a note book with page protectors) for a while. They don't seem to carry craft books with button ideas in them anymore.
you could make a model of a really tiny car (possibly a chariot) and use buttons as miniature wheels! The other uses of buttons are endless but another of my favorites is to grind the button down to make a kind of powder! depending on the color of button the powder will vary!
white:salt! etc!
I have a large assortment of lovely buttons, many of them matching, and I wondered if anyone had a craft idea on how to use them?
Noreen from Dover, PA
I have made necklaces out of vintage buttons by stringing them on elastic cord - I have also seen barrettes covered with buttons - I used a collection of buttons on some of my shirts/jackets - You can make pins out of buttons by gluing them to pin backs - ditto earrings (button kind) - pearl buttons can be sewn on clothes in patterns - I also have used large vintage buttons as closures on handbags...There is so much you can use them for - sewing on, and gluing & stringing!
Hi Noreen,
Buttons are great for earrings. Any new outfit I get, I check to be sure there are two extra buttons.
I also have seen buttons glued to picture frames and they look real cute.
Enjoy your treasures!
My children and I used to make button people~~We got wooden bead faces, buttons and pipe cleaners. Thread the face on the pipe cleaner and then add buttons and then add 2 more pipe cleaners to make arms and legs...when it comes to the end~~leave enough room at the ends of pipe cleaners to twist around to make hands and feet. Then give them away for presents or the kids can play with them. enjoy
A good friend of mine used buttons to put around a long mirror that you put on your bathroom door. It was beautiful. She also used buttons to decorate picture frames.
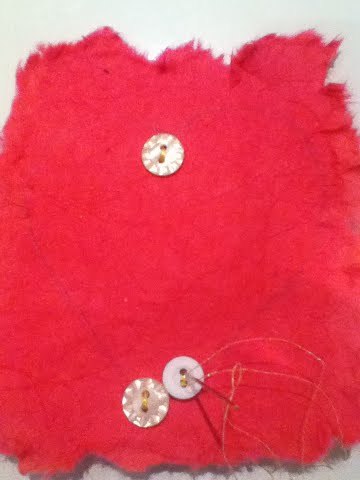
last valentines day i made victorian style hearts as presents for people, i cut out heart shapes x 2 from red felt, stuffed with cotton wool, glued the edges together, glued white gathered/ ruffle lace trim all the way round the heart , then glued on buttons all over in a pearly king/queen style , glued a ribbon bow at the bottom and sewed a ribbon loop at the top for hanging , they took minutes to make but every 1 ood and ahhed over them it really looks very pretty.
carol
ps if u want to know about the pearly kings and queens lol thats another story altogether!
What kind of paste would I use to put old buttons on the back of a hand mirror and do I paint it first?
By Sally K
Does anyone have any ideas for me how to make jewelry or other items with buttons? I have a huge collection and would love to be able to create some nice things to sell, as I have been out of work for over a year now. Any advice would be appreciated! Thanks.
By LINDA CHAMPLIN from Lower Adirondacks, NY
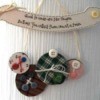
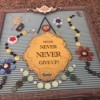
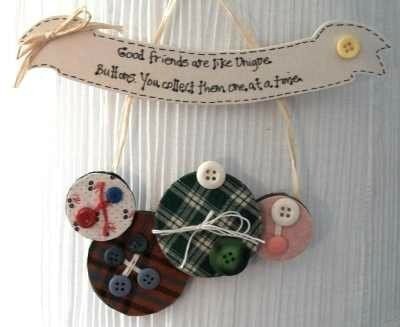
This delightful wall hanging carries a thoughtful message and uses fabric covered wooden discs and buttons to support the sentiment. This is a page about making a button and fabric wall hanging.
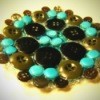
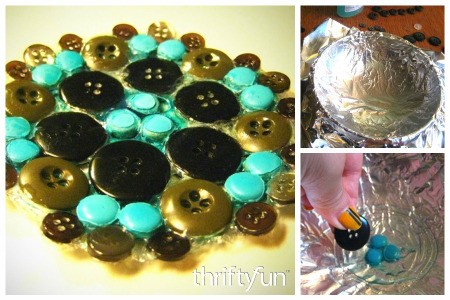
This is a page about making a dish out of buttons. This button dish is fun to make and display.
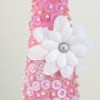
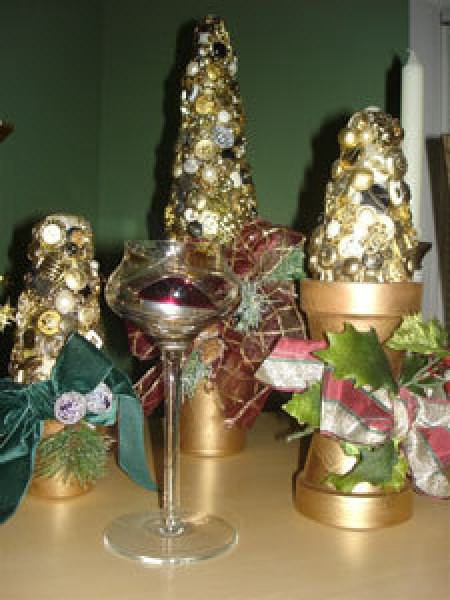
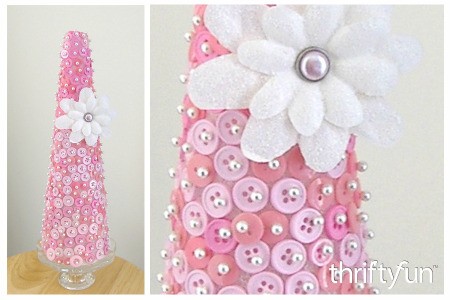
This is a page about making a button tree. Make a pretty decoration for your home or to give as a gift, with a Styrofoam or paper cone and your choice of buttons and other decorative bits.
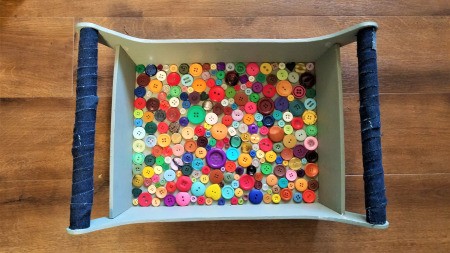
Decorate a simple wooden tray with a burst of colored buttons for a pretty display piece. Add a layer of resin or a piece of plexiglass and it becomes a serving tray.
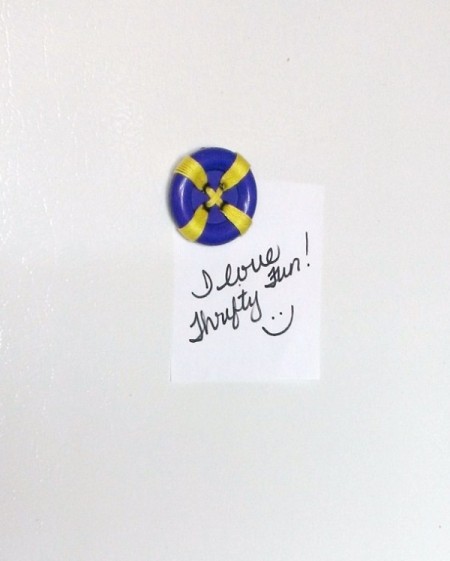
Finding crafts to make from buttons in your stash or an especially nice one you bought for just the right project is a common event. One quick easy craft is a magnet. This is a page about making button magnets.
This is a page about making a button brooch. You can make pretty brooches using old recycled buttons or new ones purchased for the project.
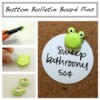
This is a page about making button bobby pins. Create your own unique bobby pins by adding buttons of your choice.