Check out these Decoupage Craft Ideas shared by the ThriftyFun community!
I purchased an unfinished cupboard and primed it. Next I painted it gold and then a coat of red. I made it look old by sanding areas where it might have been worn. I added 3 pictures from and old calendar with decoupage glue and varnished over to protect it.

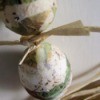
Découpage is a traditional way to decorate all manner of items with paper cutout. It's perfect for making unique eggs for Easter. This is a page about découpaged easter eggs.
This is a page about decoupage a flower vase. Liven up a plain flower vase by decoupaging it with your favorite theme.
Transform a plain recycled jar into an elegant party light. The jar is covered with handmade tissue paper, a pretty lavender stamped image, paint, and more. The instructions and photos for creating one of your own are found on this page.
Take an ordinary wooden memo holder and add photos, sayings and decorations to make it unique. This page is about making a decoupaged memo holder.
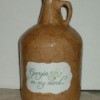
Torn paper bags create a fun pattern when used in a decoupage project, such as this jug. Coat the finished craft with a sealer and add additional decorative elements as desired. This is a page about how to decoupage a jug with paper bags.
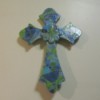
Begin with a plain wooden cross from a craft shop and some paper of your choice and create a beautiful decoupage cross to display in your home. This is a page about how to make a decoupage cross.
If you are looking for a craft to create unique wall hangings that complement your personal decorating taste and decor, try decoupage. Choose your paper design or images and learn how to make decoupage wall plaques.
Decoupage is a craft that was quite popular in Victorian times. This art form involves glueing pieces of paper to many kinds of objects creating beautiful, whimsical, or otherwise unique boxes, ornaments, bottles, and more. Learn how to make a decoupaged Styrofoam ornament in this page.
Print our your photos in black and white or color and then follow the steps in this page to decoupage them onto a wood letter or box. This page explains how to decoupage photos onto a wood letter including step by step photos.
With the the right preparation, vintage metal TV trays can be decoupaged to match your decor or interests. These old folding trays are sometimes found at thrift stores and yard sales. This is a page about decoupaging old metal TV trays.
This is a page about making a decoupaged tin. Decoupage is the perfect crafting method for transforming a new or a recycled metal container into a work of art.
This is a page about decoupaging photos on wood. You can make a personal piece of home decor or a special gift by decoupaging photos onto wooden objects.
This is a page about making decoupaged letters. Wood or paper letters from a craft store can be decoupaged to create a unique decoration for your home or to give as a gift.
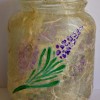
This is a page making a lavender infused sugar jar. A decorative jar filled with lavender infused sugar is a lovely gift to make or receive. Use the flavored sugar in baking or beverages. The jar can then be refilled or put to other uses.
This is a page about making a candy wrapper covered can. Create a unique decoupage can using saved candy wrappers.
This is a page about decoupaging ceramic tiles. Decoupage is one method for making decorative ceramic tiles.
This is a page about decoupaging furniture with sheet music. Scored music paper can be fun pattern to cover wooden chests and drawers.
This is a page about decoupaging on glass. Decoupage is a popular craft process for applying paper and fabric to a variety of surfaces with a product very similar to watered down glue, which in fact can be used as well.
This is a page about making photo tiles. Adhering photos to tiles is a great project if you are looking for a unique gift for a friend or family member.
Check out these Decoupage Craft Ideas.
Small wooden plaques with picture cut from magazines or other sources which are decoupaged into place using half white glue and half water or a decoupage medium, filled in or enhanced with paint.
If you're looking for a quick and easy craft to do this Easter, then decoupage is definitely for you. Decoupage comes from the old French word decouper, meaning "to cut out", so if you can cut and paste, you already know most of the techniques involved.

If you are like me, I haven't learned how to paint but love the look. Take a slate and go to craft store and find the rub on transfers that you like, I love bears thus my selection.

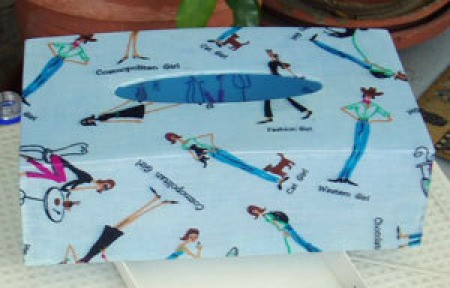
I bought plain, plastic tissue holder covers at the Euro shop and decoupaged them using paper and also fabric. I think they turned out quite nicely.
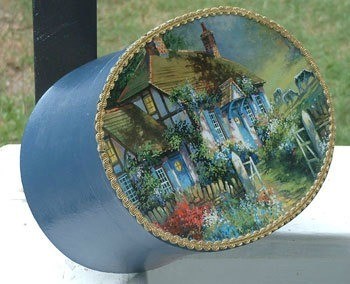
This is a paper mache box bought at WalMart, painted outside blue and inside off white. I like to save my calendars, I really like Victorian, farms and landscapes.
I've decoupaged a lot of things over the years: blank premade cardboard boxes of different shapes, stools, shelves, trays, plastic eggs, a clear glass plate, and trivet.
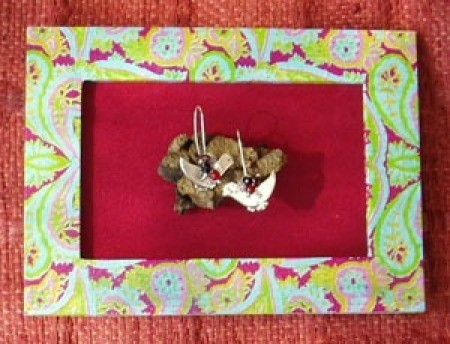
A friend will be celebrating her birthday soon and I wanted to give her a pair of earrings, but in an interesting way. So I decoupaged a frame, added the velvety paper and glued on a large chunk of cork, stuck the earrings into it and wah la!
My daughter and I have recently discovered Mod podge semi-gloss (thanks to Martha S.). We used it on all assorted size pumpkins, and used glitter or crepe paper. Tonight we're going to use fall leaves from our yard.
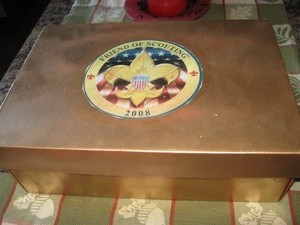
Our Cub Scout pack needed a craft for the boys on orientation night. I came up with this recycled shoe box. We spray painted it gold and then used a blue photocopy for the top. The scouts used modge podge to glue the seal to the lid.
I changed my living room and my table lamps won't match, they were peach ceramic. I cleaned the ceramic with alcohol and then I put a thin layer of Elmers' glue and, with tissue paper which I crushed with my hands forming a ball, unfold the paper and press on the glued surface all around.
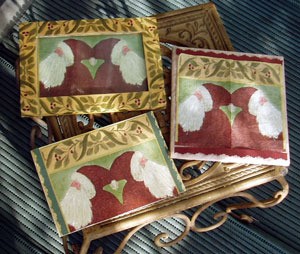
I know it might seem a little early for Christmas projects, but I thought I would post this one early. Here are three different ideas using the same beverage sized napkin.
You can make nice little pill boxes for the purse by saving nice small containers and decoupaging pictures on the lid with diluted white glue (then sealing it with clear nail polish.)
Here is a good idea for those "old aluminum trays", you might have lying around. I spray painted them, rubbed on "Treasure Gold" metallic finish.
When you go on vacation, find small items such as small stones, shells, coins (pressed pennies from a machine or small foreign currency). Get a post card or take a picture that will remind you of the trip.
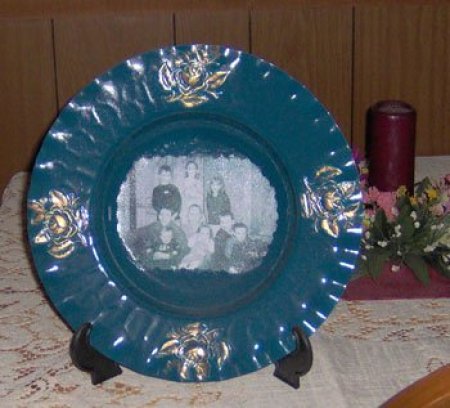
Have saucers without a cup? Take the saucers and cut a family picture to fit and glue it in the middle. Decorate around the picture in some form and let dry. Then give it a coating of decoupage. Let dry and re-do. Slip it in a decoupaged box, decorated by you. Add a pretty bow.